Homemade Strawberry Jam
Making Your Own Delicious Homemade Strawberry Jam with Seasonal Strawberries

In our home, where we enjoy plain yogurt every day, fresh and delicious strawberry jam is an absolute essential! While it takes a little effort, I made this for my family’s health. Now is the peak season for fresh, sweet strawberries, making them affordable and readily available. This homemade jam has a delightful fragrance and a balanced sweetness, tasting like a healthy, ‘well-being’ jam you’d find at an organic market. Starting the day with fresh strawberry jam over warm yogurt feels wonderful and tastes amazing. Using sweeter, ripe strawberries makes the jam even more flavorful. You’ll surely fall in love with the deep, fresh taste that far surpasses store-bought options!
Main Ingredients- 1kg fresh strawberries
- 650g granulated sugar
- Juice of 1/2 lemon (about 2 Tbsp)
Cooking Instructions
Step 1
First, carefully remove the stems from all the fresh strawberries. Wash them thoroughly under running water to remove any dirt, then drain them completely in a colander. Once the strawberries are well-drained, halve them and place them in a pot. Add about 10% of the total sugar (around 65g) initially, and squeeze in the juice of half a lemon. Lemon juice helps the jam set and adds a lovely brightness and sheen.

Step 2
Place the pot over high heat. Stir with a spatula and bring to a boil until the strawberries release plenty of their juices. Once the juices start to appear, you can gently mash the strawberries with the spatula while stirring. This saves time and helps create a smoother jam texture. Mashing the strawberries as they cook results in a better consistency.

Step 3
When the juices begin to bubble and come to a rolling boil, add the remaining 90% of the sugar (about 585g). Continue stirring until the sugar is completely dissolved. Adding sugar in stages, rather than all at once, can help prevent boiling over and aids in controlling the jam’s consistency.

Step 4
As the jam starts to boil over, reduce the heat to medium. Cooking on excessively high heat can cause the jam to burn or boil over easily, so simmering gently over medium heat is crucial.

Step 5
Once about half of the liquid has evaporated and the jam has started to thicken, stir in an additional 2 tablespoons of lemon juice. If you don’t have lemon, you can omit it, but the lemon juice really enhances the natural strawberry flavor and gives the jam a beautiful gloss, making it look more appealing.

Step 6
Now it’s time to adjust the jam’s final consistency. Since I’m making this to go with yogurt, I’ve kept it slightly thinner. If you prefer a thicker jam for spreading on toast, you can continue to simmer it over medium-low heat for longer, adjusting to your desired thickness. The longer you simmer, the thicker the jam will become.

Step 7
To check the jam’s consistency: when you lift the spatula, the jam should flow down smoothly like a thick syrup. This is a good consistency for pairing with yogurt. For spreading on toast, continue simmering until the jam drips slowly from the spatula or starts to hold its shape slightly.

Step 8
Spreading the warm jam on toast reveals how smoothly it glides. The fresh, homemade strawberry jam offers a taste and aroma that simply cannot be matched by store-bought varieties.

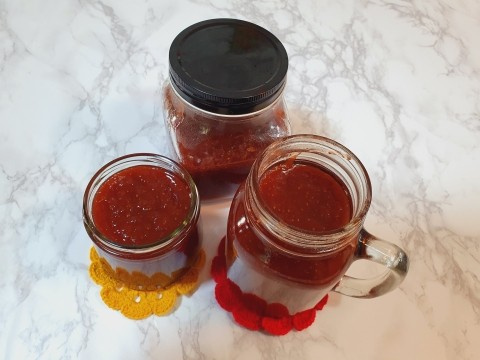
Step 9
Sterilizing the glass jars is a critical step for preserving your jam. You can do this by boiling the jars in water or by ensuring they are completely dry after washing. Using completely dry, sterilized jars will prevent mold growth and help your jam last longer. Make sure the jars are completely dry before filling.

Step 10
Once the freshly made strawberry jam has cooled completely, carefully transfer it into the sterilized glass jars. Storing the jam in the refrigerator will keep it fresh and delicious for a long time.


