Chewy and Savory Grilled Squid Pancake Recipe
Special Squid Pancake for Chuseok Holidays: Bringing Out the Chewy Flavor with Grilled Squid

Introducing a delicious squid pancake recipe using chewy grilled squid. It’s perfect for holidays or special occasions and can be easily made for the whole family to enjoy.
Main Ingredients- 2 sheets of grilled whole squid (purchased from a fish market)
- 2 Tbsp all-purpose flour
- 2 eggs
- 1 pinch salt
Cooking Instructions
Step 1
We’ve prepared fresh, grilled whole squid, the type you can buy at a fish market. Using fresh squid will make it even more delicious.

Step 2
This squid is cooked under pressure, giving it this unique elongated shape. This distinctive form adds an interesting texture to the pancake when fried.

Step 3
Cut the squid into pieces that are suitable for making pancakes. You can adjust the size based on whether you want bite-sized pieces or larger ones for a holiday table.

Step 4
Lightly rinse the cut squid under running water, then pat it thoroughly dry with paper towels. Surprisingly, a quick rinse under water actually makes the firm grilled squid softer and moister.

Step 5
Once the squid is dry, use a fine sieve to evenly dust both sides with all-purpose flour. A thin coating of flour helps the egg batter adhere better and makes the pancake crispier.

Step 6
Crack the 2 eggs into a bowl. Add a pinch of salt to enhance the flavor and remove the chalazae (the white stringy bits). Whisk well to create the egg batter.

Step 7
Dip the flour-dusted squid pieces into the prepared egg batter, ensuring they are evenly coated on all sides. Make sure the entire surface of the squid is covered with the egg mixture.

Step 8
Heat a frying pan over medium-low heat, then add a generous amount of cooking oil. Frying the pancake after the pan and oil are sufficiently heated prevents sticking and ensures even cooking. It’s better to cook slowly over medium-low heat rather than high heat from the start.

Step 9
Place the egg-battered squid onto the heated pan. If there are any gaps or holes in the squid, carefully pour some of the remaining egg batter to fill them. This helps maintain the squid’s shape nicely.

Step 10
Once the bottom side of the squid is golden brown, carefully flip it using a spatula. Flip back and forth, cooking until both sides are a delicious golden brown. Adjust the heat as needed to ensure it’s cooked through.

Step 11
If you’re serving this for ancestral rites or a holiday table, trim any uneven edges for a neat presentation. Placing larger, well-shaped pieces on the table looks elegant.

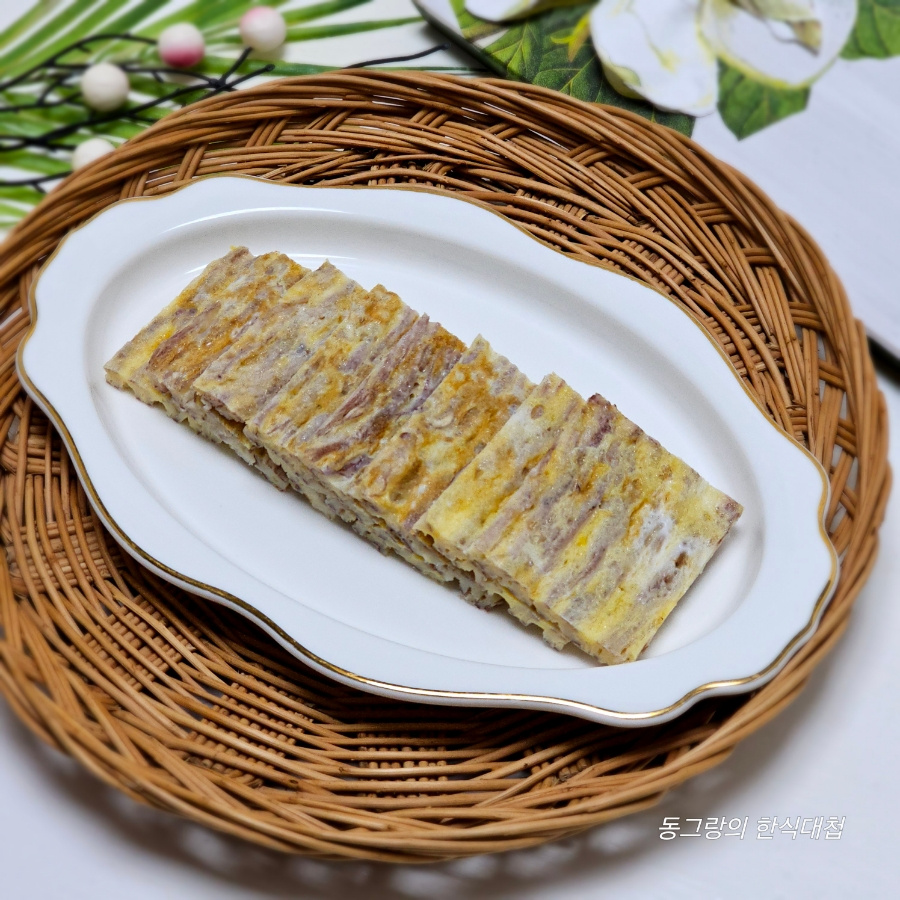
Step 12
Cut the finished squid pancake into bite-sized pieces and enjoy while warm. The chewy squid combined with the savory egg coating creates a universally loved flavor.