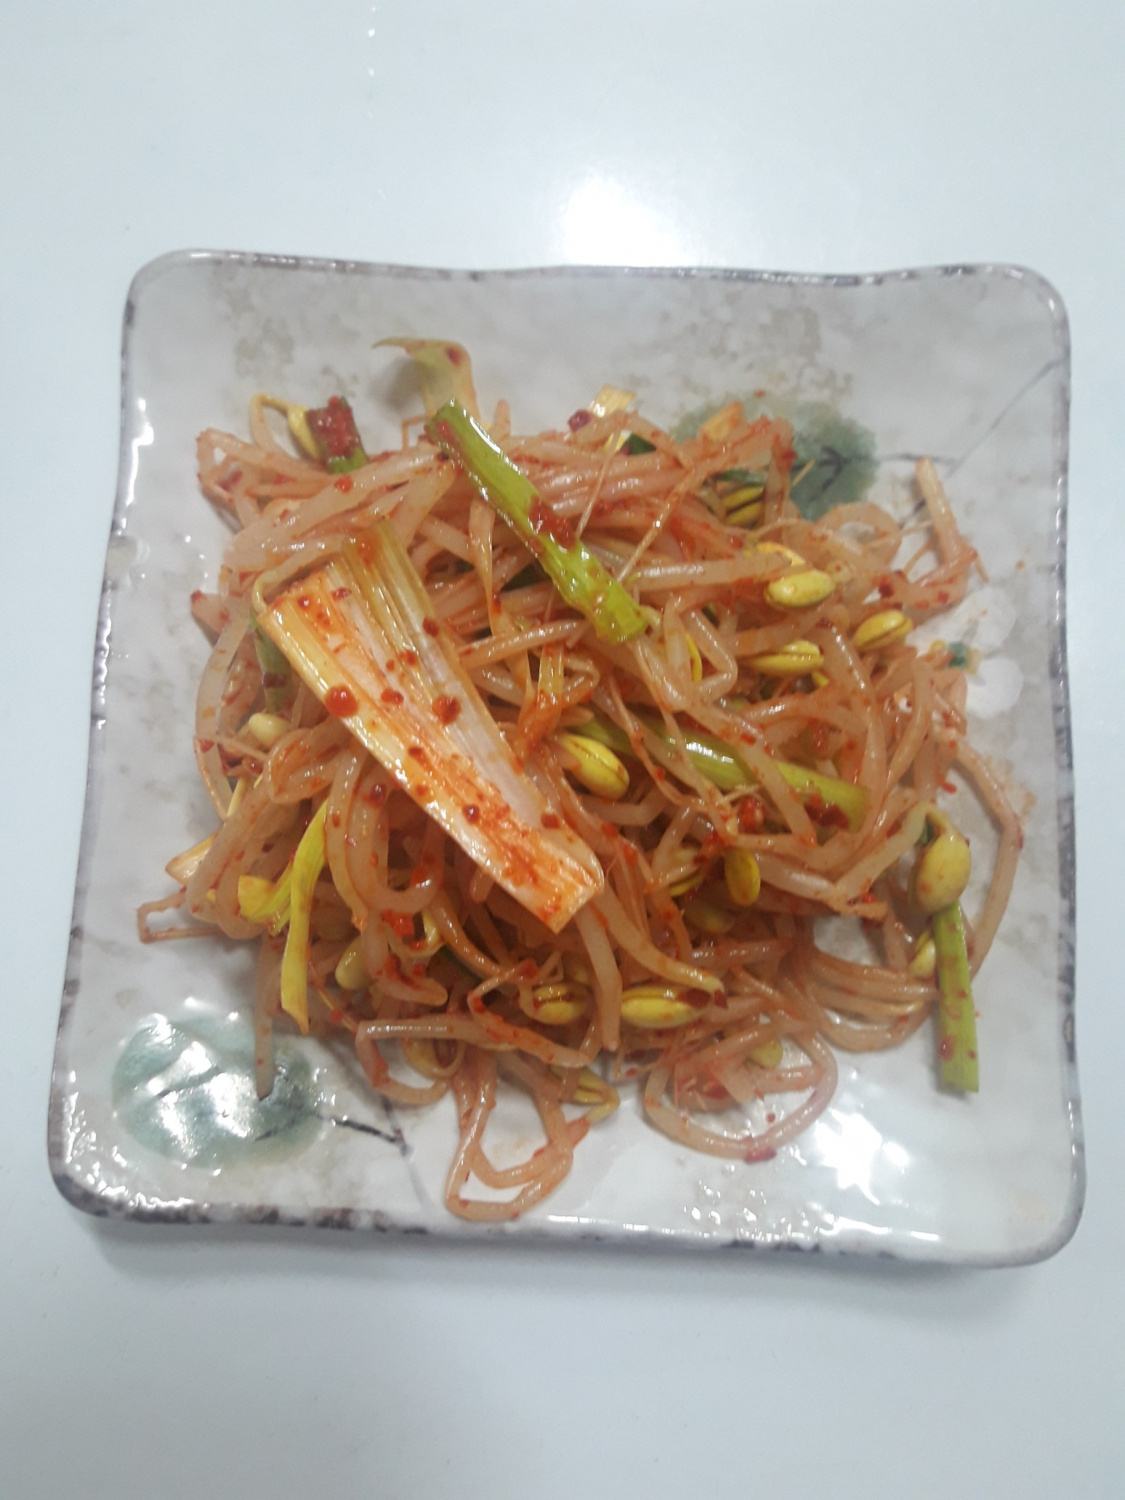
Crisp and Aromatic Young Garlic and Bean Sprout Salad: The Secret to Healthy Lunch Boxes
Delicious Lunch Box Side Dish Made with Aromatic Young Garlic and Bean Sprouts

A perfect harmony of fresh bean sprouts and pungent young garlic! This Young Garlic and Bean Sprout Salad complements any main dish, stimulating your appetite with its crisp texture and subtle garlic aroma. Boost your family’s health while preparing a simple yet delicious side for your lunch box, making it more satisfying.
Main Ingredients- 1 bag bean sprouts (approx. 200g)
- 2 stalks young garlic (or green garlic)
Seasoning Ingredients- 2 Tbsp gochugaru (Korean chili flakes)
- 1 tsp salt (or soy sauce, adjust to taste)
- 1 Tbsp sesame oil
- 1/2 Tbsp sesame seeds (or toasted sesame seeds)
- 2 Tbsp gochugaru (Korean chili flakes)
- 1 tsp salt (or soy sauce, adjust to taste)
- 1 Tbsp sesame oil
- 1/2 Tbsp sesame seeds (or toasted sesame seeds)
Cooking Instructions
Step 1
First, prepare the stars of your Young Garlic and Bean Sprout Salad: the bean sprouts and young garlic. Rinse the bean sprouts thoroughly under running water several times to remove any dirt or stray roots, then drain them well in a colander. Trim the outer layers of the young garlic, wash them clean, and then thinly slice them into strips similar in length to the bean sprouts. You can use both the white and green parts of the young garlic; for a more uniform texture, you can chop the green leafy parts finer.

Step 2
Now, it’s time to blanch the bean sprouts. Bring a generous amount of water to a rolling boil in a pot over high heat. Once boiling, add all the rinsed bean sprouts and cover the pot. Blanch for just about 1.5 to 2 minutes. Overcooking will make the bean sprouts mushy and lose their crispness, so it’s crucial to cook them just until tender-crisp. Immediately drain the blanched bean sprouts and rinse them under cold water to stop the cooking process and cool them down. Drain them thoroughly in a colander; excess water will make the salad watery and dilute the flavors.

Step 3
Next, slice the prepared young garlic to match the bean sprouts. Since the young garlic will be mixed with the bean sprouts, slice them to about 4-5 cm in length. Use both the white and green parts of the young garlic. If you prefer, you can chop the leafy parts more finely to ensure the seasoning distributes evenly. The sharp, fresh flavor and crisp texture of the young garlic will further enrich the taste of the bean sprout salad.

Step 4
Prepare the seasoning for your delicious Young Garlic and Bean Sprout Salad. In a large mixing bowl, combine 2 tablespoons of gochugaru, 1 teaspoon of salt (or soy sauce for a richer umami), 1 tablespoon of sesame oil, and 1/2 tablespoon of sesame seeds (or toasted sesame seeds). Using soy sauce can add depth of flavor, while salt provides a cleaner taste. You can add a little minced garlic if you like, but omitting it allows the natural aroma of the young garlic to shine. Mix all the seasoning ingredients well to create your dressing.

Step 5
Now it’s time to combine everything! Add the thoroughly drained blanched bean sprouts to the bowl with the seasoning. Then, add the sliced young garlic as well. Gently mix the bean sprouts and young garlic together. Be careful not to crush the bean sprouts; handle them with care to preserve their crisp texture. Mix gently to allow the fresh aroma of the young garlic to infuse into the bean sprouts.

Step 6
Finally, toss everything in the seasoning until well combined. You can use your hands for a gentle mix or a spatula to fold the ingredients from bottom to top. Remember not to press down too hard to keep the bean sprouts crisp. Once the seasoning is evenly distributed throughout the bean sprouts and young garlic, your delicious Young Garlic and Bean Sprout Salad is ready! Let it cool slightly before packing it into lunch boxes, or serve it fresh immediately. Enjoy a healthy and flavorful meal!


