Savory & Sweet Soy-Sauce Pickled Peppers (Ganjang Gochu Jangajji)
The Ultimate Golden Ratio Recipe for Homemade Soy-Sauce Pickled Peppers

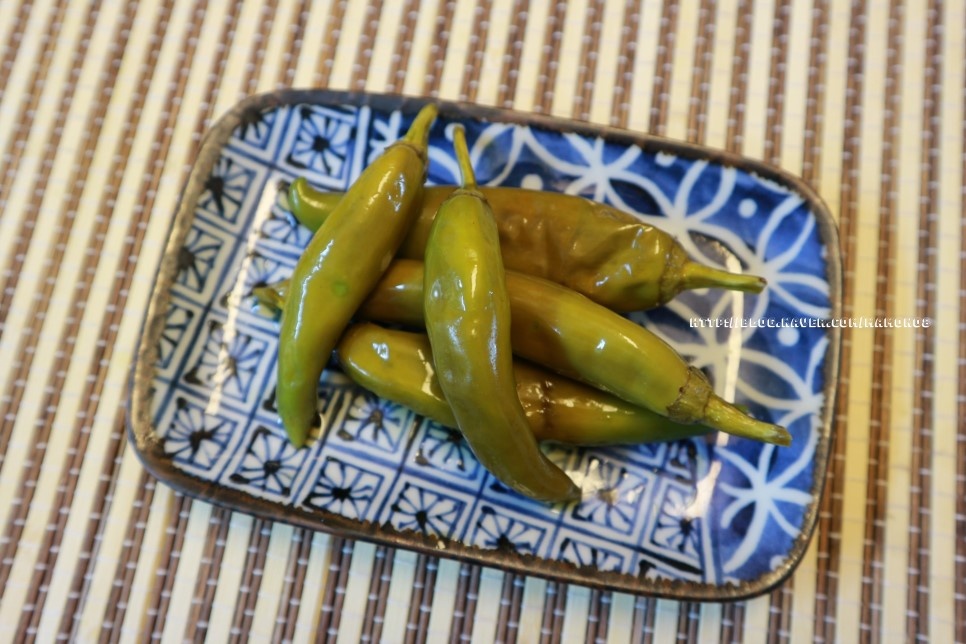
Transform a bountiful bag of Cheongyang peppers into a rice-topping delicacy and a versatile seasoning sauce with this soy-sauce pickled pepper recipe! These savory and slightly sweet pickled peppers are perfect as a side dish for rice, or as a flavorful addition to stews like sujebi, kalguksu, and sundubu jjigae. If you love a spicy kick, use Cheongyang peppers; for a milder flavor, opt for regular green peppers. The process is incredibly simple, so trust my recipe and follow along to create delicious pickled peppers!
Main Ingredients- 1 bag of Cheongyang peppers
Pickling Brine- 350ml regular soy sauce
- 350ml sugar
- 350ml vinegar
- 350ml water
- 350ml plum extract (maesilcheong)
- 350ml soju (rice wine)
- 350ml regular soy sauce
- 350ml sugar
- 350ml vinegar
- 350ml water
- 350ml plum extract (maesilcheong)
- 350ml soju (rice wine)
Cooking Instructions
Step 1
Adjust the amount of pickling brine according to the quantity of peppers, but maintain the 1:1:1:1:1:1 ratio for soy sauce:sugar:vinegar:water:plum extract:soju. Use Cheongyang peppers for a spicy flavor, or regular green peppers for a milder taste. Choosing the right pepper is key!

Step 2
Wash the peppers thoroughly under running water. It’s crucial to completely dry the peppers after washing to prevent them from becoming mushy. Let them air dry in a well-ventilated area or pat them dry meticulously with paper towels. I washed mine in the morning and pickled them in the afternoon.

Step 3
If you don’t have white sugar, brown sugar works just fine. If you lack a measuring cup, use baby food containers or regular cups for accurate measurements. If you forgot to buy sugar when you got the soju, don’t worry; just use any cup you have at home to maintain the correct ratio!

Step 4
Measure 350ml each of regular soy sauce, sugar, vinegar, water, plum extract, and soju. Combine them in a pot and bring to a rolling boil over high heat. Once boiling, continue to cook for about 1-2 minutes, then turn off the heat and let it cool completely. While the brine is cooling, prepare the washed and dried peppers!

Step 5
There are two methods for preparing the peppers. The first is to prick the peppers all over with a fork or toothpick. The second is to slightly trim the ends of the peppers with scissors or a knife, or to make small slits. Both methods aim to help the pickling brine penetrate the peppers effectively. Choose the method you prefer!

Step 6
Curious to see which method works better for pickling, I decided to prick half of the peppers with a fork and trim the stems of the other half. This way, I can compare the results and learn from the process.

Step 7
Pack the prepared peppers tightly into your pickling container, ensuring there are no air pockets. I used a Lock & Lock container specifically for pickling, and I must say, their containers are very convenient! If you don’t have a specialized container, you can use a glass jar sterilized by boiling water, or even a clean plastic bottle. Pressing them down firmly helps keep the peppers submerged in the brine.

Step 8
After pressing them down tightly, the peppers filled one 1.5-liter container and a little more than half of another. The size of the container you’ll need will depend on the quantity of peppers you’re pickling.

Step 9
Pour the completely cooled pickling brine over the peppers until they are fully submerged – and your pickled peppers are ready! Don’t forget to label the container with the date you made them. Let them sit at room temperature for 3 to 7 days before enjoying. It’s important to pour the cooled brine to prevent the peppers from becoming mushy, as advised by my mother!

Step 10
I transferred mine to the refrigerator after 4 days. The traditional method involves draining the brine, boiling it again, cooling it, and then re-pouring it for long-term storage. However, if you plan to eat them soon, they’ll be delicious as they are. For extended shelf life, separate the brine, boil it again, let it cool completely, and then pour it back. At this stage, you can taste the brine and adjust the saltiness, sweetness, and sourness to your preference, creating your own perfect flavor profile!


