Halloween Special! Adorable Homemade Butter Cookies
Fun Halloween Butter Cookie Recipe for Kids and Home Baking Enthusiasts

With Halloween just around the corner and kids eager for spooky cookie cutters and chocolate pens, why not make this weekend a memorable one with a fun home baking session? Creating these Halloween butter cookies together is a delightful activity that promises both joy and delicious treats. From mixing the dough to shaping, baking, and decorating, this recipe is designed to be an engaging experience for children and a charming trip down memory lane for adults. Bake up some sweet, buttery memories this Halloween!
Ingredients- 200g cake flour (low-gluten flour)
- 60g unsalted butter, softened
- 40g vegetable oil (e.g., canola, grapeseed)
- 1 large egg
- 2g baking powder
- 2g salt
Cooking Instructions
Step 1
About an hour before you begin baking, take the butter and egg out of the refrigerator and let them come to room temperature. This will make the butter soft and easier to cream, and the egg will incorporate smoothly into the dough without chilling the other ingredients.

Step 2
Sift the cake flour twice through a fine-mesh sieve. This process aerates the flour, removing any lumps, and results in lighter, more tender cookies. It also enhances the overall flavor.

Step 3
Place the softened butter in a clean mixing bowl. Mash it with a whisk or spatula until creamy. Gradually add the sugar in 2-3 additions, whisking well after each addition until the sugar is completely dissolved into the butter, creating a light and fluffy mixture.

Step 4
Crack the egg into the creamed butter-sugar mixture. Add the salt and baking powder. It’s best to add the egg in two or three batches, mixing thoroughly after each addition. This helps to prevent the mixture from separating and ensures a smooth, cohesive dough.

Step 5
Once the wet ingredients are well combined, add all of the sifted cake flour at once. Gently mix with a spatula or your hands until just combined and no dry flour streaks remain. Be careful not to overmix, as this can lead to tough cookies.

Step 6
Lightly dust your work surface with flour. Turn the dough out onto the floured surface and use a rolling pin to roll it out to an even thickness of about 0.5mm. Consistent thickness is key for even baking; too thin and they might burn, too thick and they’ll take longer to cook through.

Step 7
Using your favorite Halloween-themed cookie cutters (pumpkins, ghosts, bats, etc.), cut out shapes from the rolled-out dough. Let the children choose their own shapes to make the experience even more engaging!

Step 8
Carefully transfer the cut-out cookies onto a baking sheet lined with parchment paper. Ensure there is some space between each cookie to prevent them from sticking together during baking and to allow for even heat circulation.

Step 9
Preheat your oven to 170°C (340°F). Place the baking sheet with the cookies into the preheated oven and bake for approximately 15 to 20 minutes, or until the edges are lightly golden brown. Baking times may vary depending on your oven, so keep an eye on them.

Step 10
Once baked to a beautiful golden hue and fragrant with buttery goodness, remove the cookies from the oven. Let them cool on the baking sheet for a minute or two before transferring them to a wire rack to cool completely. Once cooled, decorate them with chocolate pens, sprinkles, or icing to complete your festive Halloween cookies!

Step 11
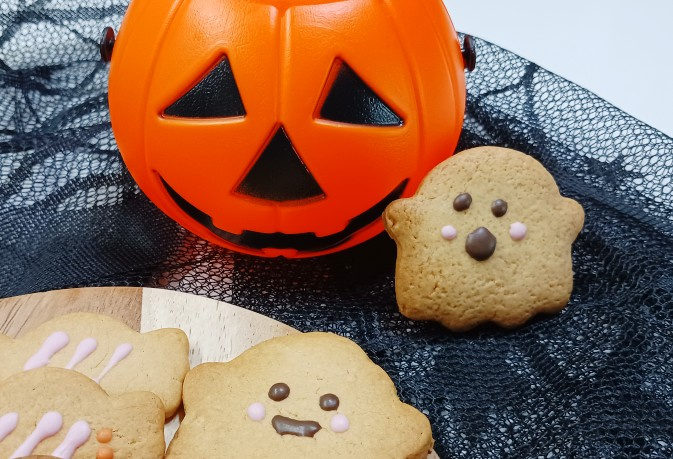
Look at these adorable Halloween cookies, beautifully decorated by our little chefs! Each one is a work of art, full of personality and sure to be a hit. Enjoy the sweet taste of Halloween and the joy of baking together!


