Crispy Kkakdugi (Cubed Radish Kimchi) Golden Recipe
Make Deliciously Fermented Kkakdugi at Home!

Let’s make delicious Kkakdugi using seasonal radishes! This is a side-dish style Kkakdugi that will have you reaching for more rice, with its perfectly sweet and sour taste. We’ve included detailed steps so anyone can easily follow along.
Main Ingredients- 2 medium-sized radishes
- 1 cup coarse sea salt (for brining)
- 2 Tbsp sugar (for brining)
- 1 liter water (for brining)
- 1 medium onion (for seasoning)
Glutinous Rice Paste- 3 Tbsp glutinous rice flour
- 8 Tbsp water (for mixing)
- 200ml boiling water
Seasoning Ingredients- 2 Tbsp minced garlic
- 1 tsp ginger powder
- 2 Tbsp plum extract (maesil)
- 1 Tbsp salted shrimp (finely minced)
- 4 Tbsp fish sauce (anchovy or similar)
- 1 Tbsp brown sugar
- 1 Tbsp salt (for final seasoning)
- 1 cup chili powder (for kimchi)
- 1/2 cup chili powder (for coloring the radish)
- 3 Tbsp glutinous rice flour
- 8 Tbsp water (for mixing)
- 200ml boiling water
Seasoning Ingredients- 2 Tbsp minced garlic
- 1 tsp ginger powder
- 2 Tbsp plum extract (maesil)
- 1 Tbsp salted shrimp (finely minced)
- 4 Tbsp fish sauce (anchovy or similar)
- 1 Tbsp brown sugar
- 1 Tbsp salt (for final seasoning)
- 1 cup chili powder (for kimchi)
- 1/2 cup chili powder (for coloring the radish)
Cooking Instructions
Step 1
First, prepare two medium-sized radishes. When making Kkakdugi, washing the radishes thoroughly without peeling the skin will help maintain a crisp texture after fermentation, preventing them from becoming too soft.

Step 2
Cut the radishes into thick cubes, about 3-4cm in length. You can adjust the size of the cubes depending on the thickness of the radish. Be careful not to cut them too thin, as they can become mushy quickly.

Step 3
Place all the cubed radishes into a large bowl.

Step 4
Prepare the brining solution. In a separate container, mix 1 cup of coarse sea salt with 2 Tbsp of white sugar. Then, add 1 liter of water and stir until the sugar and salt are fully dissolved. Brining with water helps the radishes to soften faster than using only salt, and adding sugar enhances the radish’s natural sweetness. Pour this solution over the radishes.

Step 5
Let the radishes brine for about 2 hours. You’ll notice a significant amount of liquid released from the radishes. The radishes are ready when they feel slightly pliable and tender to the touch.

Step 6
Rinse the brined radishes 2-3 times under cold running water. After rinsing, drain them thoroughly in a colander for at least 1 hour. Excess moisture can make the kimchi watery and bland.

Step 7
Make the glutinous rice paste. In a small bowl, mix 3 Tbsp of glutinous rice flour with 8 Tbsp of water until smooth and lump-free. In a saucepan, bring 200ml of water to a boil. Add the glutinous rice paste mixture and whisk continuously while it heats up. Once it starts to bubble and large bubbles pop, turn off the heat. Let it cool completely. Making the rice paste while the radishes are brining will save time.

Step 8
Prepare the onion juice for the seasoning. Grate one medium onion using a grater or blend it in a food processor to extract the juice.

Step 9
In a large bowl, combine the prepared onion juice, 2 Tbsp minced garlic, 1 tsp ginger powder, 2 Tbsp plum extract, 1 Tbsp finely minced salted shrimp, 4 Tbsp fish sauce, the cooled glutinous rice paste, and 1 cup of chili powder. Mix everything thoroughly. Add 1 Tbsp of brown sugar to aid fermentation and adjust the final taste with 1 Tbsp of salt.

Step 10
It’s beneficial to let the mixed seasoning sit for a while before using it. This allows the chili powder to deepen in color and flavor. Pre-fermenting the seasoning can also help reduce the total amount of chili powder needed for the kimchi.

Step 11
Add the drained radishes to the large bowl. First, add half a cup of chili powder and gently mix to coat the radishes with color. Then, add all the pre-fermented seasoning and carefully toss everything together, being mindful not to break the radish pieces.

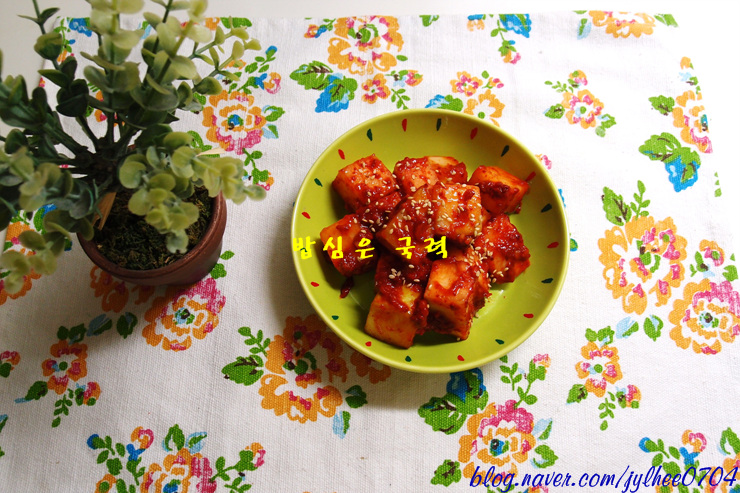
Step 12
Your delicious Kkakdugi is ready! While it’s tasty to eat immediately, letting it sit at room temperature for a day or two to ferment slightly before storing it in the kimchi refrigerator will yield an even richer flavor.


