Candied Ginger (Pyungang): A Spicy-Sweet Health Treat
Homemade Candied Ginger Recipe for Cold Prevention and Throat Health

With many people suffering from sore throats and colds in this changing weather, I wanted to share how to make healthy candied ginger at home. Ginger has long been known for its benefits in soothing coughs and supporting respiratory health. Its warming properties also help to warm the body. We’ve added Korean red ginseng and jujubes for extra nutrients and a richer flavor to this homemade candied ginger, perfect for keeping your family healthy! This recipe includes detailed steps and tips to make it easy for even beginners to follow.
Main Ingredients- Fresh ginger
- Korean red ginseng (powder or extract)
- Dried jujubes
- Water
Candied Ginger Seasoning- Granulated sugar (or brown sugar)
- Granulated sugar (or brown sugar)
Cooking Instructions
Step 1
First, prepare your fresh ginger. If it’s covered in soil, wash it thoroughly under running water. Then, soak the parts with soil in water for a bit, and you’ll find the skin peels off easily by gently scraping with a paring knife. Make sure to remove all the thin skin.

Step 2
After peeling, slice the ginger into thin, uniform slices. This is crucial for a good texture when you chew it and for proper drying later. Using a mandoline slicer will make this process much faster and more consistent, so I highly recommend it! Aim for slices about 1-2mm thick.

Step 3
Place the sliced ginger in cold water. This step helps to mellow out the characteristic spicy and pungent flavor of ginger, making it less harsh. Soaking for at least half a day, or preferably a full day, is recommended.

Step 4
Drain the soaked ginger slices in a sieve. Next, we’ll blanch them in boiling water. This step further reduces the spiciness and pungency, ensuring that everyone can enjoy the candied ginger. Blanch them in boiling water for just 1-2 minutes, then immediately remove.

Step 5
Drain the blanched ginger slices thoroughly in a sieve. Now it’s time to coat them with sugar. You can adjust the ratio of ginger to sugar according to your preference. I used a ratio of 4 parts ginger to 3 parts sugar, but if you prefer it sweeter, you can increase the sugar up to a 1:1 ratio with the ginger. Mix well to ensure the ginger slices are evenly coated with sugar.

Step 6
Now, the ginger slices coated in sugar need to be cooked. Use a wide, heavy-bottomed frying pan and cook over high heat, stirring constantly. Initially, the ginger will release moisture, and it will start to simmer.

Step 7
As the moisture begins to evaporate, reduce the heat to medium and continue to stir as if you’re stir-frying. Be careful to prevent the ginger slices from sticking to each other or to the bottom of the pan.

Step 8
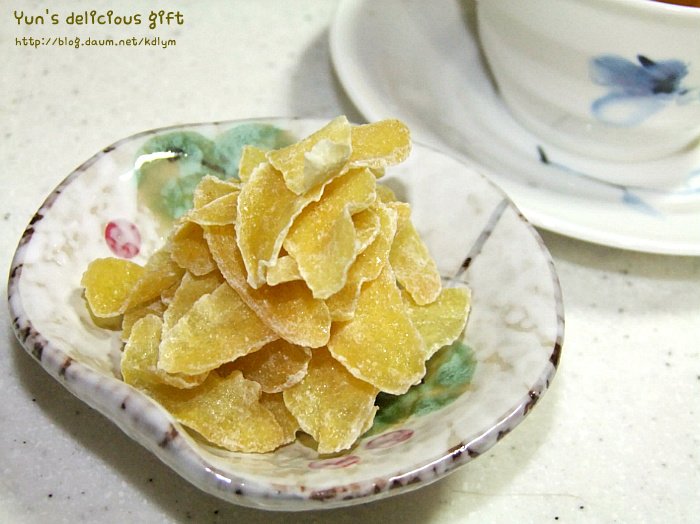
When the ginger slices, which were initially soft, start to feel firmer and sugar crystals begin to form, turn the heat down to very low. It’s important to avoid burning, so even if it takes longer, cook it slowly over low heat. At some point, the ginger slices will start to look crisp, like crackers. This is the signal to quickly turn off the heat! Transfer the candied ginger to a wide plate or tray, spread it out, and let it cool completely. You’ll have delicious candied ginger with a crisp exterior and chewy interior, perfect for the whole family!


