Adorable Teddy Bear Shaped Valentine’s Chocolates
Express Your Love This Valentine’s Day! Easy and Cute Teddy Bear Chocolates That Kids and Adults Will Adore

Celebrate Valentine’s Day on February 14th with these charming teddy bear chocolates, perfect for your husband and son. Using cute molds makes the process incredibly simple and enjoyable. They are a wonderful way to show your affection with a homemade touch. Get ready for a delightful baking experience and a sweet reward!
Ingredients- Milk Chocolate 150g x 2 bars
- White Chocolate 200g x 1 bar
- Assorted Flavored Chocolate Pens 20g x 4
- Teddy Bear Chocolate Mold
Cooking Instructions
Step 1
First, prepare your chocolate pens for decorating. Place the chocolate pens in a bowl of hot water to gently melt the chocolate inside. This step makes it much easier to pipe and fill the mold details.

Step 2
Using the melted chocolate pens, carefully fill in the fine details of the teddy bear mold. Start by filling in the eyes and nose. This precise filling will bring your teddy bear to life when it’s finished.

Step 3
Once the chocolate for the eyes and nose has slightly set, use your desired flavor of chocolate pen to fill in the area around the teddy bear’s mouth. Building layers like this adds dimension to the design.

Step 4
Gently invert the mold, and you’ll see the cute eyes, nose, and mouth of your teddy bear beautifully formed in chocolate! At this stage, you can appreciate the detailed facial features.

Step 5
Now, let’s prepare the main chocolate to fill the teddy bear’s face. A simple method is to use a piping bag. Place the chocolate into the piping bag, seal the top securely, and then place the bag in a bowl of hot water to melt gently via a double boiler method. Once the chocolate is fully melted, it’s crucial to wipe away any condensation from the outside of the piping bag before proceeding. Ensure no water gets into the chocolate.

Step 6
Using a piping bag eliminates the need to transfer melted chocolate into another container, making the process more direct and convenient. Snip off the tip of the piping bag to create an opening for piping the chocolate.

Step 7
Carefully fill the teddy bear mold with the melted chocolate. After filling, gently tap the mold on your work surface a few times. This helps the chocolate settle evenly and creates a flat back for the chocolate. Now, simply let the mold set undisturbed until the chocolate is firm.

Step 8
After about an hour, your smooth and shiny teddy bear chocolates will be ready! Handle them gently when demolding to prevent breakage.

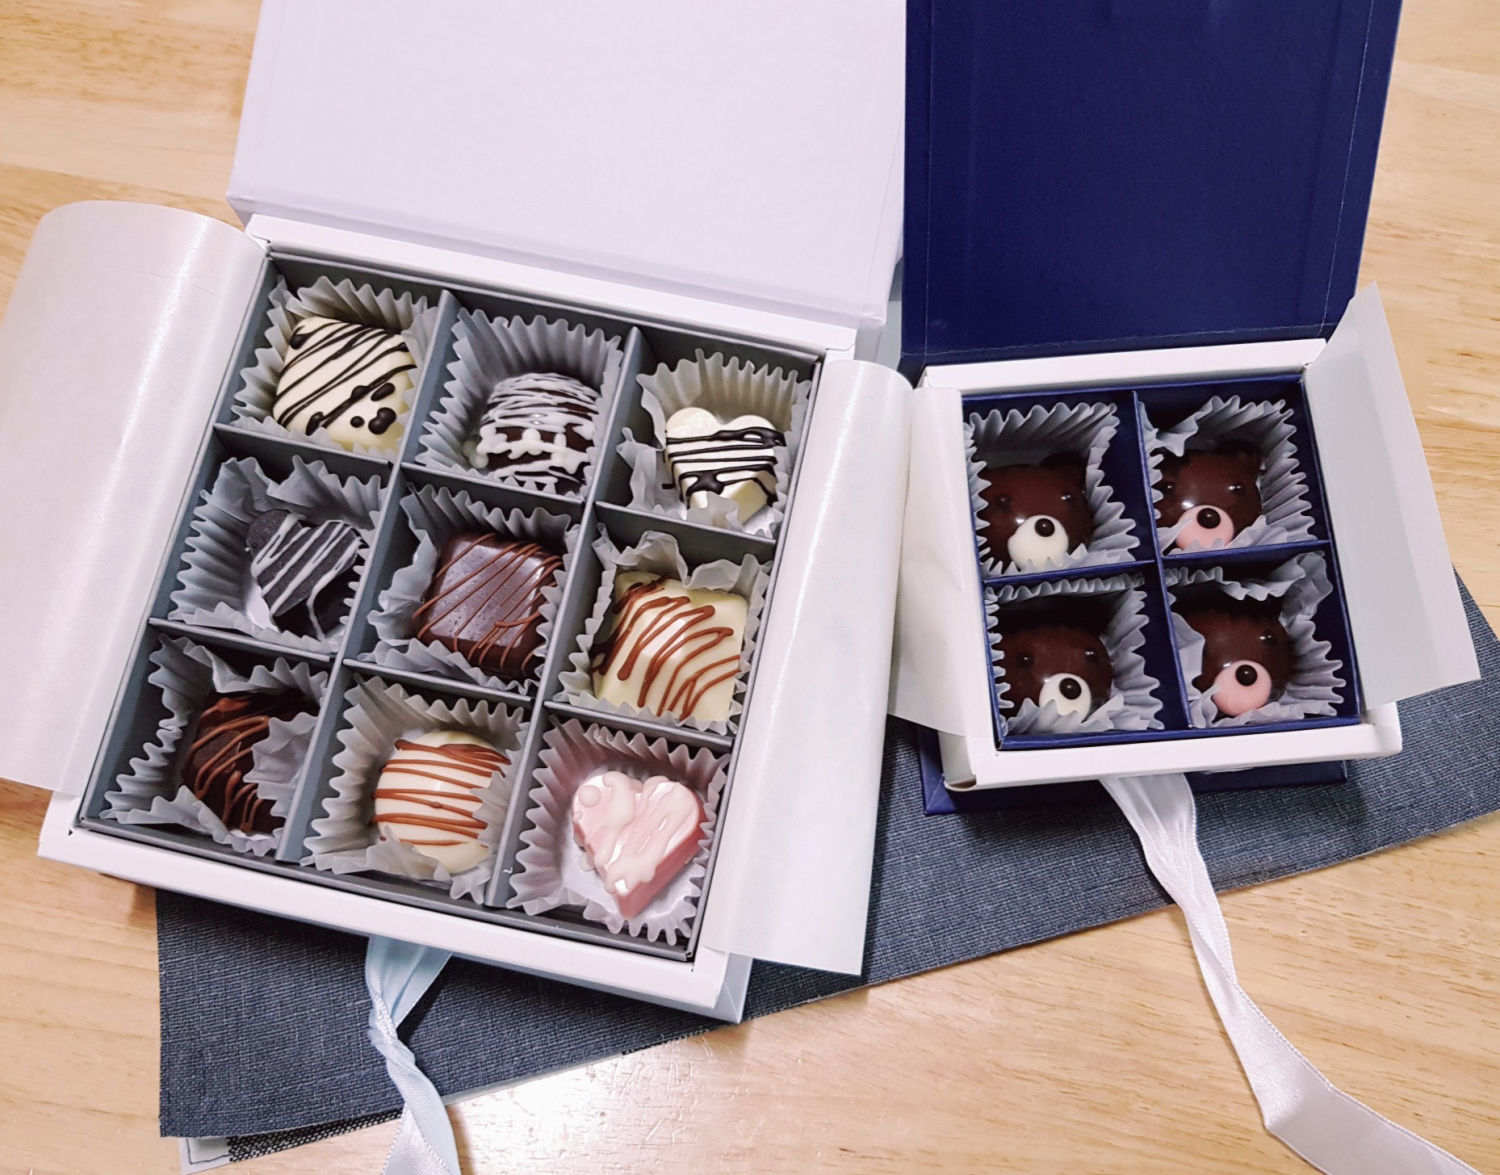
Step 9
Once fully set, carefully unmold the chocolates and arrange them neatly in a gift box. Your adorable teddy bear chocolate gift is complete!

Step 10
Next, we’ll prepare white chocolate (200g) and milk chocolate (150g) for other shapes. Melt these using the double boiler method as before.

Step 11
After melting, thoroughly wipe away any moisture from the outside of the piping bag or bowl. This step is vital to prevent the chocolate from becoming dull or streaky.

Step 12
Pour the well-melted chocolate into your prepared molds. Ensure they are filled nicely, then let them set until firm.

Step 13
After about an hour, check if the chocolates are fully hardened. Carefully release them from the mold. You should have perfectly formed chocolates.

Step 14
Now you have a variety of chocolates in different flavors and shapes! For instance, you can add cute details to the strawberry-flavored chocolates using the chocolate pens.

Step 15
It’s time for the final decorating touches. Here, you can use the chocolate pens in your favorite flavors to make the chocolates even more special and personalized.

Step 16
Don’t aim for perfection; a slightly random or scattered decorating style can look more natural and charming. Enjoy the creative process!

Step 17
Once all the chocolates are decorated, arrange them beautifully in a box. Your Valentine’s Day treat is ready to impress!

Step 18
These delightful Valentine’s chocolates, made with ease, are a wonderful way to share sweet love with your cherished ones!


