Air Fryer Garlic Flakes
Homemade Crispy & Versatile Air Fryer Garlic Chips: Easy Recipe

Today, I’m going to share a recipe for crispy and delicious air fryer garlic flakes, a magical ingredient that can elevate any dish! With just an air fryer, anyone can easily make professional-quality garlic chips. They’re perfect as a topping for salads, pasta, stir-fries, and so much more. Give this recipe a try!
Main Ingredients- 5 cloves garlic
- 1 Tbsp olive oil
Cooking Instructions
Step 1
First, peel the 5 cloves of garlic and prepare them. Be careful not to damage the garlic while peeling. Rinse the prepared garlic thoroughly under running water to remove any dirt.

Step 2
Thinly slice the clean garlic into even pieces. Slicing them uniformly without making them too thick is key to ensuring they cook evenly. Aim for a thickness of about 2mm.

Step 3
Place the sliced garlic in cold water and let it soak for about 15 minutes. This process mellows the sharp, pungent flavor of the garlic, making it more palatable. Soaking out the strong taste is important.

Step 4
After 15 minutes, drain the garlic and pat it dry. You can rinse it lightly under running water again after soaking. Thoroughly drying the garlic is crucial for achieving a crispy texture when air frying.

Step 5
Use paper towels to meticulously dry the garlic slices after draining them. If any moisture remains, the olive oil won’t coat properly, and the chips might turn out soggy.

Step 6
Add 1 tablespoon of olive oil to the thoroughly dried garlic slices and mix well. Ensure each slice is evenly coated with the oil. The olive oil will help make the garlic crispy and add a delightful nutty flavor.

Step 7
Line the air fryer basket with parchment paper and arrange all the olive oil-coated garlic slices in a single layer. Spreading them out as much as possible prevents them from overlapping, which ensures even crispiness. Overlapping slices can lead to uneven cooking.

Step 8
Preheat your air fryer to 140℃ (285℉). Place the garlic in the basket and air fry for 10 minutes. This initial stage helps to remove moisture and slightly cook the garlic.

Step 9
After 10 minutes, carefully remove the garlic from the air fryer and toss them to mix. You’ll notice a slight change in their color. Now, we’ll increase the heat to make them crispier, so mixing them evenly at this stage is important.

Step 10
Return the garlic to the air fryer and continue to cook at 140℃ (285℉) for another 12 minutes. Keep an eye on them to prevent burning. Checking their progress periodically is a good idea.

Step 11
Next, slightly increase the temperature to 150℃ (300℉) and air fry for an additional 12 minutes. Gradually increasing the temperature helps to crisp the garlic from the inside out without burning the exterior. The garlic should start turning golden brown.

Step 12
Finally, air fry for another 7 minutes at 150℃ (300℉) to achieve perfectly crispy garlic flakes. Stay vigilant until the very end to prevent burning. They are ready when they have a golden-brown hue.

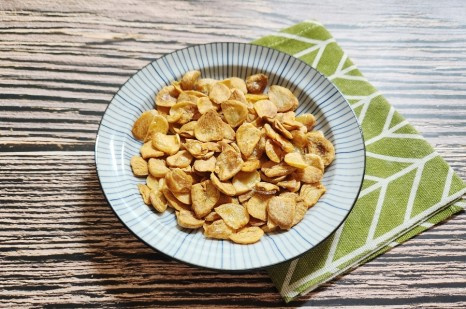
Step 13
Freshly made garlic flakes are a wonderful snack on their own, but they also add a fantastic burst of flavor and texture when sprinkled over salads, pasta, or stir-fries. Enjoy these easy, homemade crispy garlic chips!


