Aromatic Acanthopanax Root Jangajji (Pickled Stem)
Homemade Acanthopanax Root Jangajji Recipe

Discover the exquisite taste of Jangajji made from fresh Acanthopanax roots, often hailed as the ‘king of spring vegetables.’ This recipe offers a delightful balance of subtle bitterness and fragrant notes, perfect for preserving the essence of spring.
Main Ingredients- Acanthopanax roots (Ddurup) 2kg (Thick stems sliced in half or quartered lengthwise)
Pickling Brine- Soy sauce 4 cups (approx. 800ml)
- Fish sauce (Canary brand recommended) 1 cup (approx. 200ml)
- Vinegar 1 cup (approx. 200ml)
- Garlic 20 cloves (thinly sliced)
- Green onion 1 large stalk (cut into large pieces)
- Lemon 1 (sliced)
- Dried kelp 1 handful (approx. 10g)
- Water 6 cups (approx. 1.2L)
- Plum extract (Maesilcheong) 1 cup (approx. 200ml)
- Dried red chilies 3
- Soy sauce 4 cups (approx. 800ml)
- Fish sauce (Canary brand recommended) 1 cup (approx. 200ml)
- Vinegar 1 cup (approx. 200ml)
- Garlic 20 cloves (thinly sliced)
- Green onion 1 large stalk (cut into large pieces)
- Lemon 1 (sliced)
- Dried kelp 1 handful (approx. 10g)
- Water 6 cups (approx. 1.2L)
- Plum extract (Maesilcheong) 1 cup (approx. 200ml)
- Dried red chilies 3
Cooking Instructions
Step 1
Prepare 2kg of fresh Acanthopanax roots. These are characterized by their larger size and thicker stems compared to regular Acanthopanax. For the thick stems, slice them in half or make quartered cuts lengthwise to ensure the pickling brine penetrates well.

Step 2
When blanching the Acanthopanax, add a bit of salt to boiling water. First, add the thick stems and let them cook for a moment before adding the leafy parts. This method ensures the stems remain crisp while the leaves become tender, resulting in a harmonious texture.

Step 3
After blanching, rinse the Acanthopanax under cold water, drain thoroughly, and then dry them until they are semi-dry (꾸덕꾸덕), about half a day. Drying them this way allows you to skip re-boiling the brine and significantly improves the texture of the Jangajji.

Step 4
While the Acanthopanax roots are drying, prepare the pickling brine. In a pot, combine all the brine ingredients except for the lemon and kelp: soy sauce, fish sauce, vinegar, water, plum extract, garlic, green onion, and dried chilies. Bring this mixture to a boil.

Step 5
Once the brine starts boiling vigorously, turn off the heat. Add the pre-sliced lemon and dried kelp. Let it steep for about 10 minutes to infuse the flavors, then strain the mixture through a sieve to obtain a clear brine. The lemon and kelp add fragrance and help eliminate any gamey or bitter notes.

Step 6
Arrange the semi-dried Acanthopanax roots neatly in a clean container. Pour the prepared brine over the roots, ensuring they are fully submerged. To prevent exposure to air, place a weight (like a press stone or a heavy plate) on top. This is crucial for making delicious Jangajji.

Step 7
This is the Acanthopanax root Jangajji after about a week of pickling. You’ll notice it has developed a beautiful color and an inviting aroma, indicating it’s ready to be enjoyed.

Step 8
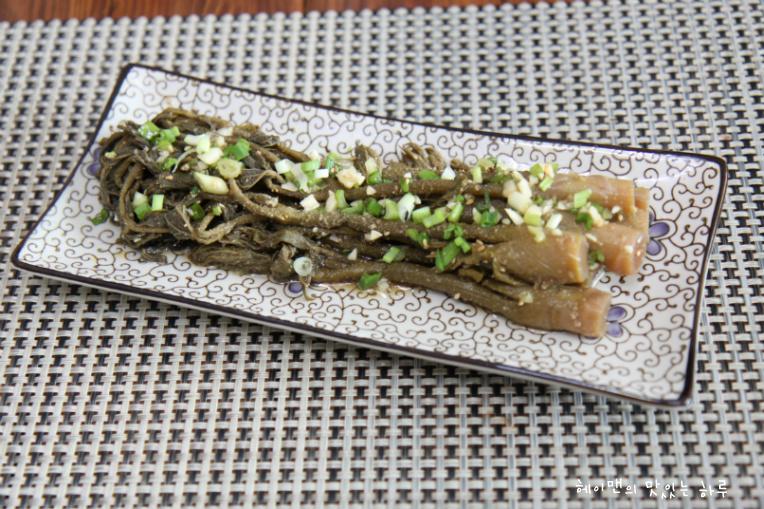
The finished Jangajji can be eaten as is, but for an extra burst of flavor, chop it into bite-sized pieces and toss with a little minced garlic, chopped green onion, sugar, sesame oil, and sesame seeds. This simple preparation transforms it into a delightful side dish or even a tasty appetizer. It’s perfect with rice or as a snack.


