Aromatic Perilla Leaf Kimchi
Homemade Perilla Leaf Kimchi: A Secret to Adding Fragrance to Your Summer Meals

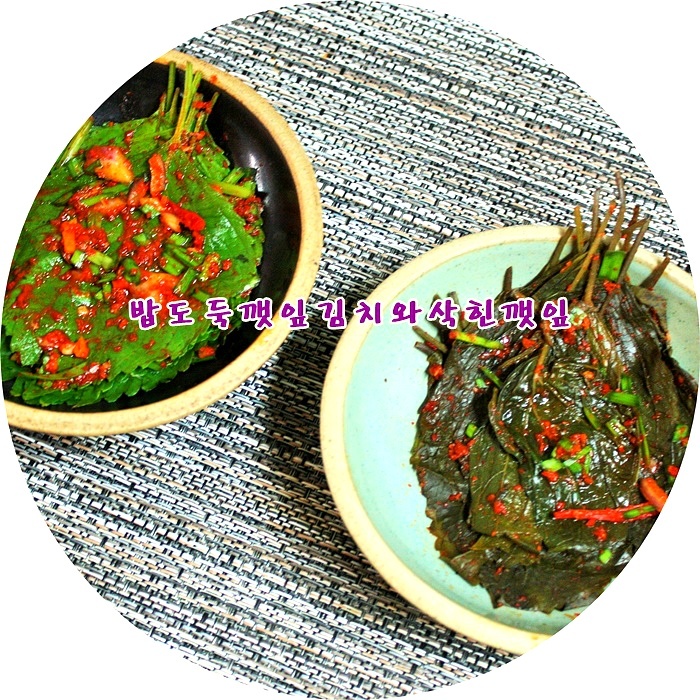
Even though I didn’t plant perilla seedlings this year, vibrant perilla shoots emerged, inspiring me to make perilla leaf kimchi. Last year, I made delicious kimchi from my own perilla leaves, but this year, due to less attentive gardening, my harvest was smaller, which was a bit disappointing. However, my craving for perilla leaves was strong, so I gathered what I could and carefully made kimchi. Though the quantity is small and it might be eaten quickly, the taste is unforgettable. Try making both versions – fermented perilla leaves and fresh perilla leaves – for a bountiful summer table.
Main Ingredients- 70 Perilla leaves
- 50g Onion
- 20g Carrot
- 30g Chives
- 1 Red chili pepper
- 1/2 Pear juice
- 1/2 Onion juice
- 1 Tbsp Minced garlic
Seasoning Ingredients- 2 Tbsp Gochugaru (Korean chili powder)
- 1 Tbsp Soy sauce
- 1 Pinch Ginger powder
- 2 Tbsp Fish sauce
Rice Flour Paste- 1 Tbsp Rice flour
- 1 cup Water
- 2 Tbsp Gochugaru (Korean chili powder)
- 1 Tbsp Soy sauce
- 1 Pinch Ginger powder
- 2 Tbsp Fish sauce
Rice Flour Paste- 1 Tbsp Rice flour
- 1 cup Water
Cooking Instructions
Step 1
Prepare Fermented Perilla Leaves: For 70 perilla leaves, prepare 2 Tbsp salt and 2 cups of water. Boil 2 cups of water with 2 Tbsp salt to make a brine. Wash the perilla leaves thoroughly, drain them, and arrange them in a container. Pour the cooled brine over the leaves. (Since I couldn’t harvest many leaves at once, I fermented them in batches.)

Step 2
After two days, the perilla leaves have a delicious color and are well-fermented. Lightly rinse the fermented perilla leaves in cold water and squeeze out any excess moisture.

Step 3
While the fermented perilla leaves are draining, pick a few fresh perilla leaves, wash them thoroughly, and drain them.

Step 4
Let both types of perilla leaves drain completely while we prepare the flavorful seasoning.

Step 5
Finely chop all the vegetable ingredients.

Step 6
While pureeing fresh pear or onion would be ideal, I opted for convenience by using pear juice and onion juice from my refrigerator. I used half of each, and enjoyed the remaining half myself! (This approach avoids the hassle of buying new ingredients.)

Step 7
In a large bowl, combine the pear juice and onion juice. Mix in the rice flour paste, then add the gochugaru and all the prepared seasoning ingredients (soy sauce, ginger powder, fish sauce). Mix well to create the seasoning paste. The natural sweetness from the pear juice means no additional sugar is needed!

Step 8
Add the chopped vegetables to the paste and gently mix until the seasoning evenly coats the perilla leaves.

Step 9
While meticulously spreading the seasoning on each leaf is an option, here’s a quicker method. Spread the perilla leaves flat in a large dish, layering them and applying the seasoning gradually. This allows you to season a large quantity of leaves efficiently.

Step 10
By spreading them out flat and layering them with seasoning in this manner, you can finish seasoning a large batch in no time. It might still take a bit of time, though!

Step 11
This freshly made perilla leaf kimchi can be enjoyed immediately, but after a few days of fermentation in the refrigerator, its flavor deepens, making it an irresistible side dish.

Step 12
With a little seasoning left over from the fresh perilla kimchi, I carefully applied it to the fermented perilla leaves as well.

Step 13
Not wanting to waste any of the delicious seasoning in the bowl, I divided the fermented perilla leaves into two portions and thoroughly coated them.

Step 14
Since there aren’t many leaves, these will be perfect to enjoy right on top of rice! In the past, I used to buy perilla leaves in bulk, make plenty of kimchi, portion it, and store it in the freezer to enjoy until the new harvest arrived. I also shared it with friends. This year, I regret not being able to grow them abundantly due to less garden maintenance.

Step 15
We’ll start by eating the fermented perilla leaves, and then wait for the perilla leaf kimchi to mature and develop its flavors.

Step 16
My husband absolutely loves perilla leaf kimchi and used to go out of his way to buy perilla leaves every year. This year, he’s a bit disappointed that I couldn’t make it for him. I’ll make sure to make plenty next year!

Step 17
Both types of perilla kimchi are delicious right away. You can even microwave the perilla leaf kimchi for 1-2 minutes for a different texture, but my family prefers it fresh, without any heating.


