Aromatic Spring Delight: Blanched Aralia Elata (Dureup) with Simple Preparation Tips
Seasonal Spring Vegetable Dish: Fresh Blanched Dureup and a Perfect Guide to Preparing It

The king of spring vegetables, Dureup (Aralia Elata), is back! Experience its unique slightly bitter flavor and satisfying texture that will awaken your appetite. This blanched Dureup is not only delicious but also packed with nutrients and is alkaline, making it great for your health. Learn how to prepare and blanch Dureup perfectly!
Ingredients for Blanched Dureup- 1 basket fresh Dureup (Aralia Elata shoots)
- 1 Tbsp coarse salt (for blanching)
- Chogochujang (spicy-sweet red chili paste) for dipping
Cooking Instructions
Step 1
⭐ Amazing Benefits and Storage Tips for Dureup ⭐
Dureup is rich in saponins, as well as vitamins, protein, calcium, potassium, and phosphorus. It is beneficial for arthritis, toothaches, headaches, dizziness, and improving arterial health. It also boosts immunity, helps manage diabetes, restores energy, relieves fatigue, and reduces stress. To store Dureup long-term, lightly blanch it in salted water, gently squeeze out excess moisture, and freeze it in a zip-top bag.

Step 2
Examine the bottom of the Dureup shoots. You may find tough, spiny parts. Trim these off first, as it will make the preparation much easier. Use a knife or scissors to cleanly cut away these sections.

Step 3
The base of the Dureup has a reddish, fibrous outer layer that contributes to its slightly bitter taste. Carefully peel away this outer skin. You can gently scrape it off with a knife for easy removal.

Step 4
After peeling the outer skin, look closely at the cut end of the Dureup base. It’s common to find soil or debris stuck to this area, making it look messy.

Step 5
Using a knife, trim off just a very thin layer, about 1-2mm, from the bottom end of the Dureup. Avoid cutting too deep to preserve as much of the vegetable as possible; just enough to remove any dirt or roughness will do the trick.

Step 6
With these simple steps, your Dureup will be neatly prepared and ready to cook. Behold the vibrant green, fresh Dureup!

Step 7
Fill a pot with plenty of water and bring it to a rolling boil with 1 tablespoon of coarse salt. Once the water is boiling vigorously, carefully add the prepared Dureup, starting with the thicker bottom ends first, then submerging the entire shoot.

Step 8
Dureup can become mushy and lose its delicate flavor if overcooked. Blanch it quickly, just for 1 to a maximum of 3 minutes, aiming for a tender-crisp texture. Adjust the cooking time based on the thickness and freshness of your Dureup.

Step 9
⚠️ Important Note: Dureup shoots may contain small amounts of natural toxins, so it is essential to blanch them in boiling water before consumption. Also, enjoy Dureup in moderation for optimal health benefits.

Step 10
Once blanched, immediately transfer the Dureup to a colander and rinse thoroughly under cold running water. This stops the cooking process, preserves the bright green color, and maintains a crisp texture. Gently shake off excess water, and your delicious blanched Dureup is ready!

Step 11
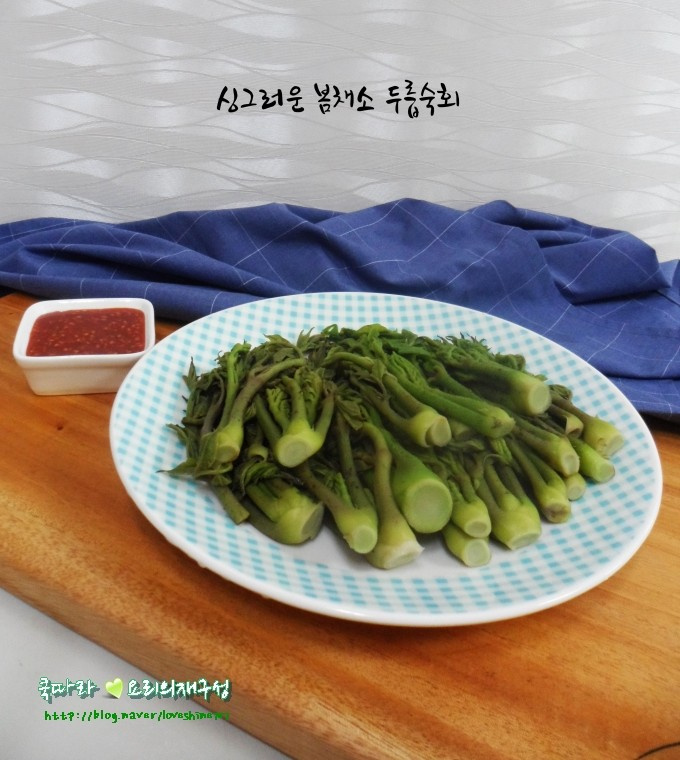
Serve your blanched Dureup with a side of Chogochujang for dipping. Savor the unique, subtle aroma, the satisfying chew, and the crisp bite. It’s a quintessential taste of spring that you’ll crave every year!


