Burnt Basque Cheesecake: The Ultimate Guide for Beginners
Effortless Home Baking: Master the Delicious Burnt Basque Cheesecake (+Jador’s Recipe)

Discover the secret to an irresistible Burnt Basque Cheesecake, inspired by Jador’s renowned recipe! This iconic cake, originating from the Basque region of Spain, is celebrated for its deeply caramelized, almost burnt exterior and its incredibly rich, creamy, and smooth interior. Unlike traditional cheesecakes, it’s intentionally baked at high temperatures without a water bath, resulting in a unique flavor profile. This detailed guide will walk you through each step, making it easy for even beginner bakers to achieve a stunning and delicious result. Get ready to impress with this no-fuss, flavor-packed dessert!
Ingredients- Cream cheese: 350g (softened at room temperature)
- Sugar: 80g (adjust to your preference)
- Eggs: 85g (at room temperature)
- Heavy cream: 110g (cold)
Cooking Instructions
Step 1
Begin by ensuring your cream cheese is properly softened at room temperature. This is crucial for a smooth batter. If it’s still cold, it will be difficult to mix without lumps. Gently whisk it until it’s creamy and lump-free. This step is key to achieving a velvety texture.

Step 2
Next, add the sugar to the softened cream cheese. It might feel a bit gritty at first, but continue whisking. As you mix, the sugar will dissolve into the cream cheese, creating a smoother consistency. Keep mixing until fully incorporated.

Step 3
Now, add the room-temperature eggs. Whisk gently until they are just combined with the cream cheese mixture. The batter should start to look smooth and luscious. You’re on your way to a beautiful cheesecake!

Step 4
Finally, pour in the cold heavy cream. Stir it into the batter until everything is well combined and you have a smooth, flowing mixture. (Pro tip: If you have leftover heavy cream, it’s perfect for your morning coffee or for another baking project!)

Step 5
This is a critical step for a perfect Basque cheesecake: managing air bubbles. Over-mixing or vigorous whisking can introduce air bubbles, which can cause the cake to puff up excessively and potentially crack or collapse. Gently fold the ingredients together using a spatula, scraping the bottom of the bowl, to minimize air incorporation. Consider sifting the batter through a fine-mesh sieve for an extra-smooth texture.

Step 6
I’m using an 18cm (about 7-inch) baking pan, which I found at Daiso. While Jador’s original recipe often calls for a smaller 12cm pan, I’ve adjusted the batter quantity for this size. (Tip: Daiso is a fantastic resource for affordable baking supplies if you need a pan!)

Step 7
Line your baking pan with parchment paper, ensuring it extends well above the rim. This not only helps with easy removal but also contributes to the cake’s signature rustic look. Pour the batter into the prepared pan. Preheat your oven to 240°C (465°F). We’ll bake the cheesecake at 240°C for 25 minutes.
Step 8
After 25 minutes, check the cheesecake. If the top isn’t as deeply caramelized as you’d like, bake for an additional 2 minutes. It’s normal for the cheesecake to puff up significantly during baking. Don’t worry if it looks a bit dramatic!
Step 9
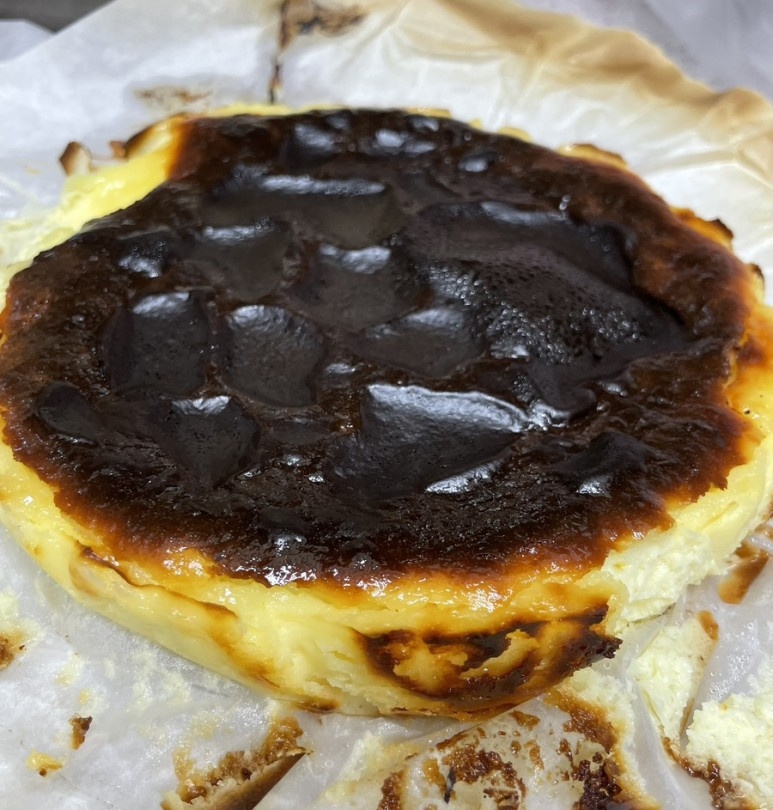
Voilà! Your Burnt Basque Cheesecake is ready. The top should be a beautiful, deep golden-brown, and any puffiness will subside as it cools. (Note: My parchment paper placement wasn’t perfect, affecting the side shape slightly, but the taste is what truly matters!). Let the cheesecake cool completely at room temperature, then chill it in the refrigerator for at least 6 hours, or preferably overnight, before serving. Enjoy that intensely creamy, rich flavor!


