Chewy and Nutritious Corn Rice
Chewy Corn Rice

Corn is rich in linoleic acid, an unsaturated fatty acid, which can help reduce cholesterol levels in the blood. It also contains protease inhibitors, which are known to have preventive effects against cancers such as breast, colon, and prostate cancer. Today, we’ll be making chewy corn rice using peeled corn kernels.
Ingredients- 2 cups rice
- 2/3 cup peeled chewy corn kernels
- 2 Tbsp job’s tears (su-su)
Cooking Instructions
Step 1
Using peeled corn kernels is very convenient for storage and versatile use in various dishes. They offer a fresher taste compared to canned corn.

Step 2
First, prepare to soak the chewy corn kernels. Canned or frozen corn kernels can be used immediately without soaking, but dried peeled corn kernels need to be soaked thoroughly to achieve a tender texture.

Step 3
In an airtight container, combine the peeled chewy corn kernels with cool water. Soak them in the refrigerator for about 15 hours. During hot summer weather, it’s highly recommended to soak them in the fridge to prevent spoilage. This slow soaking process helps the corn kernels become even chewier and more delicious.

Step 4
After 15 hours, the corn kernels should be nicely softened and plump. Don’t discard the soaking water! It’s infused with the corn’s savory flavor and nutrients, which will make your rice taste much better.

Step 5
Next, we’ll soak 2 tablespoons of job’s tears (su-su). Job’s tears add a delightful pop and nutty flavor, and they are also a healthy grain rich in dietary fiber and nutrients.

Step 6
Place the job’s tears in a fine-mesh sieve and rinse them thoroughly under running water. Then, add water and let them soak at room temperature for about 30 minutes. This soaking water should also be saved and combined with the corn soaking water to use as the rice water. Combine the corn soaking water and job’s tears soaking water to measure a total of 2 cups for cooking the rice.

Step 7
Wash the rice thoroughly. Rinse the rice 2-3 times gently and drain the cloudy water. This helps prevent the rice grains from breaking and results in fluffier, tastier rice.

Step 8
Now, everything is ready for cooking the rice. The plumped job’s tears and chewy corn kernels look very appetizing, don’t they?

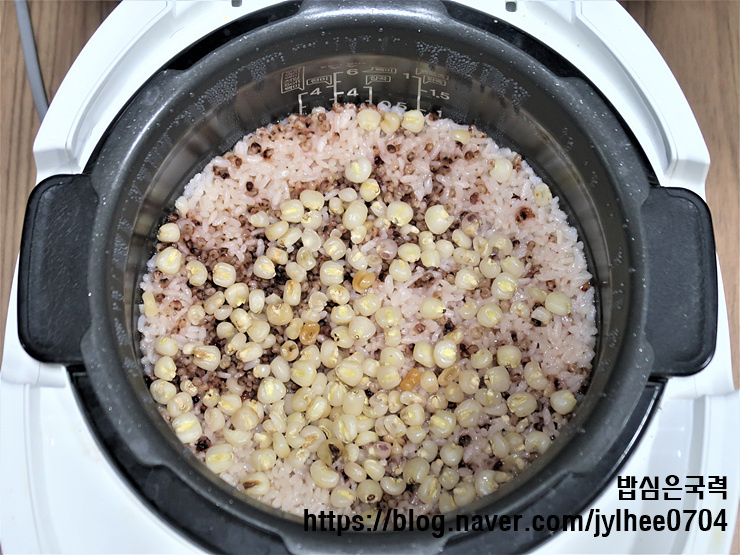
Step 9
In the inner pot of your rice cooker, add the washed rice. Then, pour in the soaked job’s tears and all the soaked chewy corn kernels. Finally, add the measured 2 cups of combined corn and job’s tears soaking water. Using this nutrient-rich soaking water ensures that the goodness of the corn and job’s tears is fully incorporated into the rice, making it healthier and more flavorful.

Step 10
Set your rice cooker to the ‘Mixed Grains’ or ‘Multi-grain’ setting and start the cooking process. Modern rice cookers are equipped with excellent functions tailored for various grains, making the process effortless.

Step 11
The rice cooker will handle everything, so all you need to do is wait. Avoid opening the lid during cooking to ensure the rice grains cook evenly and remain fluffy.

Step 12
Wow! The chewy corn rice is ready, glistening with plump corn kernels and a beautiful sheen. The steam rising from the rice cooker looks incredibly appetizing.

Step 13
As you can see, by simply soaking the corn kernels, you can easily prepare delicious chewy corn rice that adds abundance to your meal. The delightful texture of the popping corn kernels combined with the rice’s chewiness is truly delicious. This chewy corn rice is sure to please both the health and taste preferences of your family, so give it a try!


