Chewy Glutinous Rice Twisted Doughnuts (Baked, Not Fried!)
[Home Baking] How to Make Delicious Glutinous Rice Twisted Doughnuts Easily in the Oven

When those nostalgic old-fashioned treats call to you, glutinous rice twisted doughnuts are a must! But if the hassle of frying and managing leftover oil at home feels daunting, try making these chewy and delicious ones in your mini oven. While this recipe is for baking, the dough is the same, so you can still achieve a wonderful fried taste if you prefer.
Dough Ingredients- 220g Bread Flour
- 100g Glutinous Rice Flour
- 30g Sugar
- 5g Active Dry Yeast
- 5g Salt
- 35g Butter, softened to room temperature
- 150g Warm Milk
- 60g Warm Water
Topping Ingredients- 2-3 Tbsp Melted Butter (or Cooking Oil)
- 4 Tbsp Sugar
- Pinch of Cinnamon Powder (Optional)
- 2-3 Tbsp Melted Butter (or Cooking Oil)
- 4 Tbsp Sugar
- Pinch of Cinnamon Powder (Optional)
Cooking Instructions
Step 1
First, in a large bowl, sift together the bread flour and glutinous rice flour. Mix the flours, then create three wells in the center. Place the yeast in one well, the sugar in another, and the salt in the third. Coating them separately with the surrounding flour helps prevent direct contact, which can inhibit yeast activity.

Step 2
Pour in the warm milk and warm water mixture. Using a spatula or your hands, mix everything together until no dry flour is visible. Continue mixing until the ingredients just come together into a shaggy dough.

Step 3
Once the dough forms a rough ball, add the softened butter. Now, begin kneading vigorously. Continue kneading for about 10-15 minutes until the dough is smooth, elastic, and the butter is fully incorporated. You’ll know it’s ready when you can stretch a piece of dough thinly without it tearing, forming a ‘windowpane’.

Step 4
Shape the smooth dough into a ball and place it in a lightly oiled bowl. Cover the bowl tightly with plastic wrap. Poke a few small holes in the plastic wrap with a toothpick to allow air circulation. Place the bowl in a warm, draft-free spot (around 25-30°C or 77-86°F) to begin the first proof. A slightly warm oven (turned off but preheated briefly) or placing it inside a microwave with a cup of hot water can create a good environment.

Step 5
The first proof is complete when the dough has doubled or even tripled in volume, which typically takes about 1 to 1.5 hours, depending on the room temperature. To test if it’s ready, gently poke the dough with a floured finger; if the indentation remains, the proofing is successful.

Step 6
Gently turn the proofed dough out onto a lightly floured work surface. Deflate the dough by pressing down on it softly to release the large air bubbles. Then, gently shape it into a long, elongated log.

Step 7
Divide the dough log into 14 equal pieces. Each piece should weigh approximately 30-40 grams. Use a knife or a bench scraper for clean, precise cuts.

Step 8
Take each piece of dough and roll it into a smooth ball on your work surface. While shaping, gently press down to release any trapped air – this helps achieve a chewier texture. Once shaped, cover the dough balls loosely with plastic wrap and let them rest for 30 minutes at room temperature. This intermediate proofing makes the dough easier to shape into the twisted form.

Step 9
After the 30-minute intermediate proof, you’ll notice the dough pieces have become slightly puffier and more relaxed.

Step 10
Now it’s time to shape the doughnuts! Take one dough ball and gently roll or stretch it into a long rope. Hold one end and twist it around itself, then gently pull the ends apart to create the classic twisted shape. Be careful not to pull too hard, or the dough might tear.

Step 11
Line a baking sheet with parchment paper. Arrange the shaped twisted doughnuts on the prepared sheet, ensuring there’s enough space between them so they don’t stick together as they rise. Cover loosely with plastic wrap or a damp kitchen towel to prevent the surface from drying out. Let them undergo their second proof in a warm place until they have increased in size by about 1.5 times. This usually takes about 30-40 minutes.

Step 12
Once the second proof is complete, the doughnuts will look noticeably plumper and more delicate. They are now ready for baking!

Step 13
Just before baking, lightly mist the surface of the doughnuts with water 3-4 times using a spray bottle. This helps create a slightly crisp exterior while keeping the inside moist. Bake in a preheated oven at 180°C (350°F) for about 15 minutes, or until golden brown. Adjust the time and temperature according to your oven’s performance.

Step 14
As soon as the doughnuts come out of the oven, while they are still warm, brush them generously with melted butter or cooking oil using a pastry brush. The butter adds a lovely richness and helps the topping adhere.

Step 15
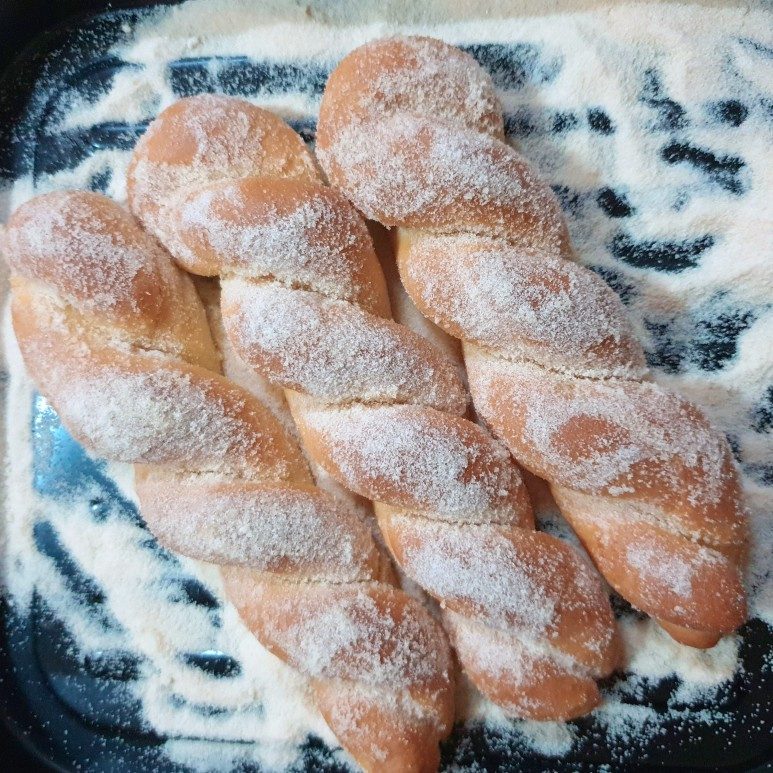
Immediately after brushing with butter, roll the warm doughnuts in the sugar or cinnamon-sugar mixture until well coated. Applying the butter and sugar while the doughnuts are warm ensures they stick well and gives them a beautiful sheen.

Step 16
This photo shows doughnuts baked on the middle rack of the oven. Feel free to experiment with the top, middle, and bottom racks to achieve your desired level of browning and crispness. Bake your perfect batch of glutinous rice twisted doughnuts!


