Colorful Bell Pepper Ring Cheese Fried Rice
A Recipe for Visually Stunning and Delicious Bell Pepper Ring Cheese Fried Rice

We’ll create a beautiful dish by shaping bell peppers into rings, filling them with delicious fried rice, topping with plenty of cheese, and baking in the oven! It’s not difficult at all. Without further ado, let’s create this masterpiece together with me, Hanami! It’s not just pretty; it tastes amazing too.
Ingredients- 1.5 bowls of warm cooked rice
- 1/2 red bell pepper
- 1/2 yellow bell pepper
- 1/4 onion
- 2 slices of ham
- 3 Tbsp tomato sauce
- Pinch of whole black pepper
- Plenty of mozzarella cheese
Cooking Instructions
Step 1
First, wash and prepare all the ingredients that will add flavor to your fried rice. Remove the seeds from the bell peppers and peel the onion.

Step 2
Slice the bell peppers into rings about 1 cm thick. Be careful not to scoop out too much of the center, as you’ll be filling them with fried rice. Dice the onion and ham slices into small cubes that will fit inside the bell pepper rings.

Step 3
Heat a frying pan over medium heat and add the diced ham. Sauté until it releases its savory aroma.

Step 4
Once the ham starts to look slightly golden and a bit bumpy on the surface, add the chopped bell peppers and onion. Stir-fry until the vegetables become translucent and tender.

Step 5
When the vegetables are well-cooked, crack in some whole black pepper and toss gently. The peppery aroma will enhance the flavors of the ingredients. Now, add the warm cooked rice. Using a spatula, gently mix the rice with the other ingredients, being careful not to mash the rice grains.

Step 6
As you continue to stir-fry the rice with the vegetables, the amount of ingredients might seem quite generous. You might think, ‘Oh no, did I add too much?’

Step 7
But not at all!

Step 8
This is the perfect amount to fill the bell pepper rings beautifully, making them both visually appealing and delicious. So, don’t worry and keep stir-frying!

Step 9
Once the fried rice is nearing completion, add 3 tablespoons of tomato sauce and stir quickly to combine everything evenly. The tomato sauce will add a tangy sweetness and a mouthwatering color to the fried rice.

Step 10
A helpful tip: if you cut the bell pepper rings too wide in the center, or overcook the fried rice, it might be difficult to fill them later. Try to maintain the shape of the bell pepper rings carefully!

Step 11
Carefully pack the fried rice into the prepared bell pepper rings, pressing down firmly to fill them completely. It’s important to pack it tightly so the rice doesn’t fall out.

Step 12
Doesn’t the fried rice nestled perfectly inside the bell pepper rings look wonderfully appetizing?

Step 13
Now, generously sprinkle mozzarella cheese over the fried rice. The melting cheese will beautifully bind the fried rice and bell peppers together.

Step 14
Arrange the bell pepper ring fried rice with cheese on a baking sheet and place it in a preheated oven. Bake at 180°C (350°F) for 10-15 minutes, or until the cheese is melted and golden brown. Adjust the baking time according to your oven’s specifications.

Step 15
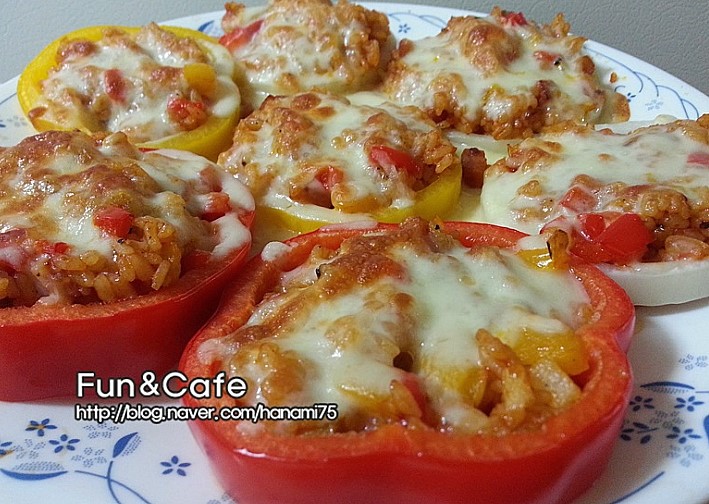
The finished bell pepper ring cheese fried rice, fresh from the oven, boasts an absolutely stunning visual appeal that will leave you in awe! Enjoy it while it’s hot.


