Cool & Delicious Summer Special: Refreshing Cold Jjolmyeon Noodles (with Homemade Mul-Naengmyeon Sauce!)
Revive your appetite on hot days with this special recipe! Enjoy the chewy texture of jjolmyeon noodles combined with a refreshing broth. You can easily make a spicy, flavorful mul-naengmyeon-style sauce at home to elevate your dish.

Today, we’re making a unique dish that’s a departure from ordinary jjolmyeon: ‘Cold Jjolmyeon,’ perfect for a refreshing summer meal! It’s designed to be enjoyed by slurping up the cool broth, much like mul-naengmyeon. We’ll also share a recipe for a spicy and sweet mul-naengmyeon sauce to go with it, so beat the heat this summer with this special cold jjolmyeon!
Main Ingredients- Jjolmyeon noodles 200g
- 1 pack of store-bought naengmyeon broth (300-400ml)
- 1/4 apple
- 1/6 carrot
- 1 hard-boiled egg
Spicy & Sweet Mul-Naengmyeon Sauce- 1 Tbsp finely minced onion
- 1/3 Tbsp minced garlic
- 1/2 Tbsp gochugaru (Korean chili flakes)
- 1 Tbsp gochujang (Korean chili paste)
- 1/2 Tbsp soy sauce
- 1 Tbsp oligo-syrup (or corn syrup/honey)
- 1/2 Tbsp sesame oil
- 1 Tbsp finely minced onion
- 1/3 Tbsp minced garlic
- 1/2 Tbsp gochugaru (Korean chili flakes)
- 1 Tbsp gochujang (Korean chili paste)
- 1/2 Tbsp soy sauce
- 1 Tbsp oligo-syrup (or corn syrup/honey)
- 1/2 Tbsp sesame oil
Cooking Instructions
Step 1
Gently separate the clumped 200g of jjolmyeon noodles with your hands. Soaking them briefly in cold water beforehand can help prevent sticking and make them chewier when cooked.

Step 2
Wash the apple and julienne it thinly without peeling. This will add a nice bite and refreshing flavor.

Step 3
Wash the carrot and julienne it thinly without peeling. This adds a vibrant color and a crisp texture.

Step 4
Fill a pot with plenty of water and add a pinch of salt for boiling the eggs. Once the water comes to a rolling boil, carefully add the cold eggs and boil for about 10 minutes until hard-boiled. (To prevent the eggs from cracking, add them only after the water has started boiling.)

Step 5
Once the eggs are hard-boiled, rinse them under cold water to cool them down, then cut them in half for serving.

Step 6
Now it’s time to cook the jjolmyeon noodles. Add the separated noodles to generously boiling water and cook for about 5 minutes. Stir gently occasionally to prevent them from sticking together. (Cooking times may vary by brand, so refer to the package instructions.)

Step 7
Immediately after cooking, rinse the jjolmyeon noodles under cold running water. This cools them down, washes off excess starch, and results in a wonderfully springy texture. Drain them thoroughly in a colander.

Step 8
To make the mul-naengmyeon sauce, finely mince the onion. This is a crucial step for bringing out the sweetness and flavor of the onion.

Step 9
In a small bowl, combine 1 Tbsp of the finely minced onion and 1/3 Tbsp of minced garlic. Add 1/2 Tbsp of gochugaru for spiciness and 1 Tbsp of gochujang for a savory depth of flavor.

Step 10
Now, let’s add sweetness and aroma. Mix in 1/2 Tbsp of soy sauce, 1 Tbsp of oligo-syrup for sweetness (adjust to your preference), and finally 1/2 Tbsp of sesame oil for a nutty finish. Stir well until all the ingredients are thoroughly combined. You can also add a little sugar or plum extract if you like.

Step 11
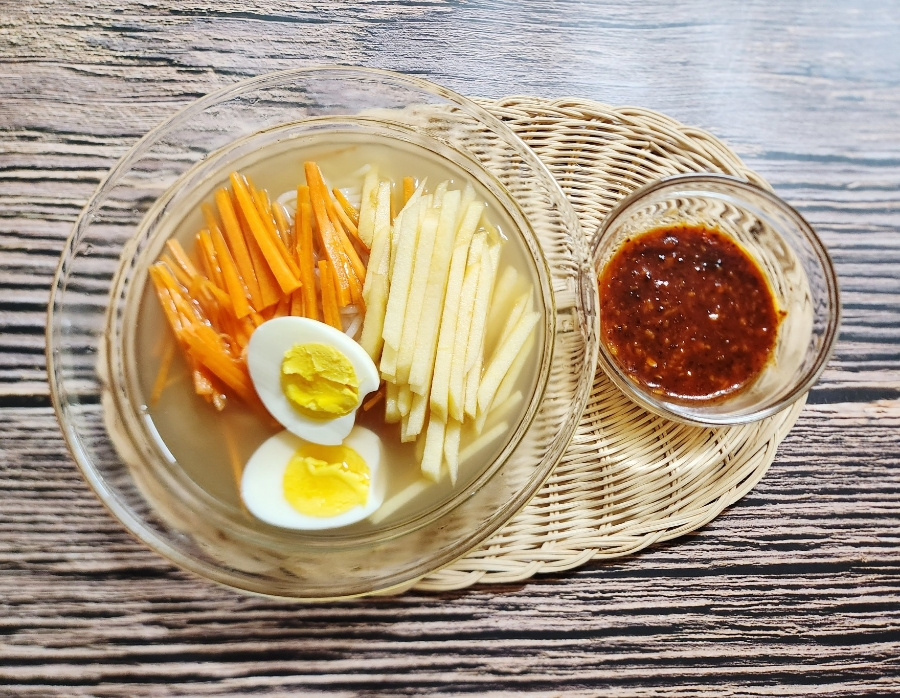
Arrange the drained jjolmyeon noodles attractively in a serving bowl. Top with the julienned apple and carrot as a colorful garnish.

Step 12
Place the prepared half of the hard-boiled egg on top. Pour the entire pack (about 300-400ml) of cold store-bought naengmyeon broth over the noodles. If you don’t have store-bought broth, you can use regular mul-naengmyeon broth or make your own.

Step 13
Finally, add 1-2 tablespoons of the homemade spicy and sweet mul-naengmyeon sauce to your liking and mix well. Your refreshing and flavorful cold jjolmyeon is now complete! Enjoy your delicious meal!


