Creamy Milk and Fruit Bingsu
How to Make a Nutritious Milk and Fruit Bingsu Without an Ice Shaver

Let’s make delicious bingsu without an ice shaver. This recipe is packed with nutrition and flavor!
Bingsu Ingredients- 200ml Milk (frozen the day before)
- 1 handful Almonds (approx. 30g)
- 50g Watermelon (diced)
- 50g Blueberries
- 1 handful Mulberries (approx. 30g)
- 10g Roasted Soybean Flour (approx. 1 Tbsp)
- 2 tsp Honey or Syrup
- 3 tsp Sweet Red Bean Paste for Bingsu
Cooking Instructions
Step 1
Hello everyone! Today, I’m excited to share a super simple recipe for a nutritious ‘Milk and Fruit Bingsu’ that you can make right at home without needing any special ice shaver equipment. Using milk as the base makes it incredibly creamy and rich, and the addition of fresh fruits adds a delightful sweetness and vibrant flavor. Let’s get started on this easy and delicious bingsu!

Step 2
First, prepare your milk. The day before you plan to make the bingsu, take about 200ml of milk. Slightly open the top of the milk carton to allow air to escape, and then place the entire carton in the freezer. Freezing the milk this way makes it much easier to break into icy pieces later. Let it sit at room temperature for a little while before you begin assembling.

Step 3
Next, select your favorite seasonal fruits. Dice them into bite-sized pieces for easy eating. In this recipe, we’re using watermelon, mulberries, and blueberries that we had on hand. However, feel free to use strawberries, Korean melons, mangoes, or any fruit you love! The key is to use what’s fresh and what you enjoy.

Step 4
Once all your ingredients are prepped, it’s time to assemble the bingsu. Take the frozen milk block and place it into your serving bowl. You can either place the block as is and let it gradually melt as you eat, or use a spoon or fork to break it into smaller icy pieces before adding the fruit. This method allows you to enjoy the creamy milk flavor as it melts. Start by putting the frozen milk into the bowl.

Step 5
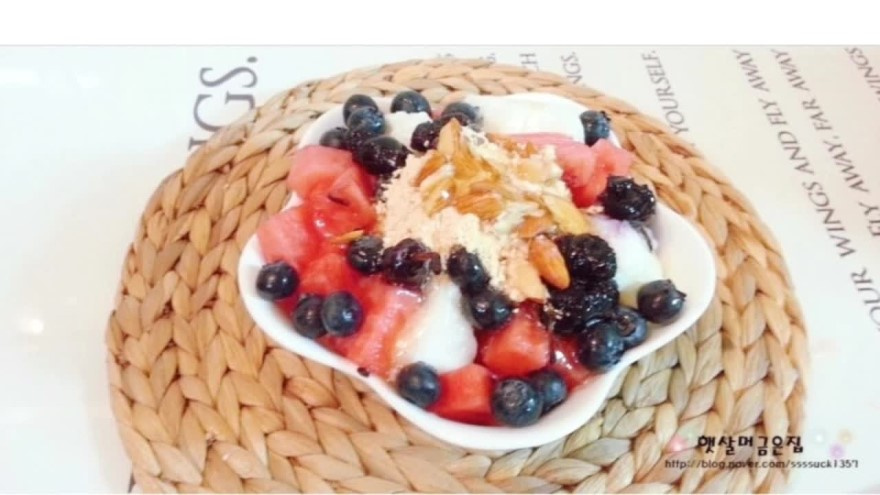
Now, artfully arrange your fresh, diced fruits on top of the frozen milk. The colorful assortment of fruits will make your bingsu look as beautiful as it tastes! Finally, sprinkle over the roasted soybean flour, sweet red bean paste, and almonds for that perfect finishing touch. Your nutritious and delightful Milk and Fruit Bingsu is now complete. Isn’t that wonderfully simple?

Step 6
Don’t let the lack of an ice shaver stop you from enjoying delicious bingsu! With this easy method of pre-freezing milk and adding your favorite toppings, you can create cafe-quality, refreshing bingsu anytime you like. This simple yet satisfying recipe is the perfect way to stay cool and enjoy a sweet treat. Enjoy!


