Crisp and Delicious Young Radish Kimchi (Yeolmu Kimchi)
Spring Delicacy: Homemade Refreshing Young Radish Kimchi Recipe

A delightful change from your usual winter kimchi! Introducing a fresh and crisp young radish kimchi. Best enjoyed right after making, this kimchi is also incredibly delicious when added to bibimbap. Come explore the delightful charm of young radish kimchi, bursting with the freshness of spring!
Main Ingredients- 1 bundle young radish (yeolmu)
- 1 bundle green onions (scallions)
Cooking Instructions
Step 1
First, prepare the green onions. Trim off the tough root ends and peel away any papery outer skins. Remove any yellowed or wilted leaves, as these can impart a bitter taste.

Step 2
Next, trim the young radishes. Similar to the green onions, cut off any wilted or yellowed leaf tips. If the radishes are very large, you can cut them into 2-3 sections for easier handling.

Step 3
Rinse the trimmed young radishes thoroughly under running water to remove any dirt or debris. Cut them into bite-sized pieces. Layer the radishes in a bowl, sprinkling coarse sea salt between each layer. Turn them occasionally to ensure even salting.

Step 4
While the young radishes are salting, let’s make the porridge paste for the kimchi. In a small bowl, combine 2 Tbsp of glutinous rice flour with 3 Tbsp of water. Whisk until smooth, ensuring there are no lumps.

Step 5
In a saucepan, bring 2 cups of filtered water to a boil. Once boiling, gradually whisk in the dissolved glutinous rice flour mixture. Cook over low heat, stirring constantly, until the mixture thickens into a smooth porridge. Let the porridge cool completely at room temperature. This step is crucial for a refreshing kimchi.

Step 6
Now, let’s lightly salt the green onions. I sprinkled a little coarse sea salt on the root ends of the green onions and let them sit in a light brine for about 10 minutes. This helps them soften and become more pliable. (Chef Baek sometimes uses fish sauce for this step).

Step 7
After about 1 hour of salting, rinse the young radishes thoroughly in cold water at least twice to remove excess salt. Drain them well in a colander. Properly draining the water is key to preventing the kimchi from becoming too watery or bland.

Step 8
While the young radishes are draining, prepare the broth that adds depth of flavor. In 2 cups of broth (made from boiling anchovies, kelp, dried pollock, shiitake mushrooms, onion, radish, etc.), add 10 Tbsp of Korean chili flakes (gochugaru) and let them soak and soften. This helps the chili flakes dissolve evenly and prevents clumps in the seasoning.

Step 9
It’s time to mix everything in a large bowl. Add the cooled porridge paste, 3 Tbsp minced garlic, 2 Tbsp salted fermented shrimp, 2 Tbsp fish sauce, 4 Tbsp plum extract, 1 Tbsp salt, and the soaked chili flake mixture. Gently mix all the seasoning ingredients together until well combined.

Step 10
If the green onion roots are thick, cut them in half lengthwise, and then cut the entire green onion in half crosswise. Add these prepared green onions to the seasoning mixture first and gently toss to coat them evenly. Be careful not to overmix.

Step 11
Now, add the drained young radishes to the bowl and mix everything together. Gently toss with your fingertips to combine, avoiding vigorous mixing which can bruise the radishes and make them lose their crispness. The goal is to coat them lightly without mashing.

Step 12
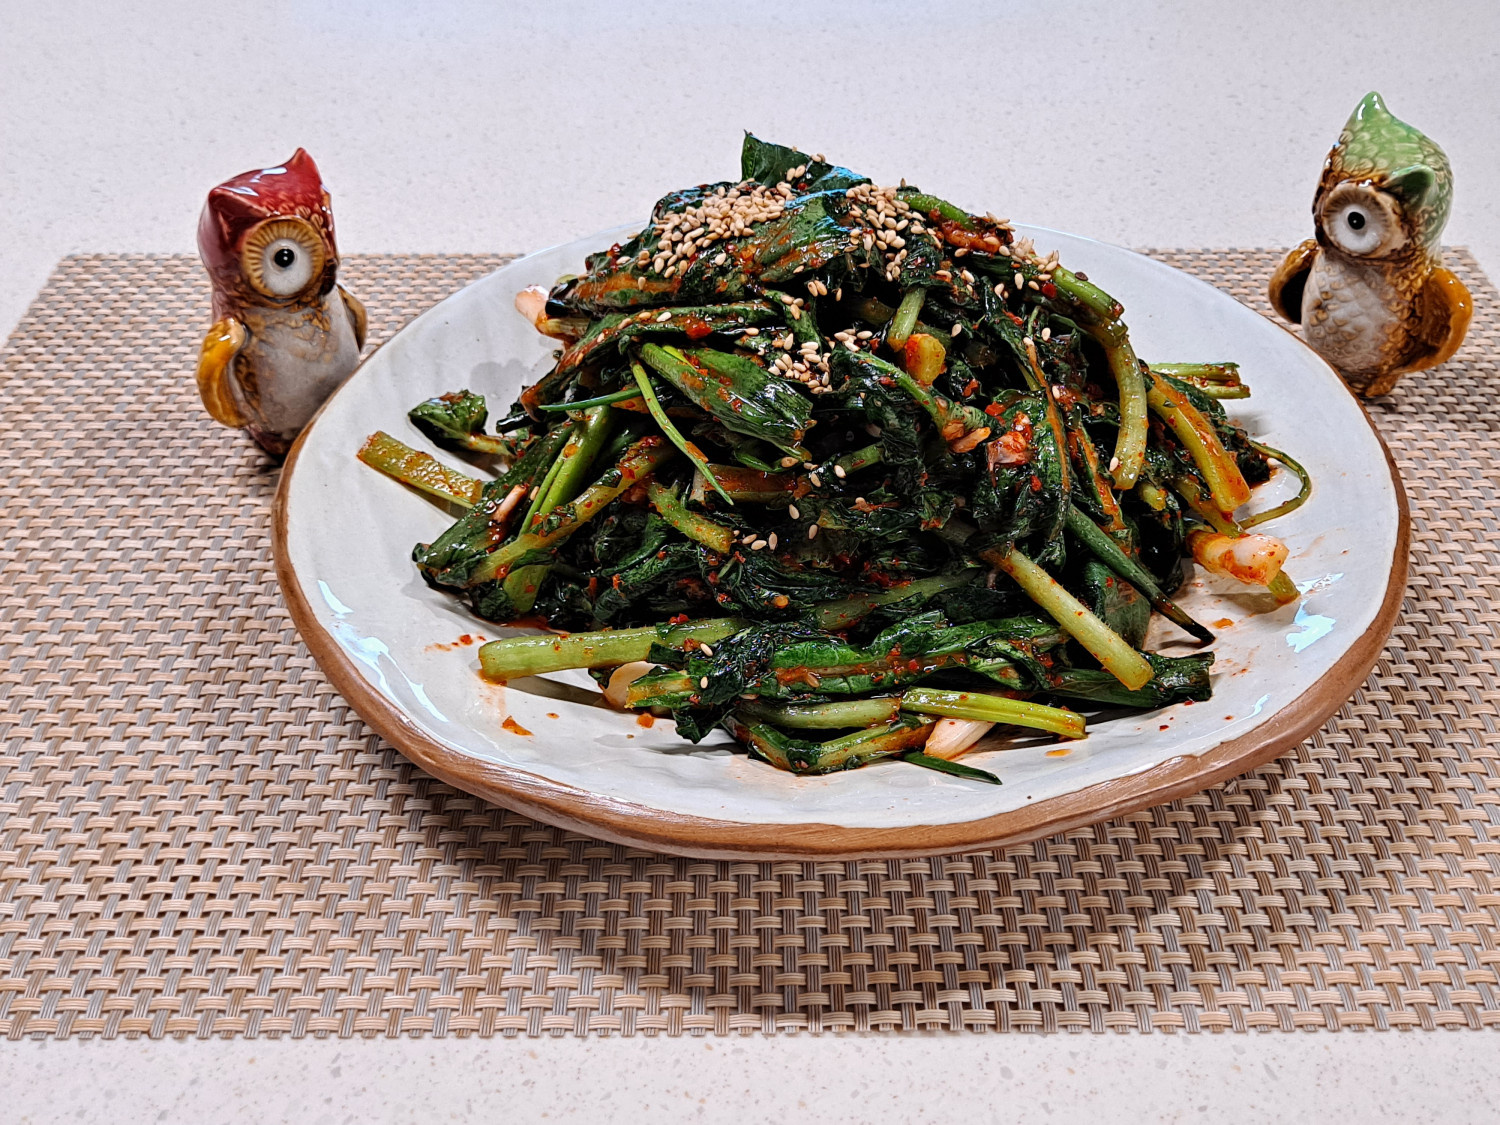
Your fresh, just-made young radish kimchi (geotjeori) is ready! Imagine how delicious it will be mixed with hot rice, a dollop of gochujang (chili paste), a drizzle of sesame oil, and a sprinkle of sesame seeds. Enjoy the delightful taste of spring!


