Crispy and Aromatic Homemade Nurungji (Scorched Rice)
Patience is Bitter, But Its Fruit is Savory? – Making Nurungji

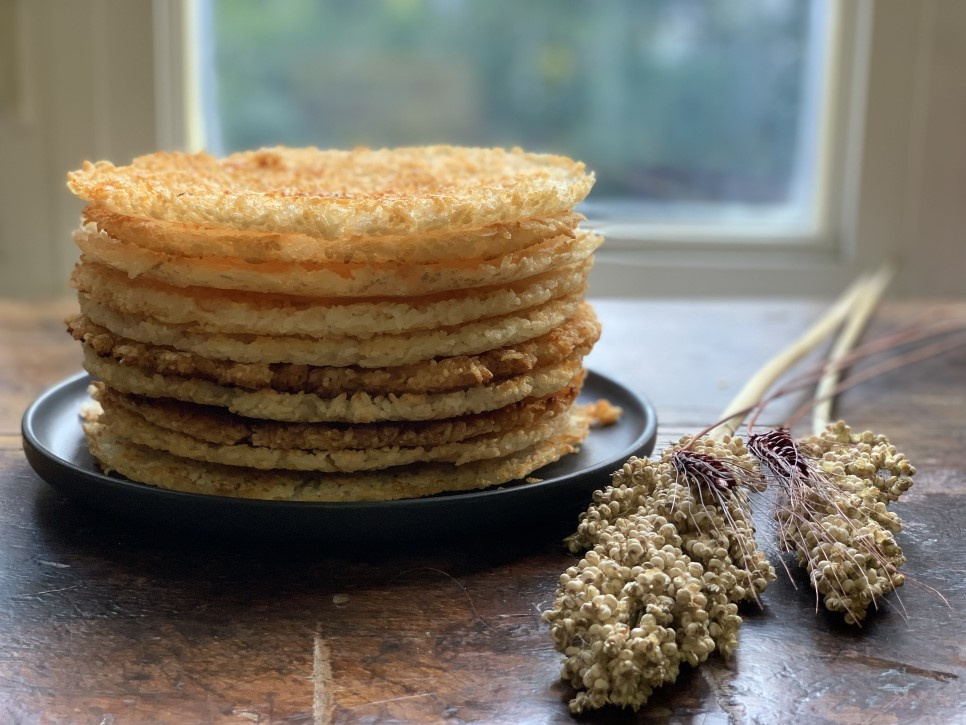
Nurungji, the Korean scorched rice, holds a special place in many hearts, and this recipe will guide you to create this delightful treat at home. Using leftover cooked rice, you can transform a simple ingredient into a wonderfully crispy and flavorful snack. This detailed guide covers the traditional pan-frying method, which requires a bit of patience but yields a deeply satisfying result, as well as quicker alternatives using a panini grill or an air fryer. Each method includes time estimates and helpful tips. While the process demands a calm demeanor, the reward is a rich, nutty aroma and a satisfying crunch that brings a taste of nostalgia. Enjoy your homemade nurungji as a crunchy snack or as a base for a comforting bowl of sungnyung (scorched rice tea).
Ingredients- Cooked Rice: 1.5 – 2 bowls (preferably warm or slightly cooled)
- Kelp-infused Water: 2 – 3 Tbsp
- Salt: a pinch (optional, for enhanced savory notes)
Cooking Instructions
Step 1
Prepare the Kelp-infused Water: Start by soaking a piece of dried kelp (about 5×5 cm) in 1 cup of cold water for at least 30 minutes. This infusion will add a subtle umami depth to your nurungji.

Step 2
Combine Rice and Kelp Water: In a wide bowl, place the cooked rice (1.5 to 2 bowls). Gently pour the kelp-infused water (2 to 3 Tbsp) over the rice. Using your hands, carefully mix the water into the rice, ensuring the grains are lightly coated and slightly loosened, almost like preparing rice for bibimbap. Press gently to encourage the grains to stick together later. A tiny pinch of salt can be added at this stage to enhance the flavor, though it’s optional.

Step 3
Form the Nurungji in the Pan: Heat a non-stick frying pan over medium heat. Spread the rice mixture evenly across the pan in a thin, uniform layer. Press down firmly with a spatula or your hand to help the rice grains bind together, forming a cohesive disc. Begin cooking over medium heat to evaporate some moisture, then reduce the heat to low once the bottom starts to set. This low and slow cooking prevents burning and ensures even crisping.

Step 4
Flip and Achieve Golden Crispiness: Allow the nurungji to cook for about 20 minutes on the first side, or until the bottom turns a beautiful golden brown. Carefully flip the nurungji to cook the other side. To avoid breakage, you can gently slide it onto a plate and then invert the pan over the plate, or use two wide spatulas. Continue to cook over low heat for another 15-20 minutes, or until both sides are evenly golden and crispy. (For an Air Fryer: Cook at 180°C (350°F) for 20-30 minutes, flipping halfway. For a Panini Grill: Cook for approximately 10-15 minutes, checking frequently.)


