Crispy and Delicious Autumn Radish Kkakdugi
Easy and Delicious Kkakdugi Recipe Using Autumn Stored Radishes (Beginner-Friendly!)

Think making kimchi is difficult? Kkakdugi is the easiest and simplest kimchi to make! I’ll show you how even beginner cooks can make it with confidence. Try making crispy kkakdugi with delicious radishes stored from this autumn for a satisfying side dish. The stored radishes started to sprout, so I quickly made kkakdugi. Shall we start making kkakdugi, which anyone can easily follow? #Kkakdugi #SideDish #RadishRecipe #HomestyleCooking #AutumnRadish #EasyKimchi
Kkakdugi Ingredients- 3kg radish (about 5 medium-sized radishes)
- 200g green onions
- 1 Tbsp glutinous rice flour
- 1 cup water
Kkakdugi Seasoning Ingredients- 8 Tbsp chili powder
- 5 Tbsp anchovy sauce
- 2 Tbsp minced garlic
- 2 Tbsp salted shrimp (finely minced)
- 1 Tbsp sugar
- 0.5 Tbsp fine sea salt (for salting radish)
- 8 Tbsp chili powder
- 5 Tbsp anchovy sauce
- 2 Tbsp minced garlic
- 2 Tbsp salted shrimp (finely minced)
- 1 Tbsp sugar
- 0.5 Tbsp fine sea salt (for salting radish)
Cooking Instructions
Step 1
3kg of radish is equivalent to about 5 medium-sized radishes. I stored them wrapped in newspaper, so there were some dark spots on the surface. Use a peeler to thoroughly remove the skin. Peeling the radish is the preparatory step that signals the start of cooking.

Step 2
Peel the radish and cut it into cubes of about 2-3 cm. Uniformly sized pieces help the seasoning to be absorbed evenly and cook properly. Cut them into bite-sized pieces.

Step 3
Place the cubed radish in a large bowl and sprinkle evenly with 2 Tbsp of fine sea salt for salting. Autumn radishes are firm and have less moisture, so they don’t need to be salted for a long time separately. Letting them sit while you prepare the seasoning will allow the radish to absorb some flavor and release a little moisture, helping the seasoning to blend better.

Step 4
Making a glutinous rice paste will make the kkakdugi softer and help the seasoning adhere better, resulting in a tastier dish. In a pot, mix 1 Tbsp of glutinous rice flour with 1 cup of water. Cook over low heat, stirring constantly, until it thickens into a paste. Turn off the heat and let it cool completely.

Step 5
Let’s start making the seasoning! First, finely mince 2 Tbsp of salted shrimp. If there are large chunks of salted shrimp, the seasoning won’t be even, so mincing them finely is important. Now, in a bowl, combine 8 Tbsp chili powder, 5 Tbsp anchovy sauce, 2 Tbsp minced garlic, the finely minced salted shrimp, and 1 Tbsp sugar. Pour in the cooled glutinous rice paste and mix well to create the seasoning paste.

Step 6
We’ll add the green onions when mixing the kkakdugi. Wash 200g of green onions thoroughly and cut them into lengths of about 5 cm. If the white parts are too thick, cut them in half lengthwise so the seasoning can penetrate well and they are easier to eat.

Step 7
There, we’re almost done! Once the green onions are added, the kkakdugi mixing is complete. Isn’t it really simple?

Step 8
Add all the prepared seasoning paste to the kkakdugi radishes that were sprinkled with salt.

Step 9
Add the seasoning and gently mix with the radish. Be careful not to mix too vigorously at first, as the radish pieces can break. Mix gently until the seasoning is evenly distributed on the radish. (The seasoning was just right when I made it! It can vary slightly depending on measurements.) Once the seasoning is evenly mixed, add the cut green onions and mix gently once more to complete the delicious kkakdugi!

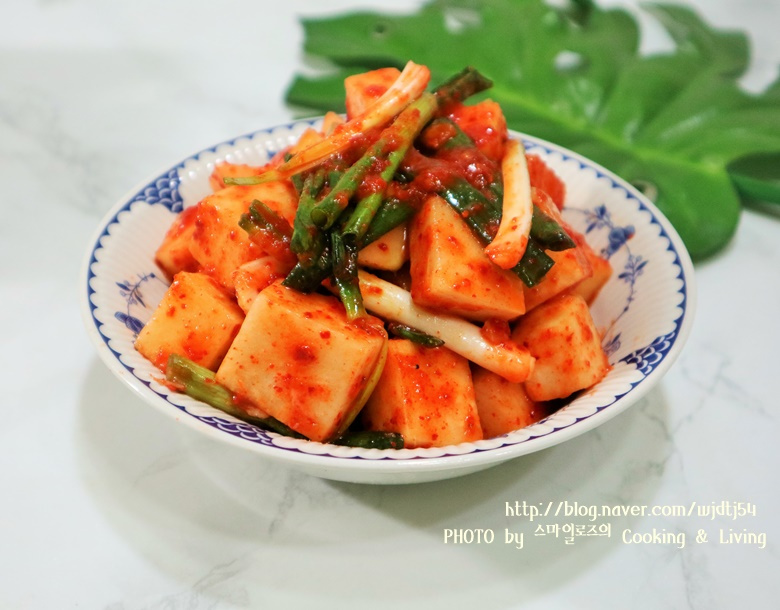
Step 10
Ta-da! Look at the appetizing color of the kkakdugi. Doesn’t it make your mouth water just by looking at it? Freshly made kkakdugi is also delicious to eat right away as a side dish with rice.

Step 11
I filled one small container and one slightly smaller side dish container with kkakdugi. After letting it sit at room temperature for about two days, I put it in the refrigerator. Wow! It’s incredibly crispy and refreshing. Unlike kkakdugi made during the kimchi-making season, this one is delicious even when eaten right after making it.

Step 12
While it’s typical to let it ferment in a kimchi container, it was so delicious that I served a plate of it with my dinner that very evening. I just couldn’t resist eating it right away. (Laughs)

Step 13
As the weather gets warmer, I worry about dieting, but why does my appetite keep increasing? Even though I made it myself, it’s so delicious that I can’t stop eating it. I find myself quite amusing. I highly recommend you try making this crispy and delicious kkakdugi!


