Crispy and Delicious Kkakdugi Fried Rice Recipe
How to Make Simple Kkakdugi Fried Rice with Leftover Radish Kimchi

Have leftover Kkakdugi (cubed radish kimchi) that you don’t know what to do with? Instead of just eating it, let’s transform it into a delicious Kkakdugi fried rice! This dish offers a wonderful texture and a savory, slightly sweet, and spicy flavor profile that makes it incredibly satisfying. It’s a fantastic way to use up your kimchi and enjoy a quick, flavorful meal. Let’s get cooking!
Main Ingredients- Well-fermented Kkakdugi (cubed radish kimchi) – 1 bowl (approx. 200g)
- Green onion – 1 handful (white parts preferred, chopped)
- Warm cooked rice – 1.5 bowls (approx. 250g)
Seasonings for Flavor (using tablespoon as standard)- Gochugaru (Korean chili flakes) – 1 Tbsp
- Gochujang (Korean chili paste) – 1 Tbsp
- Corn syrup or Oligosaccharide – 1 Tbsp
- Sesame oil – 1 Tbsp
- Soy sauce – 1 Tbsp
- Gochugaru (Korean chili flakes) – 1 Tbsp
- Gochujang (Korean chili paste) – 1 Tbsp
- Corn syrup or Oligosaccharide – 1 Tbsp
- Sesame oil – 1 Tbsp
- Soy sauce – 1 Tbsp
Cooking Instructions
Step 1
This recipe is for one serving, using 1.5 bowls of rice. For two servings, prepare two bowls of rice. Slightly sticky rice is ideal for fried rice, rather than very dry, fluffy rice. If using cold rice from the refrigerator, let it sit at room temperature for a bit to remove the chill.

Step 2
Heat a frying pan over medium-low heat and add cooking oil. Add the chopped green onions and stir-fry until fragrant and slightly translucent, creating scallion oil. Be careful not to burn the green onions. This infuses a lovely aroma into the dish.

Step 3
Cut the Kkakdugi into bite-sized pieces. If your Kkakdugi is very juicy, you can lightly squeeze out some of the excess liquid to prevent the fried rice from becoming too mushy. Adjust the amount of soy sauce based on the saltiness of your Kkakdugi.

Step 4
Once the scallion oil is fragrant, add the cut Kkakdugi to the pan. Stir-fry for 1-2 minutes, allowing the kimchi to cook slightly. This helps to mellow its sharp tanginess and deepen its flavor.

Step 5
Now, it’s time to add the seasonings that will bring this fried rice to life. Add 1 tablespoon of Gochujang and stir-fry it with the Kkakdugi. Cooking the Gochujang briefly before adding other ingredients helps to remove any raw taste and enhance its savory depth.

Step 6
Next, add 1 tablespoon of soy sauce for an extra layer of savory flavor. You can adjust the amount of soy sauce depending on how salty your Kkakdugi is. If the kimchi is bland, feel free to add a little more soy sauce.

Step 7
Add 1 tablespoon of Gochugaru (Korean chili flakes) for color and a touch of spiciness. Stir-frying the chili flakes briefly helps to prevent them from burning and enriches the overall flavor profile.

Step 8
Continue to stir-fry for about 1 minute over medium heat, ensuring the Kkakdugi and seasonings are well combined. The kimchi should start to look glossy as it coats with the mixed sauces.

Step 9
Add 1 tablespoon of corn syrup (or oligosaccharide) for a touch of sweetness and shine. If you prefer less sweetness, feel free to reduce the amount.

Step 10
Some recipes suggest adding a small amount of water to create a slightly wetter, mixed-rice consistency. For a similar effect, add about 2/3 cup of water (using a paper cup as a measure) and let it simmer and reduce. This step is optional and can be adjusted or omitted based on your preference.

Step 11
Stir-fry over medium-low heat until the sauce thickens and the Kkakdugi is tender yet still has a slight crispness. The key is to let the flavors meld while retaining the kimchi’s signature crunch.

Step 12
Add the warm rice to the pan. If using cold rice, break it up with your spatula to ensure there are no clumps. Stir-fry for about 1 minute, mixing the rice thoroughly with the Kkakdugi mixture.

Step 13
Fry vigorously, ensuring each grain of rice is coated with the delicious Kkakdugi seasoning. The goal is to achieve fluffy, well-seasoned fried rice.

Step 14
Finally, drizzle in 1 tablespoon of sesame oil and stir-fry for another 30 seconds. This adds a final touch of nutty aroma. It’s best to add sesame oil towards the end to preserve its fragrance.

Step 15
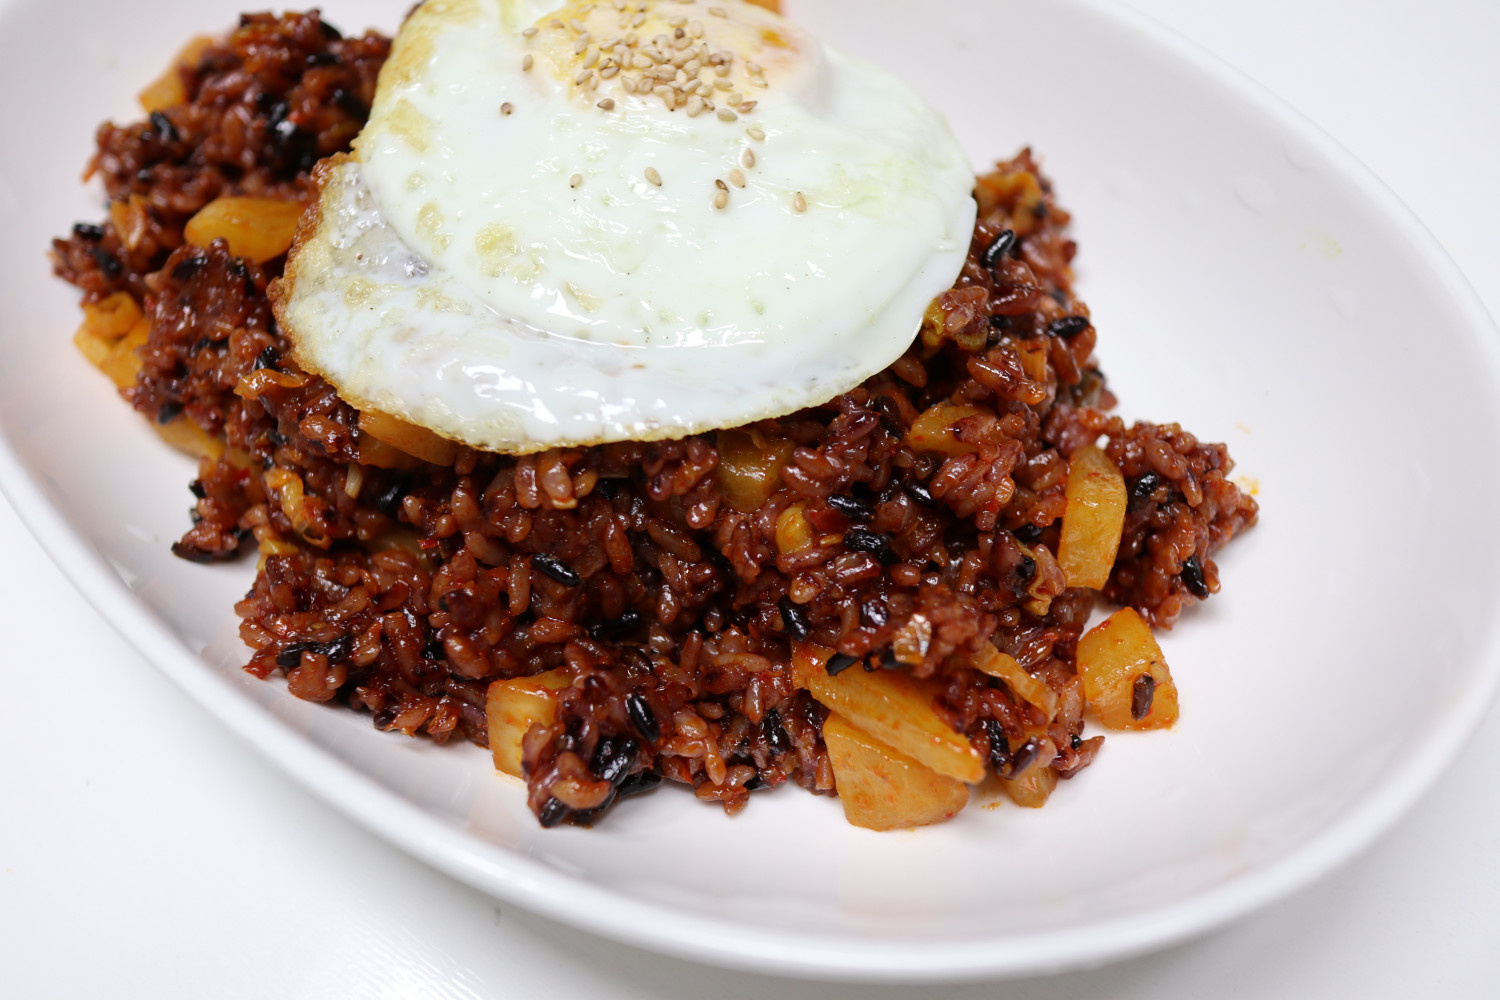
Voila! Your appetizing Kkakdugi fried rice is ready. The appearance might vary depending on how you cut the kimchi, but the taste is guaranteed to be fantastic. You’ll love the fluffy rice and the crunchy kimchi!

Step 16
For an extra treat, top your fried rice with a perfectly fried sunny-side-up egg. Breaking the yolk and mixing it with the rice is pure bliss!

Step 17
Note: Using black rice gave this fried rice a deeper color. If you use white rice, the color will be a lighter, lovely orange hue. Mixing in black or multi-grain rice also makes it healthy and delicious.

Step 18
Enjoy your meal! Savor this satisfying and flavorful Kkakdugi fried rice.


