Crispy and Delicious Pickled Garlic Scapes: The Golden Recipe
How to Make Pickled Garlic Scapes for Your Everyday Table

Are you running out of side dish ideas for your daily meals? For those times, try making these hearty pickled garlic scapes using fresh, seasonal garlic scapes! Garlic scapes are abundant in season right now and readily available at markets. A single bunch yields a generous amount, perfect for making a staple side dish that lasts. This recipe uses the universally loved 1:1:1:1 ratio for the soy sauce mixture, creating a delightful sweet and sour flavor. You can adjust the sugar or vinegar to suit your taste preference for sweetness or tanginess. Making pickled garlic scapes is surprisingly simple: just boil the seasoned ingredients and pour them over the prepared garlic scapes. They pair wonderfully with grilled meats and offer a unique, delicious twist to your wraps compared to regular pickled garlic.
Ingredients- 2kg fresh garlic scapes
- 500ml soy sauce
- 500ml vinegar
- 500ml water
- 500g sugar
Cooking Instructions
Step 1
First, prepare the seasoning mixture that will determine the flavor of your pickles. Measure out 500g of sugar using a measuring cup.

Step 2
Next, measure 500ml of vinegar to add a pleasant tanginess.

Step 3
Measure out 500ml of soy sauce for a rich umami flavor and depth.

Step 4
Finally, measure 500ml of clean water, and combine all the seasoning ingredients in a pot. Bring the mixture to a boil over high heat. Once boiling, reduce the heat to medium-low and let it simmer gently for about 15 minutes. Simmering allows the flavors to meld beautifully and develop a rich taste.

Step 5
Now, let’s prepare the garlic scapes. It’s crucial to thoroughly remove moisture from the garlic scapes; this is the secret to keeping your pickles delicious for a long time. Use paper towels to pat them dry meticulously. Once dry, cut the garlic scapes into manageable pieces, about 5cm in length. They can be too long to handle comfortably if left longer.

Step 6
Pour the seasoned mixture, which has been boiled and slightly cooled, over the prepared garlic scapes. Pouring the warm, not hot, mixture helps retain the crispness of the scapes. Gently mix the garlic scapes with the seasoning to ensure they are evenly coated. Let it cool further.

Step 7
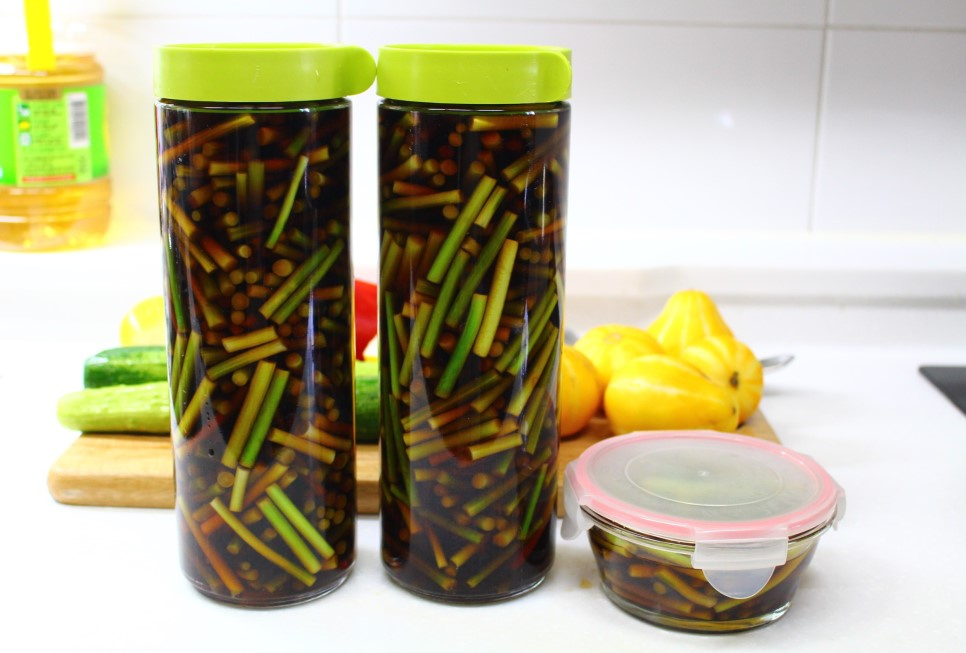
Transfer the finished pickled garlic scapes into clean, sterilized glass jars and seal them tightly. After 3 days, you’ll need to re-boil the pickling liquid and pour it over the scapes again. Re-boiling prevents the brine from becoming diluted and also acts as a sterilizer, significantly extending the shelf life of your pickles. Reheat the previously boiled pickling liquid, let it cool completely, and then pour it over the garlic scapes for longer preservation. Repeating this process 3 times is ideal, but 1-2 additional re-boilings are sufficient if time is limited.

Step 8
This recipe yields approximately two 1.2L jars of pickled garlic scapes, with a little extra. Making pickled garlic scapes is truly simple and easy, isn’t it? Although simple to make, they provide a substantial and long-lasting side dish for your meals. I prepared 2kg, but just like last year, they were so delicious I suspect they’ll be all gone before summer arrives!


