Crispy Celery Jangajji (Pickled Celery)
Easy Recipe for Celery Jangajji: Savory Soy Sauce Pickles Ready in a Day

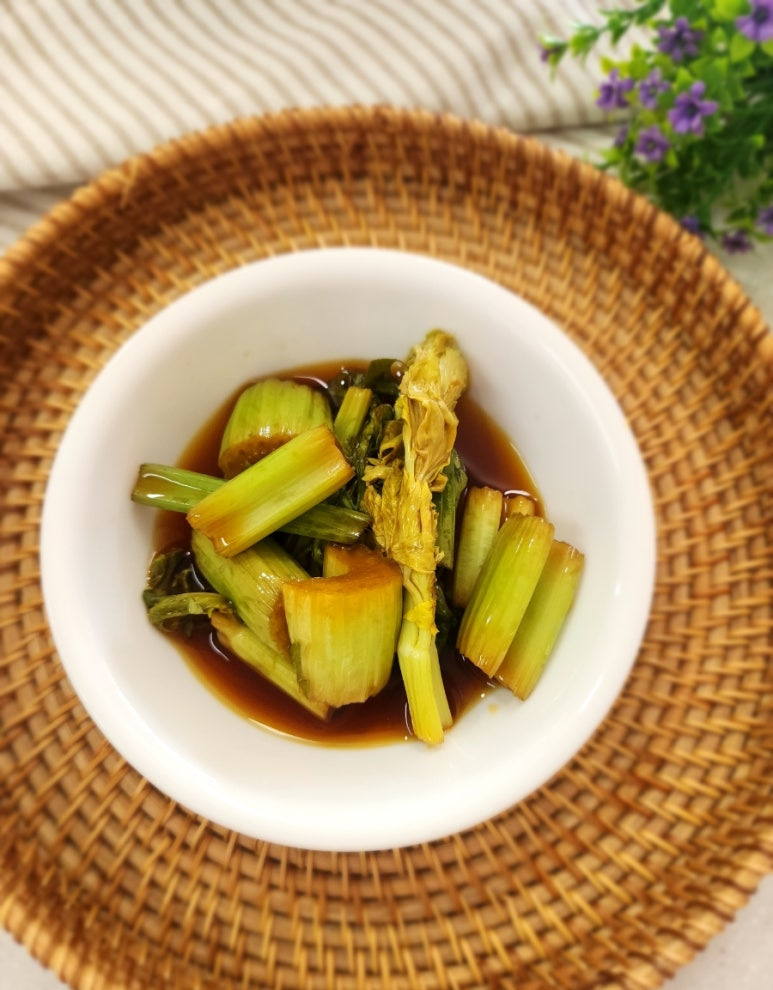
A delightful side dish perfect for when you lack appetite! Make your own crispy celery jangajji at home with this simple recipe. It’s ready to eat in just about a day, making it incredibly convenient. This version is less salty than traditional jangajji, offering a refreshingly tangy flavor similar to pickles. Even those who aren’t fans of celery will enjoy this! It’s a fantastic side for rice, and also works wonderfully as a topping for sandwiches or salads.
Ingredients- 1 bunch fresh celery
- 2 cups soy sauce (400ml)
- 2 cups sugar (400g)
- 2 cups vinegar (400ml)
- 3 cups water (600ml)
Cooking Instructions
Step 1
Prepare one bunch of fresh, crisp celery. Look for firm stalks and vibrant green leaves.

Step 2
Trim off the bottom end of the celery stalks. Wash the stalks and leaves thoroughly under running water to remove any dirt or debris. Ensure they are completely clean.

Step 3
Cut the cleaned celery stalks into bite-sized pieces, about 2-3 cm long. Avoid cutting them too thinly to maintain their crisp texture.

Step 4
The leafy parts of the celery will shrink considerably when cooked. Therefore, you can cut them into slightly larger pieces initially; they will naturally reduce in size as they soften. Just chop them roughly.

Step 5
Place the prepared celery into a container or kimchi jar. It might seem like too much and the lid may not close at first, but don’t worry! The celery will wilt down as it pickles. Pack it in generously.

Step 6
Now, let’s make the delicious pickling brine. Pour 2 cups (400ml) of soy sauce into a pot.

Step 7
Add 2 cups (400g) of sugar to the pot to provide sweetness.

Step 8
Finally, add 3 cups (600ml) of water. We will add the vinegar later. This mixture forms the base of our brine.

Step 9
Bring the soy sauce mixture to a boil over medium heat. As soon as it starts boiling, turn off the heat. Allow the brine to cool down completely, either in the pot or transferred to another container. Never pour hot brine over the vegetables!

Step 10
Once the soy sauce mixture has cooled down completely (it should be cold, not just warm), add the 2 cups (400ml) of vinegar and stir well. Adding the vinegar last helps preserve its fresh, tangy flavor.

Step 11
Pour the completely cooled soy sauce and vinegar mixture over the celery that you’ve placed in the container. Ensure the celery is submerged in the brine.

Step 12
Leave the container at room temperature for about half a day to one night (approximately 6-7 hours). During this time, the celery will start to soften and absorb the flavors of the brine.

Step 13
After the resting period, you’ll notice the celery has wilted and settled at the bottom of the container. Its volume will have significantly decreased.

Step 14
Using chopsticks or tongs, gently turn the celery over to ensure the brine evenly coats all pieces. While you can start eating it now, it’s even better if you refrigerate it overnight and enjoy it from the next day onwards.

Step 15
The finished celery jangajji retains the fresh aroma of celery and a wonderfully crisp texture. With a 2:2:2 ratio of soy sauce, sugar, and vinegar, plus 3 cups of water, it achieves a perfectly balanced sweet and tangy flavor, making it a delightful pickle-style jangajji that isn’t too salty. It’s truly a rice-lover’s dream!


