Crispy & Chewy Glass Noodle Rice Paper Pancakes
Crispy Outside, Chewy Inside! The Ultimate Glass Noodle Rice Paper Pancakes Have Arrived!

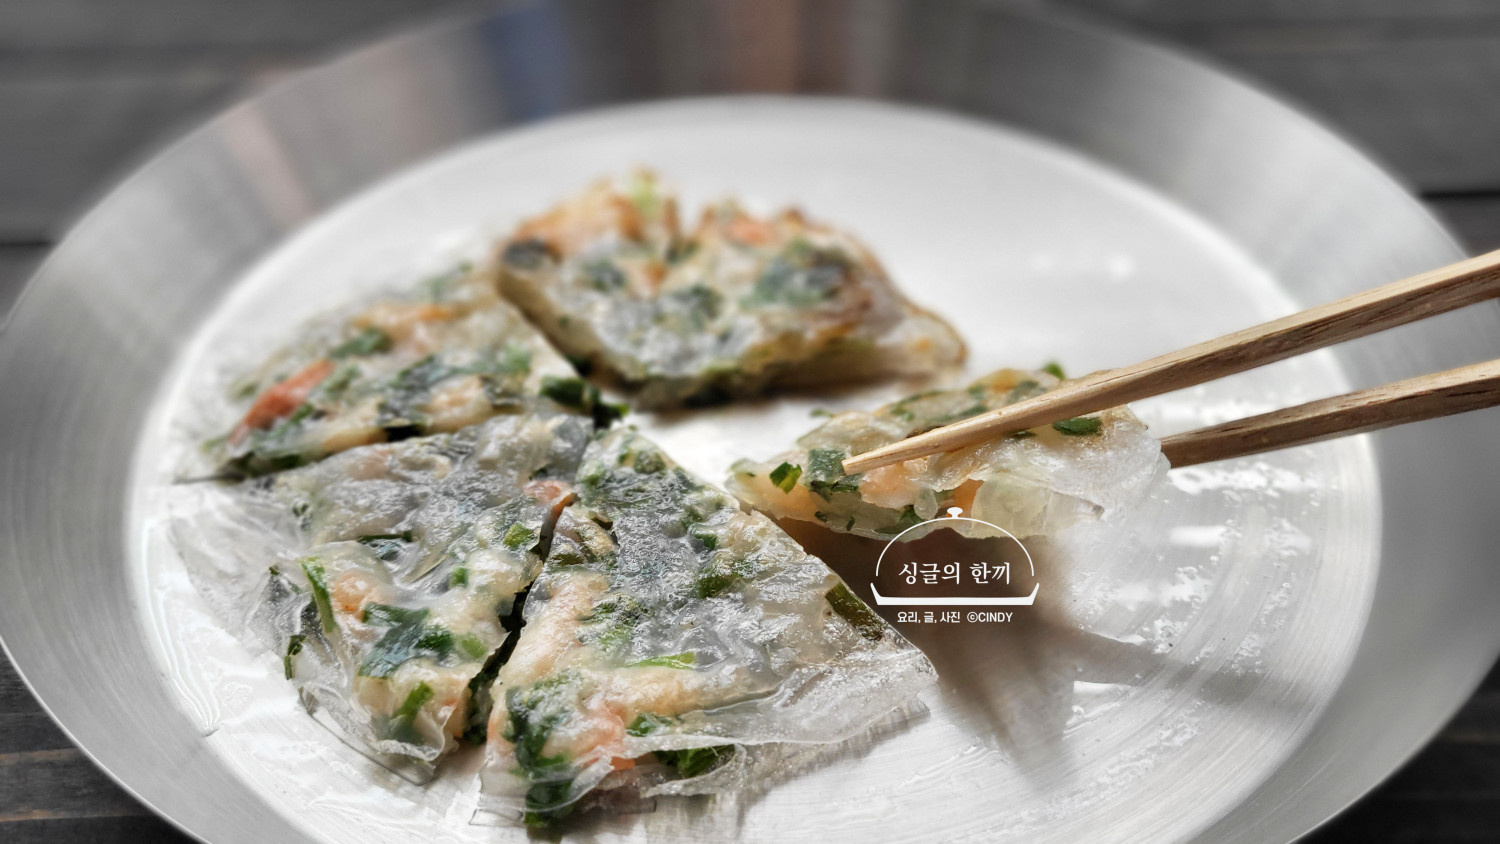
Experience a fantastic pancake with a wonderfully crispy exterior and a satisfyingly chewy interior, made with the magical combination of glass noodles and rice paper!
Main Ingredients- 10 sheets of rice paper
- 120g shrimp (cocktail or peeled)
- 50g fresh chives
- 50g dried glass noodles
Cooking Instructions
Step 1
First, prepare the glass noodles. Place the dried glass noodles in a bowl and soak them in cold water for at least 1 hour, or until fully softened. It’s crucial for the noodles to be tender.

Step 2
Once softened, drain the glass noodles well using a colander. Then, using kitchen scissors, cut them into small pieces about 2cm long. If they’re too long, it can be awkward to handle when making the pancake.

Step 3
Chop the shrimp. If using cocktail shrimp, you can chop them to your desired texture. Avoid mincing them too finely, as you want to retain some of their pleasant chewiness.

Step 4
Wash the fresh chives thoroughly and pat them dry. Finely chop them into pieces about 1-2cm in length.

Step 5
And there you have it – the three main stars of our filling: glass noodles, shrimp, and chives! They are ready to bring flavor and texture to your pancake.

Step 6
Now, combine all the prepared filling ingredients in a large bowl. Add 2 tablespoons of starch (corn or potato) and season with 1/4 teaspoon of salt for basic flavor.

Step 7
The amount of starch may vary depending on the moisture content of your ingredients. Add just enough so the ingredients hold together. Lastly, add a pinch of black pepper to taste for an extra layer of flavor.

Step 8
Lay out a sheet of rice paper on a cutting board or large plate. Place a portion of your prepared filling mixture onto the center of the rice paper.

Step 9
Since the rice paper will shrink slightly when cooked, leave about a 1cm border around the filling. Gently spread the filling out in a flat layer. This ensures even cooking and a neater appearance.

Step 10
For an optional touch, you can add thinly sliced red chili on top. It enhances the visual appeal and adds a mild spiciness that can be pleasant for adults, cutting through any richness. (Feel free to omit if you don’t have red chili.)

Step 11
Now, carefully take another sheet of rice paper and place it over the filling to cover. Gently press down to help the layers adhere.

Step 12
This recipe yields approximately 5 pancakes, depending on the size of your rice paper.

Step 13
It’s time to cook! Heat a frying pan over medium heat and add a generous amount of cooking oil. Place the prepared pancake onto the hot pan and fry until golden brown on one side.

Step 14
Once the first side is golden and cooked, carefully flip the pancake to cook the other side. As it fries, the rice paper will become increasingly translucent, revealing the filling inside.

Step 15
When the pancake is nearly done, the surface will be golden and crispy. If you cook it a little longer, the edges of the rice paper might turn slightly brown, similar to the texture of toasted rice crust (nurungji), adding an extra delightful crunch.

Step 16
An interesting tip: cooking on high heat for a shorter time can make the rice paper edges puff up and become lacy and crispy, creating a beautiful, unique texture. Just be mindful to prevent burning!

Step 17
Once cooked, transfer the pancakes to a wire rack or paper towels to drain any excess oil. Serve them warm and enjoy this delightful treat!


