Crispy Squid Kimchi Pancake Recipe
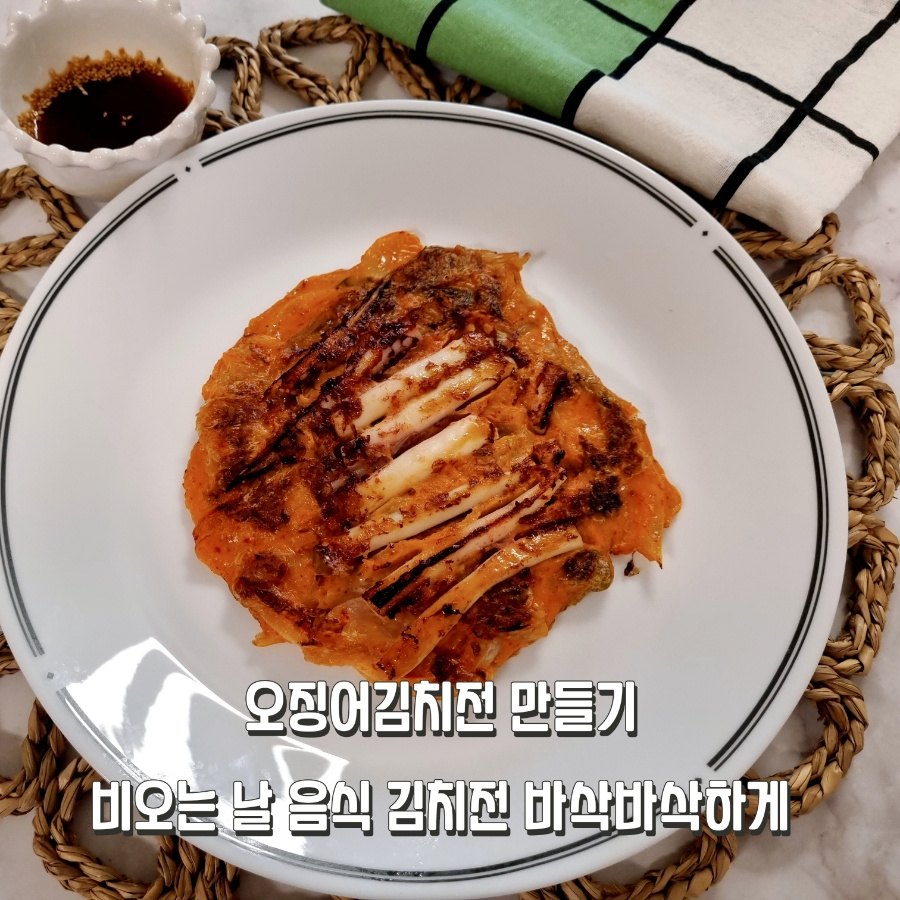
The Ultimate Rainy Day Snack: Crispy Kimchi Pancake! A Delectable Kimchi Pancake Recipe Enhanced with Tender Squid

The continuous rain over the weekend left me homebound and a bit bored. What better way to lift the spirits than by making a savory Kimchi Pancake, accompanied by the soothing sound of rain? While a basic Kimchi Pancake only requires kimchi and flour, adding chewy squid significantly enhances the texture and flavor, making it a perfect treat. The key to a truly delicious Kimchi Pancake is its crispiness. This is achieved by balancing the batter consistency, the amount of water, and using a generous amount of oil. Let’s embark on making this delightful squid Kimchi pancake, a perfect companion for a rainy day!
Pancake Ingredients- Well-fermented kimchi, 2 cups
- 1 squid
- 1/2 onion
Kimchi Pancake Batter- 1 cup pancake mix
- 1/2 cup cold water
- 2 eggs
- 1/2 Tbsp sugar
Dipping Sauce- 2 Tbsp soy sauce
- 1 Tbsp vinegar
- 1 Tbsp water
- 1 cup pancake mix
- 1/2 cup cold water
- 2 eggs
- 1/2 Tbsp sugar
Dipping Sauce- 2 Tbsp soy sauce
- 1 Tbsp vinegar
- 1 Tbsp water
Cooking Instructions
Step 1
Using kitchen scissors, cut the kimchi into bite-sized pieces. This makes it easier to mix into the batter. For the best flavor, use slightly sour, well-fermented kimchi like aged kimchi (mukimchi) or sour kimchi. These will lend a deeper, richer taste to your pancake.

Step 2
Wash the onion thoroughly and slice it thinly into strips. The natural sweetness of the onion will complement the tangy kimchi, adding another layer of flavor to your pancake.

Step 3
Clean the squid and rinse it under cold water. Pay special attention to the suction cups on the tentacles; gently scrub them to remove any grit or impurities. You can choose to keep the squid skin on, as it contains beneficial nutrients. However, if you prefer a softer texture, you can peel it off. Slice the prepared squid into thin, long strips.

Step 4
In a bowl, combine 1 cup of pancake mix. For a perfectly crispy pancake, add 1/2 cup of cold water. It’s crucial to adjust the water amount; too much liquid will result in a soggy pancake. Consider the moisture content of the kimchi itself when determining the right batter consistency.

Step 5
Crack 2 eggs into the batter and whisk them in thoroughly until well combined and no lumps remain. Adding eggs contributes to a richer, more tender texture.

Step 6
Add the chopped kimchi and sliced onion to the batter. Sprinkle in 1/2 tablespoon of sugar. Mix everything together until well combined. Tip: I prefer to add the squid on top as a topping while frying the pancake. If you love squid, feel free to mix it directly into the batter for a squid kimchi pancake.

Step 7
Don’t be shy with the oil – it’s the secret to a crispy pancake! Use a neutral cooking oil with a high smoke point (like vegetable oil) rather than olive oil for a better taste and crispiness. Heat a generous amount of oil in a pan over medium-high heat. Ladle the batter onto the hot pan, spreading it thinly and widely to form a pancake shape. Listen for that satisfying sizzle – it’s the sound of a perfect pancake in the making!

Step 8
Arrange the sliced squid evenly over the pancake batter. It’s important to wait until the edges of the pancake turn golden brown before attempting to flip. Maintain medium-high heat to ensure crispiness. Once the edges are nicely browned, carefully flip the pancake using a spatula.

Step 9
To ensure the squid is cooked through, reduce the heat to medium-low. Gently swirl the pan to move the pancake around. This allows the oil to circulate evenly, ensuring the pancake cooks to a uniform crispiness. Cook the side with the squid for a little longer. Once the squid is cooked, your delicious Kimchi Pancake is ready!

Step 10
While the kimchi pancake is delicious on its own, a simple dipping sauce elevates the experience. Whisk together 2 tablespoons of soy sauce, 1 tablespoon of vinegar, and 1 tablespoon of water for a quick and flavorful accompaniment. (Adjust seasoning to your personal taste.)


