Crispy & Sweet Cinnamon Card Cookies
Craft Your Own Message with Cinnamon Card Cookies

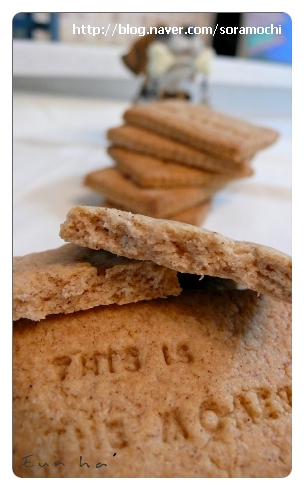
Today, we’re diving into making beloved cinnamon cookies! We’ll use a simple square cutter to shape them and then imprint your desired message, turning them into unique ‘card cookies’ that convey your thoughts. While they share similarities with store-bought cookies like Loacker, we’ve reduced the sugar content for a less sweet taste. These cookies offer a delightful crispiness without being overly hard, so keep that in mind. They’re perfect for conveying special messages on memorable occasions!
Cookie Dough Ingredients- 150g cake flour, sifted
- 60g unsalted butter, softened to room temperature
- 50g light brown sugar, finely granulated
- 1 egg yolk
- 1 Tbsp milk
- 1 tsp ground cinnamon (adjust to taste)
- 1/4 tsp baking powder, sifted
Cooking Instructions
Step 1
First, place the softened butter, which has been brought to room temperature, into a bowl. Use a whisk to beat it until it reaches a creamy consistency. Be mindful that cold butter won’t mix well, so ensure it’s properly softened.

Step 2
Gradually add the light brown sugar to the creamed butter in 2-3 additions, whisking until the sugar is fully incorporated and the mixture becomes pale and creamy. Next, add the egg yolk and whisk vigorously to combine without the mixture separating. (This recipe uses a small amount of yolk, so separation is unlikely.)

Step 3
Once the sugar is completely dissolved and the mixture is smooth, add the sifted cake flour, baking powder, and cinnamon. Use a spatula to gently fold the dry ingredients into the wet until just combined, being careful not to overmix. When there are still faint streaks of flour, add 1 tablespoon of milk and mix until the dough reaches the desired consistency. Wrap the finished dough in plastic wrap, flatten it into a disc, and refrigerate for about 30 minutes. This chilling step makes the dough easier to handle and shape.

Step 4
After the chilling period, evenly roll out the dough to a thickness of about 3mm. On warmer days, the dough can become sticky quickly. To prevent sticking, use a very small amount of extra flour on your work surface and rolling pin as you roll out the dough.

Step 5
Use a square cutter to shape the cookies. Arrange the cut-out dough pieces on a baking sheet, leaving some space between them. Bake in a preheated oven at 180°C (350°F) for approximately 13 minutes, or until golden brown. Keep an eye on the cookies to adjust the baking time as needed.


