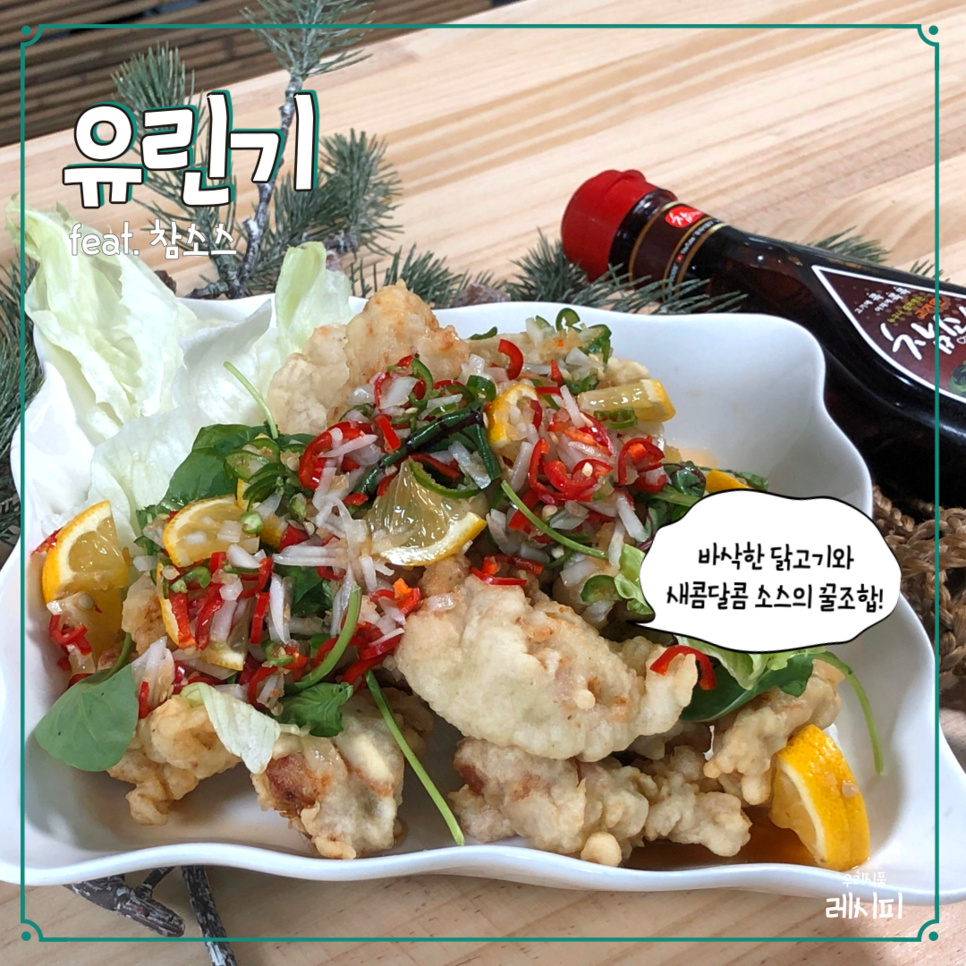
Crispy Yurinji (Sweet and Sour Fried Chicken)
The Ultimate Korean-Chinese Appetizer Recipe: Crispy Yurinji!

Yurinji is a perfect dish for a delightful drinking snack at home or for impressing guests! Here’s an easy-to-follow recipe to make delicious Yurinji right in your own kitchen. Enjoy the irresistible combination of crispy chicken and a tangy, sweet sauce!
Main Ingredients- 800g boneless, skinless chicken thigh, cut into bite-sized pieces
- 200g frying powder (tempura powder)
- 200ml water
- 1 egg white
- 15g Korean green chili peppers (cheongyang chili), finely minced
- 15g red chili peppers, finely minced
- 30g onion, finely minced
- 10g minced garlic
- 60g Chamsauce (or your favorite sweet and sour sauce)
- 10g baby leaf greens
- 50g lettuce, torn into bite-sized pieces
Chicken Marinade- 10g minced garlic
- 5g grated ginger
- A pinch of black pepper
- 10g minced garlic
- 5g grated ginger
- A pinch of black pepper
Cooking Instructions
Step 1
First, wash the chicken thigh pieces under cold running water to remove any impurities. Then, cut them into bite-sized pieces, approximately 2cm in size. It’s best to use boneless, skinless thighs for this recipe, but feel free to use other chicken parts if you prefer, just ensure they are cut to a similar size.

Step 2
In a bowl, place the prepared chicken pieces. Add the minced garlic, grated ginger, and a pinch of black pepper. Gently toss and mix everything together to ensure the chicken is evenly coated with the marinade. Let it marinate for about 20 minutes at room temperature (or in the refrigerator for a deeper flavor).

Step 3
Now, let’s prepare the vegetables for the sauce. Finely mince the Korean green chili peppers, red chili peppers, and onion. Mincing them very finely will ensure they meld beautifully into the sauce and provide a pleasant, not overpowering, spicy and fresh kick.

Step 4
In a mixing bowl, combine the finely minced chilies and onion with the Chamsauce. Stir well until all the ingredients are thoroughly mixed. If you like a tangier or sweeter sauce, feel free to adjust the amount of vinegar or sugar to your preference. This creates your vibrant and flavorful Yurinji sauce.

Step 5
To make the crispy coating, whisk together the frying powder, egg white, and water in a bowl. Mix until you have a smooth batter with no lumps. The batter should be thick enough to coat the chicken pieces well but not too heavy. If it’s too thin, it won’t stick; if it’s too thick, the coating might become heavy or soggy.

Step 6
Dip each marinated chicken piece into the batter, ensuring it’s fully coated. Heat your frying oil to 170°C (340°F). Carefully add the battered chicken pieces to the hot oil, ensuring not to overcrowd the pan. Fry for about 5 minutes, or until the chicken is golden brown and crispy. Frying at a moderate temperature prevents the outside from burning before the inside is cooked through.

Step 7
Once the chicken pieces are golden and crispy, remove them from the oil using a slotted spoon or spider strainer. Place them on a wire rack set over a baking sheet, or on paper towels, to drain any excess oil. This step is crucial for maintaining the crispiness of the fried chicken.

Step 8
Now it’s time to plate your Yurinji. Start by arranging the torn lettuce pieces evenly at the bottom of your serving plate. This creates a fresh bed for the crispy chicken. Next, artfully place the fried chicken pieces on top of the lettuce. Finally, scatter the fresh baby leaf greens over the chicken for a touch of color and freshness.

Step 9
For the grand finale, generously drizzle the prepared sweet and sour Yurinji sauce over the entire dish. Your delicious Yurinji, with its perfectly crispy exterior and tender interior, is now ready to be enjoyed! Serve immediately for the best texture and flavor.


