Delicious Braised Burdock Root Recipe
A Hearty Side Dish… Savory Braised Burdock Root

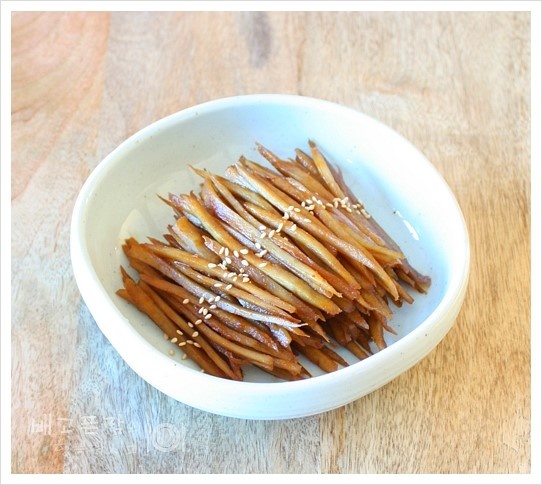
I’ve made braised burdock root. I bought burdock root, which I usually skip even for kimbap because it’s in season. While you can simply slice it diagonally and braise it, I meticulously julienned it into a fine shred for this dish, just in case I got tired of it and wanted to use it in kimbap. It’s been a while since I made it, but it tastes great!
Ingredients- Julienned burdock root, 5 handfuls
- Water, 1/2 cup
- Soy sauce, 6 Tbsp
- Sake (cooking wine), 3 Tbsp
- Gochujang (Korean chili paste), 1 Tbsp
- Plum extract, 1 Tbsp
- Oligosaccharide, 2 Tbsp
- Sugar, 1 Tbsp
- Cooking oil, 1 Tbsp
- Sesame oil, 1 Tbsp
Cooking Instructions
Step 1
Wash 3 burdock roots thoroughly. Use the back of a knife to gently scrape off the skin. The skin should peel off quite easily.

Step 2
Burdock root can discolor quickly, so as you peel each root, immediately submerge it in a bowl of water mixed with 4 tablespoons of vinegar. This vinegar bath will help prevent browning and keep the burdock root looking fresh.

Step 3
Slice the burdock root diagonally, about 0.3cm thick, and then julienne it into fine, thin strips, also about 0.3cm in thickness. While you’re julienning, keep the strips submerged in the vinegar water to maintain their color.

Step 4
Drain the julienned burdock root from the vinegar water.

Step 5
Rinse the burdock root strips under running water, swishing them around gently. This step helps remove any residual earthiness or bitterness, ensuring a cleaner taste. Drain well.

Step 6
Place the 5 handfuls of drained, julienned burdock root into a pot.

Step 7
Pour in 1/2 cup of water.

Step 8
Cover the pot and bring it to a boil over high heat. Let it come to a rolling boil for a moment to start softening the burdock.

Step 9
Once the burdock has cooked slightly and the initial boil subsides, remove the lid to allow some moisture to evaporate.

Step 10
In a separate bowl, combine the braising sauce ingredients: 6 Tbsp soy sauce, 3 Tbsp sake, 1 Tbsp gochujang, 1 Tbsp plum extract, 2 Tbsp oligosaccharide, 1 Tbsp sugar, and 1 Tbsp cooking oil. Mix well until thoroughly combined. Pour this sauce evenly over the burdock in the pot.

Step 11
Stir everything together over high heat until the sauce is well incorporated and starts to boil. Once it boils, reduce the heat to medium-low and let it simmer gently. Continue to cook until the sauce reduces and coats the burdock.

Step 12
As the burdock braises, spread it evenly in the pot to prevent sticking. Stir and flip the burdock occasionally to ensure the sauce penetrates evenly. Cook until the sauce has significantly reduced and is clinging to the burdock. Be careful not to let the sauce burn; if it seems to be reducing too quickly, lower the heat further or add a tiny splash of water.

Step 13
Finally, drizzle in 1 Tbsp of sesame oil and stir for another minute or so to infuse the nutty aroma. This completes your delicious braised burdock root. It’s tasty served warm, but the flavors deepen beautifully when cooled and stored in the refrigerator.


