Flavorful Bacon Kimbap
A Must-Have for Picnics! Kimbap Lunch Boxes Elevated with Juicy Bacon

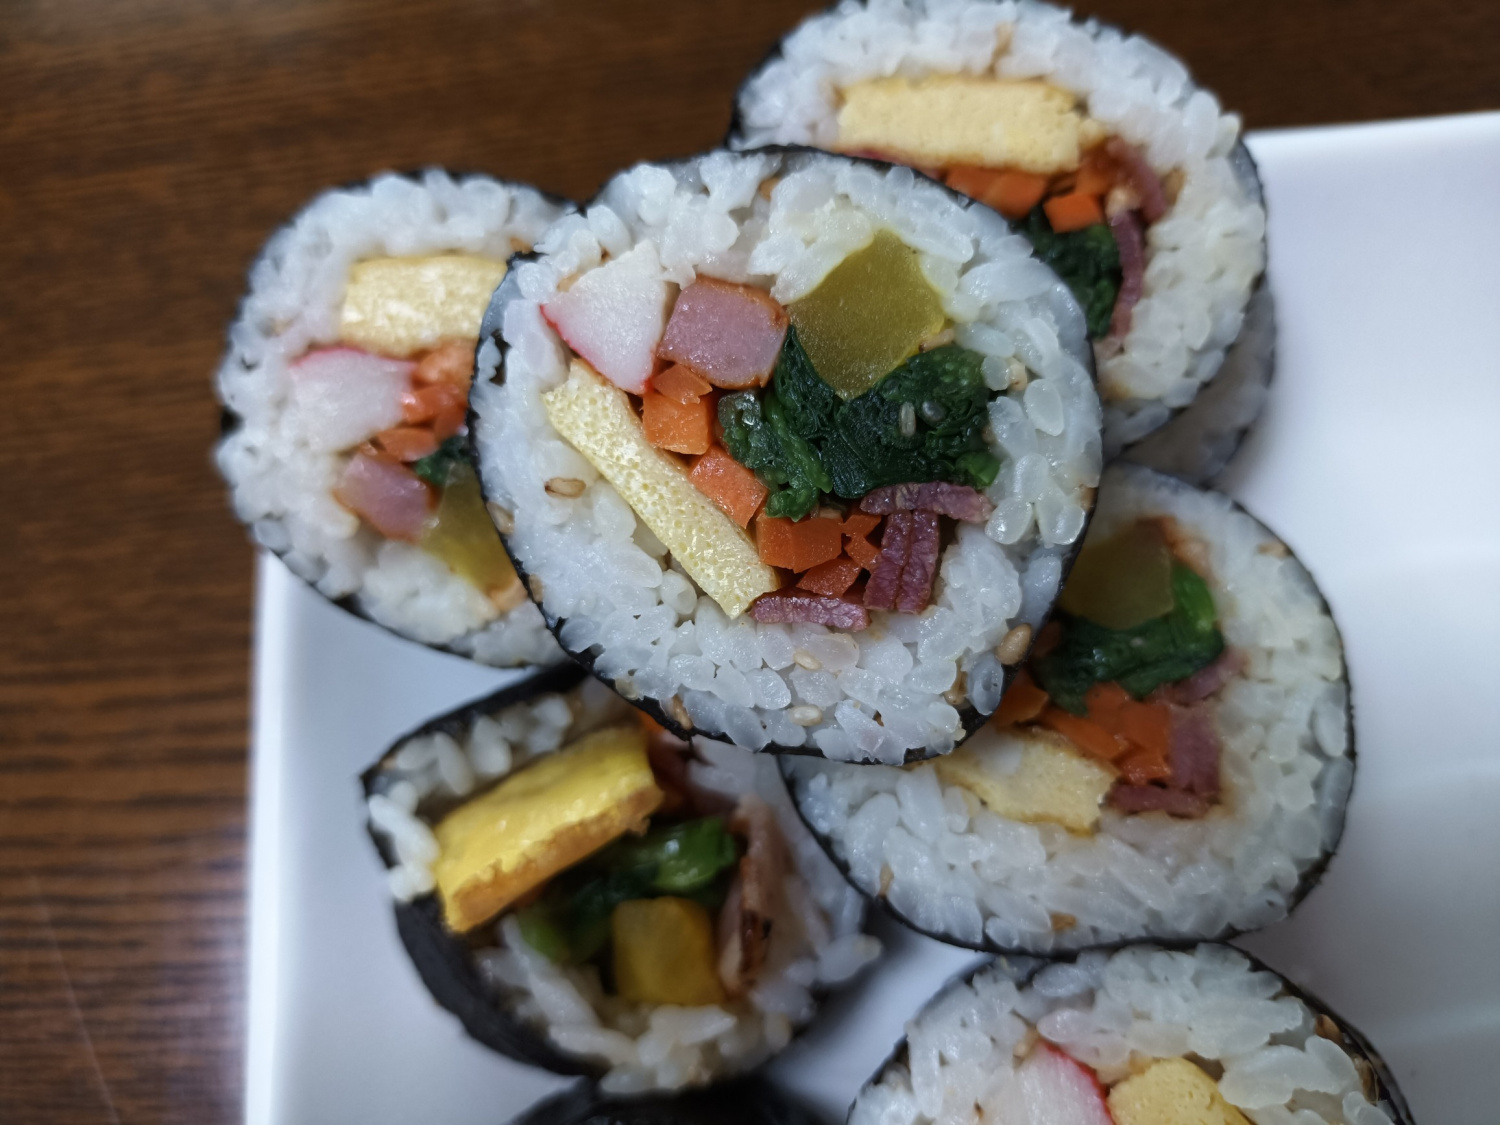
Don’t let your picnic be complete without meat! Enjoy this special Kimbap lunch box featuring delicious bacon. We found we had some bacon leftover at home, so we decided to add it to our kimbap and it turned out incredibly delicious, so we had to share! While most people are skilled at rolling kimbap, we highly recommend trying bacon for an elevated experience – it truly transforms the quality of your kimbap. We even seasoned the rice specifically for kimbap, ensuring the flavor penetrates each grain for a perfectly balanced taste. The rice is seasoned just right, making it a truly satisfying meal!
For Cooking Rice- 4 cups short-grain rice
- 4 tsp seasoned salt
- 1 tsp sugar
- 4 tsp vinegar
- 2 Tbsp sesame oil
- 3 Tbsp toasted sesame seeds
For Filling- 1/2 bunch spinach
- 1 carrot
- 1 pack pickled radish (danmuji)
- 4 eggs
- 10 strips processed ham
- 5 imitation crab sticks
- 10 strips bacon
- 5 slices cheddar cheese
- Pinch of salt
- Pinch of cooking oil
- 1/2 Tbsp minced garlic
- 1/2 bunch spinach
- 1 carrot
- 1 pack pickled radish (danmuji)
- 4 eggs
- 10 strips processed ham
- 5 imitation crab sticks
- 10 strips bacon
- 5 slices cheddar cheese
- Pinch of salt
- Pinch of cooking oil
- 1/2 Tbsp minced garlic
Cooking Instructions
Step 1
First, trim off any yellow or wilted leaves and the root ends of the spinach. Wash it thoroughly under running water multiple times to remove all dirt. Pay special attention to cleaning the roots, as they can hold a lot of soil.

Step 2
Add a very small pinch of salt to boiling water. This helps to keep the spinach a vibrant green color and controls the cooking time. Add the prepared spinach and blanch for no more than 20 seconds. Overcooking will make it mushy and diminish its texture.

Step 3
Immediately after blanching, rinse the spinach under cold running water. This stops the cooking process, intensifies the green color, and helps maintain a crisp texture.

Step 4
Gently squeeze out the excess water from the spinach by cupping your hands together. Avoid squeezing too hard, as this can mash the spinach. Just remove enough water to prevent sogginess.

Step 5
Since the bacon will add saltiness, we won’t season the spinach separately. Instead, chop the spinach – both leaves and stems – into bite-sized pieces. This allows for a good mix of textures and flavors within the kimbap.

Step 6
Wash the carrot thoroughly and julienne it into thin strips suitable for kimbap filling.

Step 7
Place the julienned carrots in a pan with a little cooking oil and stir-fry. This process brings out the natural sweetness and aroma of the carrots.

Step 8
While stir-frying the carrots, add a small amount of minced garlic to enhance the flavor. Season with salt very lightly. It’s better for it to be slightly under-salted than too salty. Use just a pinch or two sprinkled by hand.

Step 9
Stir-frying carrots over high heat can cause them to turn yellow on the outside while remaining raw inside. Use medium heat and cook until the carrots are tender and slightly softened. Turn off the heat just as they reach this point.

Step 10
Drain the pickled radish (danmuji) well in a colander. Removing excess liquid prevents the kimbap from becoming soggy.

Step 11
Whisk the eggs in a bowl and add a tiny pinch of salt to season lightly. Avoid over-whisking to ensure a tender omelet.

Step 12
Heat a lightly oiled pan over low heat. Pour in a thin layer of egg mixture and cook until set, then flip and cook the other side until golden brown. Cooking slowly ensures the omelet is cooked through.

Step 13
Once the egg omelet is cooked, cut it into large pieces that are easy to handle and place inside the kimbap. Avoid cutting too thinly, as it might crumble.

Step 14
While you can use the processed ham and imitation crab sticks as they are, lightly pan-frying them in a bit of oil first enhances their flavor and makes them more appetizing. This adds another layer of deliciousness to the kimbap.

Step 15
Our star ingredient, bacon, should be fried until crispy on both sides. Fully cooking the bacon is key to achieving a satisfying chew and reducing greasiness, making it much more delicious. Undercooked bacon can be tough, so be sure to fry it until it’s nice and crisp. Laying the strips flat and cooking them individually ensures even crisping.

Step 16
We forgot to take a photo of cooking the rice! Using 4 cups of rice should yield approximately 8-10 kimbap rolls. The seasoning amounts listed above (4 tsp seasoned salt, 4 tsp vinegar, 1 tsp sugar, 2 Tbsp sesame oil) are for 4 cups of rice and can be adjusted to your preference. You can mix the seasonings into the rice before cooking or stir them in after the rice is cooked – both ways yield delicious results. Ensure the seasoning is well mixed into the rice grains for even flavor distribution.

Step 17
Because bacon is salty, we recommend using only one strip per roll. For even more variety, consider combining bacon with cheese or experimenting with different ingredient combinations for diverse flavors. Adding bacon alone transforms the kimbap, creating a unique and deeply satisfying taste experience. Enjoy your delicious Bacon Kimbap!


