Golden Glutinous Rice Gochujang
Homemade Glutinous Rice Gochujang: An Easy and Delicious Recipe

Homemade gochujang offers a depth of flavor and umami unmatched by store-bought varieties. The best part is you can customize the spiciness, sweetness, and saltiness to perfectly suit your taste, making it a healthier and more delicious choice. For detailed step-by-step instructions, please refer to the video guide: https://youtu.be/l9a6ZgsLXBM.
Gochujang Ingredients- Fine Gochugaru (Chili Powder) 1.8kg (choose one with low moisture content)
- Glutinous Rice Flour 1kg (adds thickness and sweetness to the gochujang)
- Malt Barley (Yeot-gireum) 1kg (used to create a sweet liquid that ferments into a rice-like consistency)
- Meju Powder (Fermented Soybean Paste Powder) 500g (adds depth and a savory, complex flavor)
- Mixed Korean Wheat Flour 500g (a blend of wheat, barley, and brown rice flour is recommended)
- Corn Syrup (Jocheong) 1.5kg (provides a natural, deep sweetness without artificial enhancers)
- Plum Extract (Maesil Cheong) 2000ml (adds a sweet and sour note, aiding fermentation)
- Coarse Sea Salt 800g (good quality salt that dissolves easily)
- Filtered Water Total 7L (used for making the malt barley liquid and cooking)
- Soju 1 bottle (approx. 1.8L, helps with preservation and inhibits unwanted bacterial growth)
Cooking Instructions
Step 1
Begin by soaking 1kg of malt barley (yeot-gireum) in lukewarm water (around 30-40°C or 86-104°F) for at least 30 minutes. This process is crucial for dissolving the starches in the malt barley, creating a milky, sweet liquid.

Step 2
Gently knead the soaked malt barley to extract the milky liquid. Gradually add the total 7L of filtered water in portions, squeezing the malt barley thoroughly to release all its essence. Strain the liquid through a sieve to remove any solid particles, ensuring you have a clear, milky solution.

Step 3
In a rice cooker pot, combine the extracted malt barley liquid with 1kg of glutinous rice flour. Whisk thoroughly until no lumps remain. Set the rice cooker to the ‘Keep Warm’ function and let it ferment for 7 to 8 hours. This slow fermentation process converts the starches into sugars, giving the gochujang its characteristic sweetness and smooth texture. If your rice cooker is small and you have leftover malt barley liquid, store it at room temperature and add it when you boil the mixture later.

Step 4
After 7 to 8 hours, the mixture should have fermented, resembling cooked rice grains in consistency. It should be soft and slightly broken down but not entirely mushy. This indicates successful fermentation.

Step 5
Pour the fermented mixture into a large, deep pot. Bring it to a boil over high heat, stirring continuously to prevent it from sticking to the bottom. Constant stirring is key to avoid scorching.

Step 6
Once the mixture reaches a rolling boil, reduce the heat to medium-low and let it simmer gently for about 30 minutes. Continue stirring occasionally. This step evaporates excess water and thickens the mixture, concentrating the natural sweetness.

Step 7
Transfer the thickened mixture to a large, clean container (like a plastic tub or large bowl). While it’s still hot, add 1.5kg of corn syrup (jocheong) and 800g of coarse sea salt. Stir well until the salt is completely dissolved. Crucially, allow this mixture to cool down completely before proceeding. Adding other ingredients while hot can negatively affect the fermentation process.

Step 8
Now, prepare the essential powdered ingredients that define the gochujang’s flavor. Add 500g of meju powder for a deep, savory note and 500g of mixed Korean wheat flour (preferably a blend containing barley and brown rice) to impart a smooth texture and a pleasant color.

Step 9
Once the corn syrup and salt mixture is completely cool, add the meju powder and mixed wheat flour. Whisk or stir vigorously with a spatula to combine, ensuring there are no lumps and everything is smoothly incorporated.

Step 10
Continue to mix until the powders are fully dissolved into the liquid base, creating a smooth, homogenous paste. The harmony of these ingredients is vital for a well-balanced gochujang.

Step 11
It’s time to add the vibrant color and iconic flavor of chili powder. Incorporate 1.8kg of fine gochugaru (chili powder) into the paste. Mix thoroughly until the chili powder is evenly distributed. You can adjust the amount of chili powder based on your preference for spiciness.

Step 12
Add 2000ml of plum extract (maesil cheong). This adds a delightful sweet and sour complexity and enhances the overall aroma and flavor profile of the gochujang.

Step 13
Finally, pour in 1 bottle of soju (approximately 1.8L). Mix everything together until the gochujang paste is uniform in color and consistency. The soju acts as a natural preservative, helping to prevent spoilage and ensuring a good fermentation over time.

Step 14
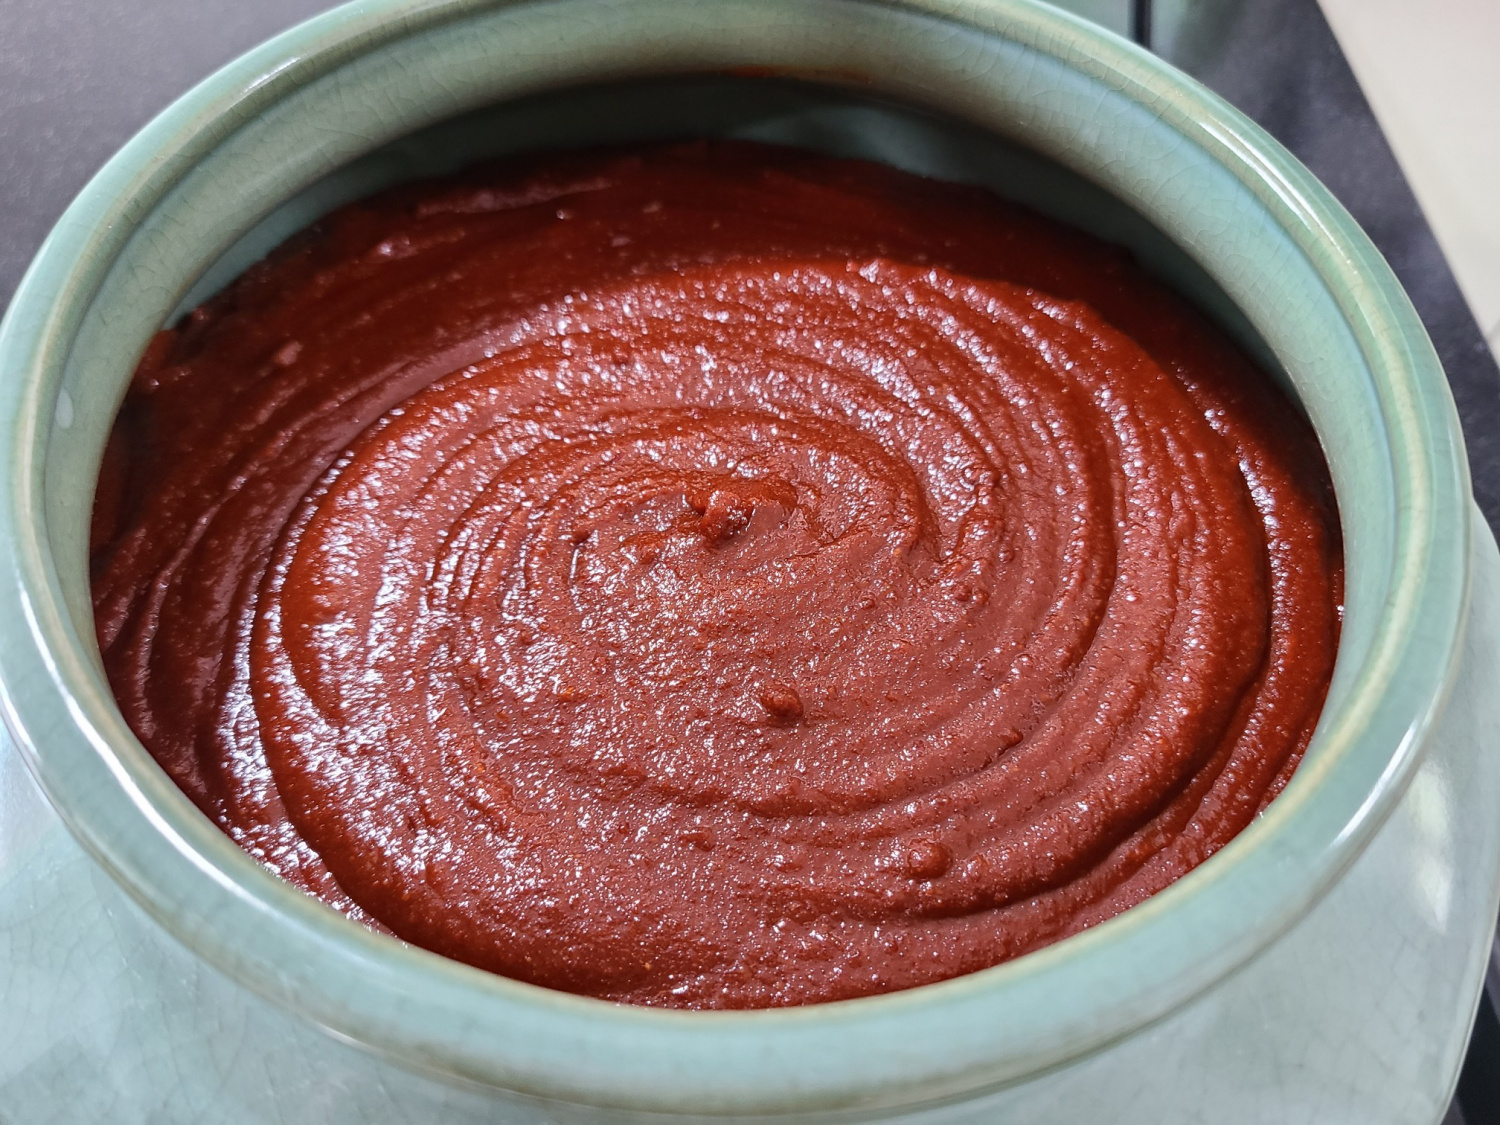
Transfer the well-mixed gochujang paste into a clean earthenware jar (hangari). To further aid preservation and prevent mold, pour about 1/4 cup of homemade soy sauce (jip-ganjang) around the rim of the jar. Lightly sprinkle some salt on the surface of the gochujang. Cover with a breathable lid (glass lids are ideal) and store in a cool, sunny spot for at least 3 months for optimal fermentation. During warmer months, you might shorten the fermentation to about 15 days before refrigerating to control the fermentation process.

Step 15
Carefully place the finished gochujang paste into the clean earthenware jar. Press down gently to remove any air pockets, which helps in better preservation. Once fermented, this homemade gochujang will be a wonderful addition to stews, marinades, dipping sauces, and more, adding a rich, authentic Korean flavor.


