Golden Rolled Omelet: The Secret to Perfect Success at Home!
The seemingly simple, yet tricky Rolled Omelet: A foolproof guide to making it soft and delicious every time.

The rolled omelet is a fundamental dish. It looks easy, but many find it hard to make it taste and look perfect at home. Learn the proper way to make it this time and achieve delicious results! Thank you!
Essential Ingredients- 6 fresh eggs
- 20g green onions or scallions (use both white and green parts)
- 10g carrot
- 1/2 teaspoon salt (adjust to taste)
- 1/2 teaspoon sugar (for a subtle sweetness)
- 1 tablespoon water (for a softer texture)
- A little cooking oil (for greasing the pan)
Cooking Instructions
Step 1
First, prepare the vegetables that will add vibrant color and flavor to your rolled omelet. Finely chop 20g of green onions or scallions after removing the roots and washing them thoroughly. Using the green parts will enhance the flavor.

Step 2
Peel and wash the 10g of carrot. Slice it thinly first, then julienne it into very fine strips. Finally, mince the julienned carrots. Mincing them finely will help them incorporate smoothly into the egg mixture and result in a softer texture when cooked.

Step 3
In a wide bowl, crack 6 fresh eggs. Gently whisk them using a fork or a whisk until the yolks and whites are well combined, being careful not to create too much foam. Over-whisking can make the final omelet tough.

Step 4
Add the minced green onions (or scallions) and carrots to the egg mixture. The colorful vegetables will make the omelet visually appealing, and their slight crunch and fragrance will enrich its overall flavor.

Step 5
Season the egg mixture with 1/2 teaspoon of salt and 1/2 teaspoon of sugar for balanced flavor. A little sugar helps to mask any eggy smell and adds a touch of umami. Whisk again gently until all ingredients are well incorporated. Now, add 1 tablespoon of water; this is key to achieving a moist and tender rolled omelet.

Step 6
Now it’s time to cook the rolled omelet. Heat your non-stick pan over medium-low heat. Pour in about 1/2 tablespoon of cooking oil. Dip a paper towel in the oil and spread it thinly and evenly across the entire pan surface. This prevents the egg from sticking and ensures a smooth cooking process. Be mindful that a too-hot pan will burn the egg quickly.

Step 7
Pour the prepared egg mixture into the heated pan, making sure not to pour it too thickly. Heat control is crucial! If the heat is too high, the outside will burn while the inside remains uncooked. Maintain medium-low heat, and as the surface begins to set, reduce the heat to low.

Step 8
When about 90% of the egg surface is cooked and the top is still slightly moist, begin to roll it up. Starting with small, multiple folds will help create a plump and attractive cross-section when sliced. For a firm, professional look, gently push the cooked portion to one side.

Step 9
Once the first roll is complete, move it to one side of the pan. Add a tiny bit more cooking oil to the empty space in the pan and re-grease it evenly with a paper towel. This step ensures the next layer of egg mixture won’t stick and will blend seamlessly.

Step 10
Now, pour another portion of the egg mixture into the empty space next to the rolled omelet. Allow the new egg mixture to seep slightly underneath the existing roll. This will help bind the layers together and prevent the omelet from breaking apart.

Step 11
Repeat the process: once the newly added egg mixture is about 90% cooked, roll it up again. Continue this process until all the egg mixture is used. Each layer will build up to create a wonderfully thick and appealing rolled omelet.

Step 12
After the final roll, place the completed omelet back on the pan and let it cook for about 10-20 seconds on each side, flipping gently. This final step ensures the entire omelet has a beautiful golden-brown color and is cooked through perfectly.

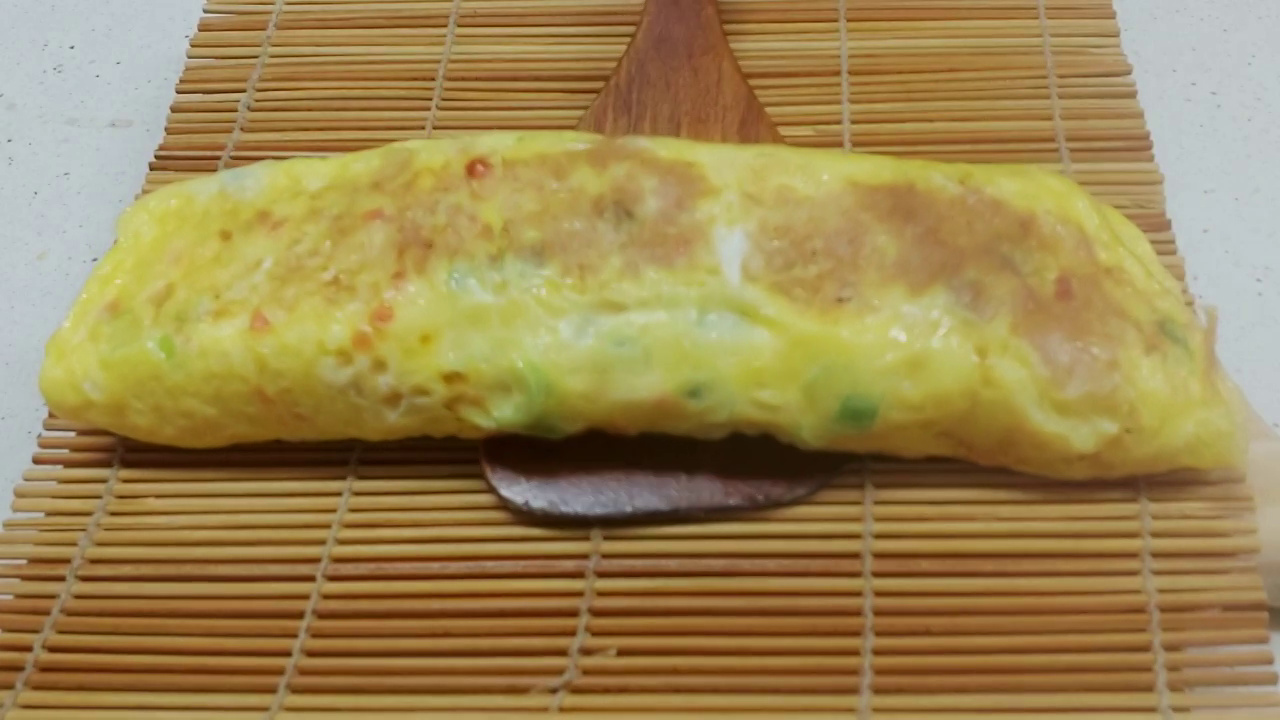
Step 13
Carefully remove the cooked rolled omelet from the pan and place it on a bamboo sushi mat or a cutting board. Using a bamboo mat is helpful for shaping. It’s best to shape it while it’s still warm.

Step 14
Using the bamboo mat or your hands, gently press the omelet to shape it evenly from all sides. Pressing firmly will create a compact, neat shape that holds together well when sliced. This ensures a tidy presentation.

Step 15
Slicing a hot rolled omelet can cause it to crumble and lose its shape as the steam escapes. Allow it to cool slightly until it’s firm enough to slice cleanly. While still warm is fine, letting it cool a bit produces the neatest cuts. Your delicious rolled omelet is now ready!


