Hearty Nurungji and Egg Porridge
Simple Nurungji Egg Porridge: How to Make Nurungji Egg Porridge Cooking Recipe

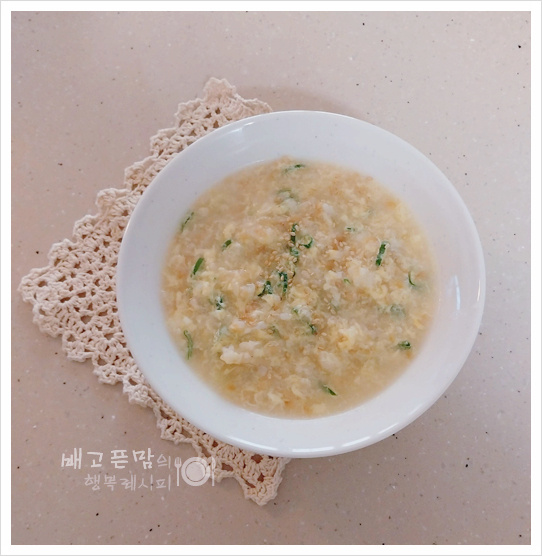
A simple and delicious nurungji (scorched rice) and egg porridge recipe. This recipe uses leftover nurungji, making it extra nutty and satisfying. It’s perfect for a quick and nutritious breakfast or a light meal, as it can be prepared in about 10 minutes without a rice cooker. The delightful combination of soft nurungji, fluffy egg, and aromatic green onions, enhanced by the savory aroma of the nurungji, creates a truly special flavor. It’s a great way to use up leftover nurungji and is also recommended as a snack for children.
Ingredients- 1 cup nurungji (scorched rice crust, approximately 200ml cup)
- 2.5 cups water (approx. 500ml)
- 1 egg
- 1/2 green part of scallion
- 1/2 teaspoon salt
- A drizzle of sesame oil
- A pinch of toasted sesame seeds
Cooking Instructions
Step 1
First, measure 1 cup of nurungji using a 200ml measuring cup and place it into a clean pot. (Tip: Slightly softer nurungji will break down more easily than very hard pieces.)

Step 2
Next, add 2.5 cups of water (approximately 500ml) to the pot using the same measuring cup. The amount of water can be adjusted to your preference.

Step 3
Now, place the pot on the stove over medium-high heat and bring to a boil. Once the water starts boiling vigorously, reduce the heat to medium-low. Cover the pot and let it simmer for about 5-7 minutes, allowing the nurungji to soften and break down.

Step 4
While the nurungji is simmering, crack 1 egg into a separate bowl. Finely chop the green parts of the scallion and add them to the bowl. Add 1/2 teaspoon of salt and gently whisk everything together until well combined.

Step 5
Once the nurungji in the pot has softened sufficiently, use a spatula or ladle to stir and break down the nurungji into a smooth porridge consistency, ensuring there are no large clumps. (Tip: If there are stubborn clumps, mash them with the back of your spoon for an even smoother texture.)

Step 6
Pour the prepared egg mixture in a wide circle around the edges of the pot, over the nurungji porridge. This will help the egg distribute evenly as it cooks.

Step 7
After pouring in the egg, gently stir to prevent the egg from clumping. Stir slowly so that the egg cooks and blends smoothly into the porridge.

Step 8
As the porridge nears completion, turn off the heat and drizzle in a little sesame oil for added aroma. Ladle the finished nurungji and egg porridge into a serving bowl and sprinkle with toasted sesame seeds for a tempting garnish.

Step 9
Enjoy your warm and satisfying nurungji and egg porridge!


