Homemade Black Bean Tofu: A Nutritious Delight
Making Nutritious and Savory Black Bean Tofu

Homemade black bean tofu boasts a nutty flavor and deep richness that’s unparalleled to store-bought varieties. Made with nutritious black beans, this recipe allows you to create delicious and healthy tofu right in your own kitchen. It’s wonderful served warm as is, or paired with spicy kimchi for a satisfying meal.
Tofu Ingredients- 300g Black Beans (large Suri-tae variety)
- 2 liters Water
- 2 Tbsp Nigari (or a homemade brine substitute)
Cooking Instructions
Step 1
The first secret to making delicious tofu is to soak the beans sufficiently. Use at least 5 times the amount of filtered water as beans and soak them for a minimum of 8 hours. I soaked mine for 12 hours. Since you’re soaking the beans for an extended period, it’s best to use purified water or bottled water for hygiene. The water level might decrease as the beans soak, so add a little more water as needed. Typically, soaking them overnight results in perfectly plumped beans by morning.

Step 2
Look at them! The beans have become wonderfully plump and smooth. They seem to have more than doubled in size. These glossy black beans already look incredibly appetizing.

Step 3
Avoid putting too many beans in the blender at once. It’s better to divide the beans into smaller batches for blending. This allows the blender to process them more smoothly and achieve a finer texture.

Step 4
While the beans can be ground on their own, if the mixture seems too thick or isn’t blending smoothly, adding a little water will help create a much creamier and finer soy milk.

Step 5
Use the ‘high’ setting or the strongest speed on your blender to grind the beans until they are very smooth. The finer the beans are ground, the better the texture of the final tofu will be.

Step 6
I’ve blended all 300g of the black beans. I blended them so intensely that the blender motor got quite warm. The resulting soy milk is milky white and beautifully smooth.

Step 7
This is a ‘soy milk bag,’ very useful for making tofu. It strains the soy milk effectively while keeping the bean pulp inside, preventing any leakage. Divide the blended bean mixture into the bag in two portions. If you try to put it all in at once, the soy milk won’t drain well, and it becomes very difficult to squeeze.

Step 8
Place half of the blended beans into the bag and gently press with your hands to extract the soy milk. This requires more force than you might expect. Be sure to press the beans thoroughly, dividing the process into two or three squeezes. I noticed a lot of foam forming, which I initially left in. However, this caused excessive foam later when boiling. It’s advisable to skim off the foam as you extract the soy milk.

Step 9
After squeezing the soy milk out the first time, add a little warm water and squeeze again. The more soy milk you can extract, the more tofu you’ll be able to make.

Step 10
As you can see, there’s quite a bit of foam in the soy milk. This is because I didn’t skim off the foam during the squeezing process. Now, simmer this soy milk for about 20 to 30 minutes. The foam can suddenly rise during boiling. If this happens, adding one tablespoon of perilla oil will help it settle down. If you don’t have perilla oil, you can temporarily remove some of the boiling soy milk and then pour it back in when the foam starts to overflow; this should also help it subside. You don’t need to remove all the foam during boiling.

Step 11
After simmering the soy milk for about 20 minutes, add 2 tablespoons of nigari (coagulant). (For 300g of beans, 2 tablespoons is the right amount!) Stir gently 2-3 times, cover the pot, and let it sit for about 20 minutes. You’ll start to see the soy milk coagulate into soft tofu curds. If you don’t have nigari, you can easily make a brine substitute at home: mix 1 cup of water (paper cup measure), 1 tablespoon of salt, and 1 tablespoon of vinegar. This mixture can be used as a coagulant instead of nigari.

Step 12
While the coagulated soy milk is resting with the lid on, prepare your tofu mold. Line the tofu mold with the cheesecloth or bean curd bag.

Step 13
Carefully pour the coagulated tofu curds into the lined mold. You can still see some foam remaining, as I didn’t remove it all earlier.

Step 14
Place something heavy on top to press the tofu. Tofu molds often come with a wooden lid. Use this lid, place it on top of the curds, and then add a heavy object (like a stone or a bottle filled with water) on top of the lid. Press for at least 30 minutes for firm tofu. I removed mine a little over 20 minutes, which resulted in tofu that wasn’t as firm as I’d hoped. Pressing for the full duration is key.

Step 15
This is the leftover bean pulp after squeezing out the soy milk, known as ‘biji’. Because they are black beans, the pulp is dark in color. Biji is delicious in stews or can be fried into savory pancakes. I’ve stored mine in a zip-top bag in the freezer for later use in various dishes.

Step 16
Here’s the tofu I made, pressed as best as I could. If I had used a heavier weight for a longer time, it would have resulted in a firmer block of tofu.

Step 17
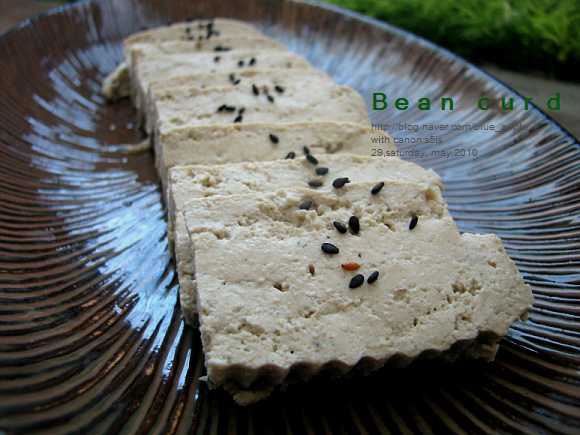
I’ve transferred the finished tofu to a plate. It’s roughly the size of a standard block of tofu. The black bean variety gives it an appealing dark hue.

Step 18
I sliced into the warm, freshly made tofu. I was surprised by its incredibly rich and nutty flavor – it was worth all the effort! My daughters loved it so much they ate it plain. I also tried it wrapped in spicy kimchi, which was a delightful instant treat. The savory tofu and the crisp kimchi created a wonderful harmony. Although you can see some specks of the black bean skins, the overall taste is deeply rich and satisfying, offering a true black bean tofu experience.


