Homemade Choco-Pie with a Special Coffee Cream Twist
Winter’s Sweet Delight: Crafting Homemade Choco-Pies Filled with Marshmallow and Rich Coffee Cream!

The beloved Choco-Pie, a symbol of sharing warmth and affection, can now be made even more special right in your own kitchen! This recipe elevates the classic by adding a decadent coffee butter cream alongside the fluffy marshmallow filling, creating a delightful balance of sweet and subtly bitter notes. Experience a new dimension of flavor with every bite. Let’s embark on a journey into the world of these uniquely crafted Choco-Pies, perfect for sharing heartwarming moments.
Choco-Pie Cake Ingredients- 100g Dark couverture chocolate
- 50g Butter, room temperature
- 2 Eggs, room temperature
- 50g Sugar
- 90g Cake flour (low-gluten flour)
- 20g Cocoa powder
- 3g Baking powder
Cooking Instructions
Step 1
Hello everyone! Today, we’re going to make a special homemade version of everyone’s favorite nostalgic snack, the Choco-Pie. Get ready to experience the fantastic combination of marshmallow and coffee cream with this easy-to-follow recipe!

Step 2
First, let’s prepare the coffee paste for our coffee butter cream. Dissolve 10g of instant coffee granules in a very small amount of hot water. Stir until fully dissolved and then let it cool completely to room temperature.

Step 3
Now, let’s move on to making the Choco-Pie cake batter. In a mixing bowl, combine 100g of dark couverture chocolate and 50g of butter that has been softened at room temperature for at least an hour. Ensure the chocolate and butter are well combined to achieve a smooth consistency.

Step 4
Fill a saucepan with a moderate amount of water and bring it to a gentle simmer over low heat. Place the mixing bowl containing the chocolate and butter over the saucepan to create a double boiler. Gently melt the chocolate and butter, stirring occasionally. Once completely melted and smooth, remove the bowl from the heat and let it cool thoroughly. It’s crucial to let it cool down, as adding it while hot will scramble the eggs!

Step 5
In a separate mixing bowl, crack 2 room-temperature eggs. Using eggs at room temperature is important for achieving the right batter texture. Whisk the eggs until they are well beaten and frothy. While we’re at it, preheat your oven to 180°C (350°F). (Preheating time: 20 minutes)

Step 6
Add 50g of sugar to the whisked eggs and mix well with a whisk until the sugar is completely dissolved and the mixture is uniform.

Step 7
Now, gently incorporate the cooled chocolate-butter mixture into the egg-sugar mixture. Remember, it’s vital that the chocolate mixture is completely cool before adding it. If it’s still warm, the eggs will cook, resulting in an undesirable texture. This is a key step for achieving a soft cake!

Step 8
Sift 90g of cake flour, 20g of cocoa powder, and 3g of baking powder into the chocolate mixture. Sifting the dry ingredients helps to prevent lumps and ensures a smoother batter. Use a spatula to gently fold everything together until just combined and no dry streaks remain. Be careful not to overmix, as this can lead to a tough cake.

Step 9
Voila! Look at this thick, rich chocolate batter. It’s surprisingly simple, isn’t it? Now, transfer this delicious batter into a piping bag. If you don’t have a piping bag, you can use a zip-top bag with a corner snipped off.

Step 10
Line a baking sheet with parchment paper or a silicone mat. Pipe out the chocolate batter onto the prepared sheet in your desired Choco-Pie shapes and sizes. I made some small and some large ones to offer variety. Bake in the preheated oven at 180°C (350°F) for 10 minutes. You’ll notice them puffing up beautifully, filling your kitchen with a wonderful aroma!

Step 11
While the Choco-Pie cakes are baking, let’s whip up the coffee butter cream. In a mixing bowl, place 70g of softened butter (softened at room temperature for over an hour) and cream it until smooth and fluffy using a hand mixer or a whisk. Ensure there are no lumps for a perfectly smooth cream.

Step 12
Add 70g of powdered sugar to the creamed butter. It’s best to add the powdered sugar in two or three additions, mixing well after each addition, until it’s fully incorporated and you have a cohesive cream.

Step 13
Now, add the cooled, concentrated coffee paste we prepared earlier. Mix everything together until well combined. The slightly bitter notes of coffee combined with the richness of butter create a wonderfully balanced cream. Again, make sure the coffee paste is completely cool before adding it!

Step 14
Ta-da! You’ve just made a simple yet incredibly flavorful coffee butter cream. Transfer this delicious cream into another piping bag, ready for assembly. Using a decorative tip will give your Choco-Pies a lovely finish!

Step 15
The Choco-Pie cakes are out of the oven and smell absolutely divine! The sweet scent of chocolate fills the air. Carefully transfer the baked cakes to a wire rack to cool completely. It’s essential they cool down fully before assembling, otherwise, the cream will melt.

Step 16
It’s time to prepare the marshmallow filling, which gives Choco-Pies their signature chewy texture. Place 10 marshmallows in a microwave-safe bowl with 2 tablespoons of water. Microwave for about 40 seconds, or until the marshmallows puff up and become melty. Keep an eye on them to prevent burning.

Step 17
Be cautious, as the melted marshmallows will be very hot! Let the steam escape for a moment, then stir vigorously with a spatula until you achieve a smooth, gooey consistency, similar to thick syrup. This stretchy, gooey marshmallow is perfect for the filling.

Step 18
All our components are ready! Now, it’s time to assemble the Choco-Pies. Take one completely cooled Choco-Pie cake and spread a generous layer of the melted marshmallow onto it. Be gentle to avoid breaking the cake.

Step 19
On the other Choco-Pie cake half, pipe or spread the coffee butter cream. Carefully place it on top of the marshmallow-covered half to create your sandwich. Repeat this process for all remaining cake halves, building delicious Choco-Pies layer by layer.

Step 20
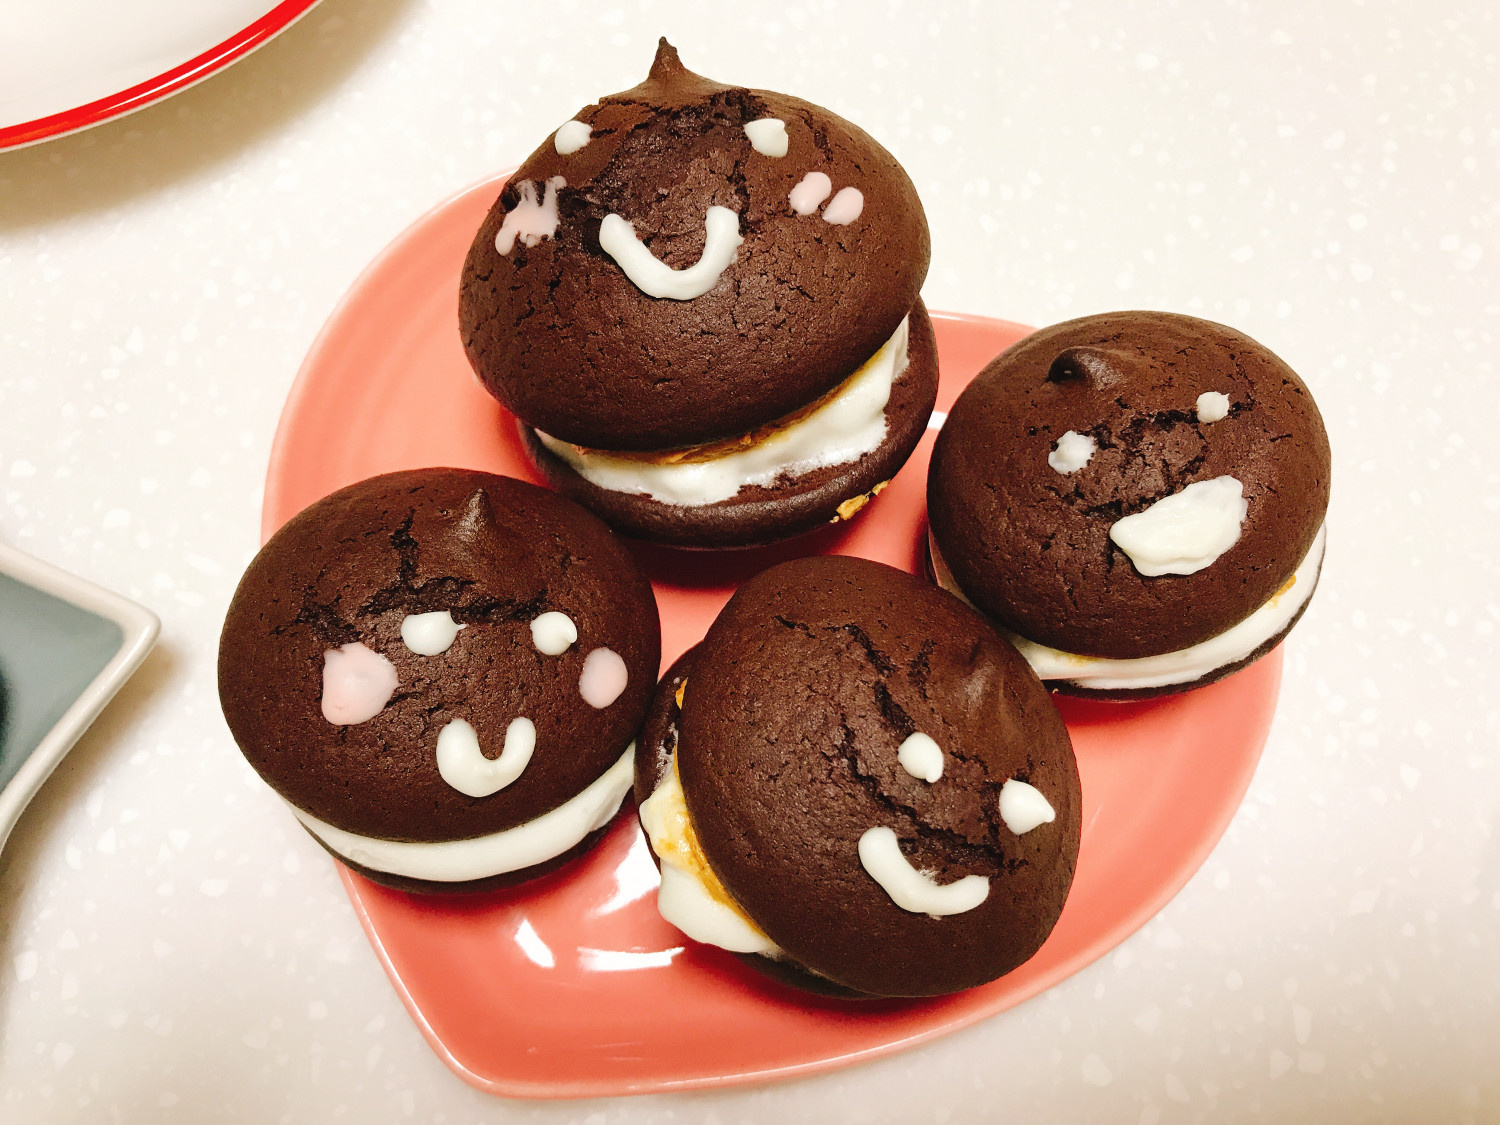
Behold! Your adorable and delicious homemade Choco-Pies are ready! To make them extra fun, especially for kids, I’ve added little faces using edible food markers. They look so cute, you might hesitate to eat them!

Step 21
Homemade Choco-Pies offer an unparalleled softness and moistness compared to store-bought versions. The sweetness of the marshmallow is perfectly complemented by the subtle coffee flavor of the butter cream, creating a rich taste without being overly sweet or cloying. They are absolutely delightful paired with a cup of Americano!

Step 22
These cute-faced Choco-Pies are almost too pretty to eat! But enjoying them is the best way to appreciate the effort. Crafting each one with care adds a special touch that makes them even more delightful.

Step 23
These homemade Choco-Pies are filled with sweetness, cuteness, and warmth, making them a wonderful treat for children or a thoughtful gift for loved ones. This winter, make your gatherings even warmer and sweeter with these delightful homemade Choco-Pies. May your days be filled with sweet happiness!


