Homemade Crispy Oiji (Pickled Cucumbers): Your Perfect Summer Delicacy Guide
#Oiji #CucumberRecipe #PickledCucumber #HomemadePickles #SummerSideDish #OijiSoup #OijiSalad

I remember my mother making pickled radish (jjangji) in late autumn, and we’d enjoy refreshing and savory jjangji cold soup and salad all winter. Come spring, she’d buy cucumbers and pickle them to make oiji, which we’d use for cooling oiji cold soup on hot summer days or as a versatile side dish. Inspired by a YouTube video claiming a simple oiji recipe, I gave it a try. I found the water and salt ratios needed a little adjustment, so I added more salt. It reinforced my belief that using a heavy weight to press down the cucumbers is crucial for perfect oiji! This summer, create a special dining table with your own batch of chewy and delicious homemade oiji.
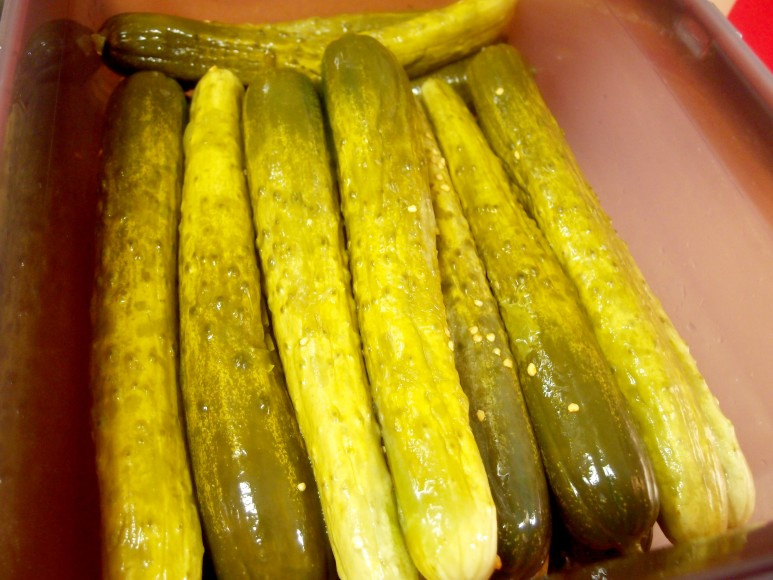
Ingredients- 25 fresh cucumbers
- 700ml water
- 300g coarse salt
- 4 Tbsp chili seeds (or dried chili peppers)
Cooking Instructions
Step 1
First, wash the cucumbers thoroughly under running water. Then, use paper towels to completely dry them. Any remaining moisture can affect the freshness and shelf life of the oiji.

Step 2
In a pot, combine 700ml of water and 300g of coarse salt. Bring to a rolling boil over high heat. Once the salt has completely dissolved, turn off the heat.

Step 3
Place the dried cucumbers snugly into a sterilized airtight container. Sterilizing the container helps to keep the oiji fresh for longer.

Step 4
Allow the saltwater from Step 1 to cool slightly until it’s lukewarm. Dip each cucumber into this lukewarm brine for about 10 seconds. This brief blanching helps maintain the cucumber’s crispness.

Step 5
Arrange the blanched cucumbers neatly back into the sterilized container. Packing them without too much overlap will ensure even pickling.

Step 6
Pour the lukewarm brine over the cucumbers in the container. Ensure there’s enough brine to cover the cucumbers completely.

Step 7
Finally, add 4 tablespoons of chili seeds. Chili seeds are excellent for removing any fishy smell from the cucumbers and the slightly ‘pickled’ odor that can develop. If you don’t have chili seeds, crushed dried chili peppers can be used as a substitute.

Step 8
Place a pressing lid or plate on top of the cucumbers to weigh them down. Let them ferment at room temperature for about 3 days. During this period, a lot of liquid will be released from the cucumbers. It’s crucial to use heavy objects, like four 2-liter water bottles, to press down firmly. Proper weighting ensures even pickling and prevents under-fermentation or spoilage.

Step 9
After 3 days, you should see that the cucumbers have turned a nice yellow color, indicating they are well-fermented. (A personal note: I felt that using an even heavier weight, like a clean and sterilized stone, might have yielded even better results. Perhaps my mother’s method of using a heavy stone was the best approach after all. It’s a reminder that not all online recipes are perfect!)

Step 10
Carefully transfer the fermented oiji to another clean container. Re-boil the brine that was collected from the oiji. This time, you will let the brine cool down completely.

Step 11
Pour the completely cooled brine over the oiji in the new container. Place the pressing lid back on, and then refrigerate in a kimchi refrigerator for another 3 days. (Total fermentation: 3 days at room temperature + 3 days in the kimchi refrigerator = 6 days).


