How to Boil Dried Radish Greens (Siraegi): The Key to Delicious Korean Dishes
Mastering the Art of Boiling and Storing Dried Radish Greens (Siraegi) for Maximum Flavor and Tenderness

Hello, everyone! ‘Bap-sim’ is strength, and delicious food fuels us! Have you ever wondered about the nutritious and flavorful dried radish greens, known as ‘Siraegi’ in Korean? These sun-dried radish leaves are packed with essential nutrients like dietary fiber, vitamins, minerals, and calcium. In particular, the high fiber content, making up over 35% of Siraegi, helps lower cholesterol, preventing heart disease, and promotes a feeling of fullness, which is great for weight management. Additionally, beta-carotene and chlorophyll act as powerful antioxidants, combating free radicals and contributing to anti-aging benefits. With their rich, savory flavor, Siraegi can be transformed into a variety of dishes, including side dishes (namul), soups, stews, rice, and porridge, making your meals more exciting. Today, I’ll guide you through the best method for boiling Siraegi to achieve ultimate tenderness and flavor, along with tips for storing them fresh for longer. Follow these steps, and you’ll unlock a whole new world of delicious Siraegi cuisine!
Main Ingredients- 10 bundles of dried radish greens (Siraegi)
- 4 Tbsp sugar
- Water (enough to fully cover the Siraegi)
Cooking Instructions
Step 1
1. Boiling Siraegi for Tenderness: First, dried Siraegi can easily crumble if stored improperly, so boiling and storing it right away is a much better approach. Begin by rinsing the dried Siraegi once under running water. This will help remove any dust or impurities.

Step 2
Soak the Siraegi in warm water. Prepare lukewarm water (around 40°C or 104°F) by mixing boiling water with cold water. Submerge the rinsed Siraegi in this water and let it soak for about 30 minutes. This step softens the Siraegi, significantly reducing the boiling time.

Step 3
As the Siraegi hydrates, you’ll notice a slightly greenish hue in the water. This is a natural occurrence as some of the Siraegi’s compounds are released, so there’s no need to worry.

Step 4
Now, let’s start boiling. It’s best to use a large pot for this. Fill the pot with enough cold water to completely cover the Siraegi. Add 4 tablespoons of sugar and stir until fully dissolved. Adding sugar helps the Siraegi become tender faster due to osmosis and also neutralizes any undesirable grassy or gamey flavors. Bring the water to a boil over high heat, then reduce to medium-low heat and simmer for about 40 minutes. Keep an eye on the water level to prevent the Siraegi from sticking or burning.

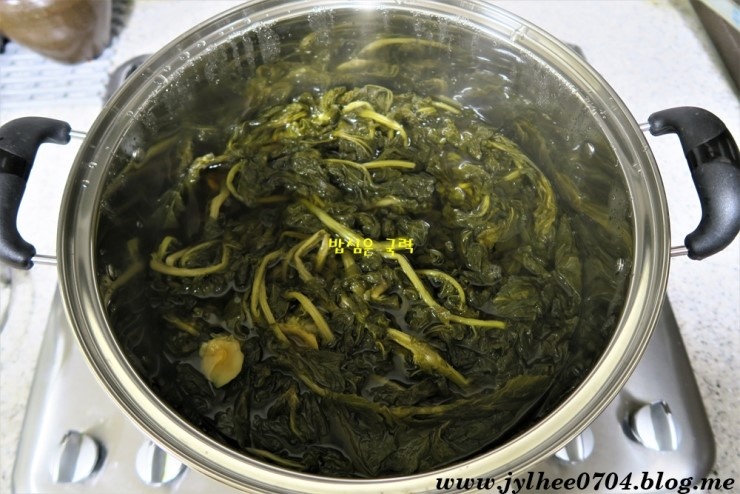
Step 5
After boiling for 40 minutes, the Siraegi will be soft and pliable, like this. Be careful not to overcook it; it’s ready when a chopstick or fork can easily pierce through it.

Step 6
Instead of removing the Siraegi, keep it in the pot, cover it with the lid, and let it steam in the water until the water has completely cooled down. This resting period allows the Siraegi to become even more tender and absorb more flavor.

Step 7
This step is crucial for removing any remaining bitterness or strong smell from the Siraegi. Drain the water from the pot, fill it with fresh cold water, and let the Siraegi soak for about 3-4 hours. Changing the water once during this period will enhance the deodorizing effect. This process helps to refine the Siraegi’s taste.

Step 8
2. Storing Siraegi Freshly: After boiling and draining, it’s best to leave a little moisture on the Siraegi for freezing. Don’t squeeze it completely dry; just gently press it with your hands to remove excess water. A bit of moisture will prevent it from drying out in the freezer and help maintain its freshness.

Step 9
To ensure a tender texture when cooked, it’s important to remove the tough fibers. Bend the thicker stem parts of the Siraegi. If you feel tough fibers, pull them away gently. This process will make the cooked Siraegi much softer and more enjoyable to eat.

Step 10
On the left, you see Siraegi before removing fibers, and on the right, after the fibers have been neatly removed. You can visually tell that it’s much softer.

Step 11
Now, cut the Siraegi into manageable pieces. Cutting them into lengths of about 4-5 cm (1.5-2 inches) is generally convenient for various dishes like soups, stews, or side dishes.

Step 12
Portion the prepared Siraegi into freezer bags or airtight containers and store them in the freezer. This way, you can easily grab a portion whenever you want to cook a delicious Siraegi dish. Properly frozen Siraegi can retain its freshness for about 3-4 months.


