How to Make Yellow Plum Elixir: Capturing the Fragrant Flavor of Plums
Making Yellow Plum Elixir (Maesil Cheong), Plum Extract, How to Ferment Yellow Plums, and Storing Plum Elixir

Here’s the plum elixir I made last year! Let’s learn how to make plum extract, how to prepare yellow plum elixir, and the best methods for storing your homemade plum elixir. Enjoy the healthy and delicious taste of homemade plum goodness!
Plum Elixir Ingredients- 30kg Yellow Plums
- 30kg Unrefined Cane Sugar (Non-GMO Sugar)
Cooking Instructions
Step 1
Thoroughly wash the earthenware jar you’ll use for making plum elixir, and ensure it’s completely dry. Letting it air dry in the sun is the best way to remove all moisture, setting the stage for a perfectly fermented elixir.

Step 2
Prepare 30kg of organic yellow plums and 30kg of unrefined cane sugar to sweeten the elixir. (Note: This recipe is based on plum elixir prepared last year.)

Step 3
Place the yellow plums in a large bowl and rinse them thoroughly under running water. I gave them a first rinse with plain water, a second rinse with baking soda sprinkled on and rubbed gently, and a final rinse with water mixed with vinegar. Even though they are organic, a meticulous wash ensures peace of mind.

Step 4
Drain the washed yellow plums in a colander and let them air dry completely. Using a fan can speed up the drying process significantly. I washed them in the evening and let them dry overnight, starting the elixir preparation the next morning.

Step 5
Once the plums are dry, use toothpicks to carefully remove the stems from each plum. It’s important to remove stems and any remaining fuzz, as these areas can easily harbor bacteria.

Step 6
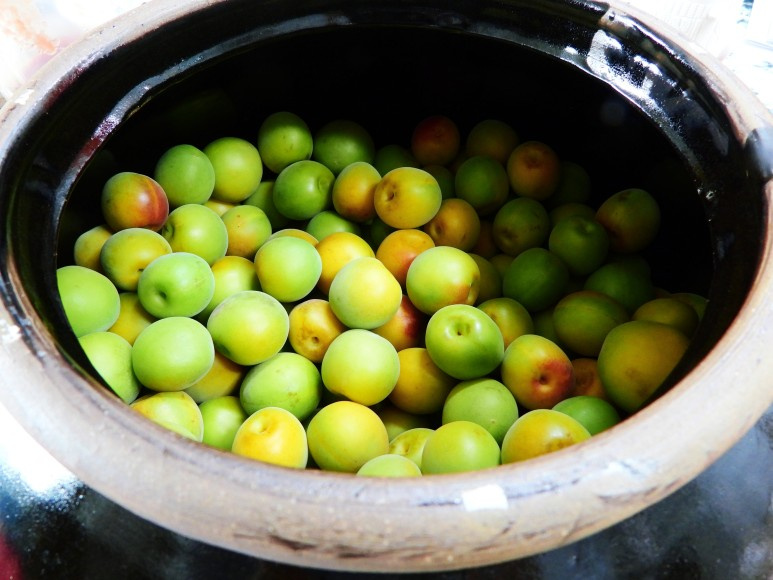
Place the stemmed yellow plums carefully into the prepared earthenware jar.

Step 7
Pour 10kg of unrefined cane sugar over the plums. While it’s common to layer plums and sugar, you can also pour them in this manner. The sugar might appear clumpy at the bottom, but it will dissolve naturally over time.

Step 8
Add another 10kg of yellow plums to the jar, layering them.

Step 9
Pour in another 10kg of unrefined cane sugar. While traditionally layered, adding them in bulk like this is also acceptable. Some sugar might clump at the bottom, but stirring occasionally will help it dissolve.

Step 10
Earthenware jars breathe, so tightly sealing the opening with plastic wrap and securing it with twine is sufficient. Be sure to write down the date you prepared the plum elixir. This helps you keep track of when it was made and estimate when it will be ready to consume after a year.

Step 11
This completes the preparation for 20kg of yellow plum elixir. Plum elixir made with the seeds intact will have significantly reduced toxicity after about a year, making it safe to consume. If you remove the seeds and ferment only the flesh, it can be consumed sooner.

Step 12
For the remaining 5kg of yellow plums, I’ll separate the flesh from the seeds and ferment them separately. Any bruised or overripe plums are sorted out and the flesh is used, while the fresh, firm plums are fermented whole with their seeds.

Step 13
Mix the yellow plum flesh (with seeds removed) with unrefined cane sugar in a 1:1 ratio. While you can reduce the sugar slightly, a 1:1 ratio is recommended for safety and proper preservation. Ensure the flesh and sugar are thoroughly mixed.

Step 14
Cover the opening securely with plastic wrap. Stir periodically to help the sugar dissolve completely. As the sugar dissolves, the plum’s flavor and aroma will deepen.

Step 15
This is the yellow plum elixir I made last year. Following the method shared by Master Hong Ssang-ri, the plum pieces have become perfectly round, like golden orbs, and are wonderfully fermented! While some may shrivel slightly, the plump, golden-orb plums are truly beautiful and delicious!

Step 16
It’s said that if you leave the plums and sugar untouched for a year without stirring, the shriveled plums will reabsorb moisture and plump up like these golden orbs. They look appealing and taste fantastic, making them enjoyable to eat as is, or mixed into yogurt, juices, or sodas for an enhanced flavor experience.

Step 17
Store the plum elixir made with only the separated flesh in clean glass jars. After about 3 months of fermentation, the plum flesh becomes chewy and the elixir is wonderfully sweet and sour. It’s perfect for mixing into yogurt, making into jam, or enjoying as a refreshing plum ade.


