Keep Your Apples Fresh Longer! The Ultimate Guide to Washing and 3 Storage Methods
Enjoy Your Seasonal Apples Crispy for Weeks with These 3 Perfect Washing and Storage Secrets

Discover how to keep your apples, whether gifts or groceries, as fresh and crisp as the day you got them. This guide provides detailed instructions on everything from proper washing techniques to effective storage using newspaper, plastic wrap, and even plastic bags. Unlock the secrets to enjoying your apples for longer!
Key Ingredients- 5 fresh apples
Cooking Instructions
Step 1
Apples are in season right now, meaning you might receive many as gifts or buy them in bulk because they’re so delicious. Proper storage is crucial to enjoying them at their best, crispest state from start to finish. Today, we’ll cover everything from a basic apple washing method to three different storage techniques that will keep your apples fresh for a long time. Let’s dive in!

Step 2
First, we’ll begin with washing to thoroughly remove any pesticides or surface impurities. Sprinkle baking soda generously over the apples. Then, gently rub the surface of the apples with your hands or a soft kitchen towel. Baking soda helps absorb surface contaminants. After this gentle scrub, rinse the apples thoroughly under running water 2-3 times.

Step 3
Next, for an even deeper clean, we’ll use vinegar. Fill a bowl with clean water and submerge all the apples. Add about 1-2 tablespoons of vinegar to the water. Let the apples soak in this vinegar solution for at least 10 minutes. The acidity of the vinegar is effective at removing residual pesticides. After soaking, rinse the apples again under running water 2-3 times to ensure no vinegar residue or smell remains.

Step 4
Rinse the apples thoroughly under running water 2-3 more times. This step is essential to completely remove any lingering traces of vinegar or any other potential impurities.

Step 5
After washing, it’s vital to remove all excess moisture. Pat the apples completely dry using kitchen towels or a clean, dry cloth. Any remaining moisture can cause the apples to soften or spoil quickly, so ensuring they are as dry as possible is key for good storage.

Step 6
For the storage method using newspaper, it’s best not to wash the apples beforehand. The natural waxy coating on the apple’s skin helps prevent moisture loss, which contributes to keeping them fresh longer. Therefore, this method is not suitable for washed apples.

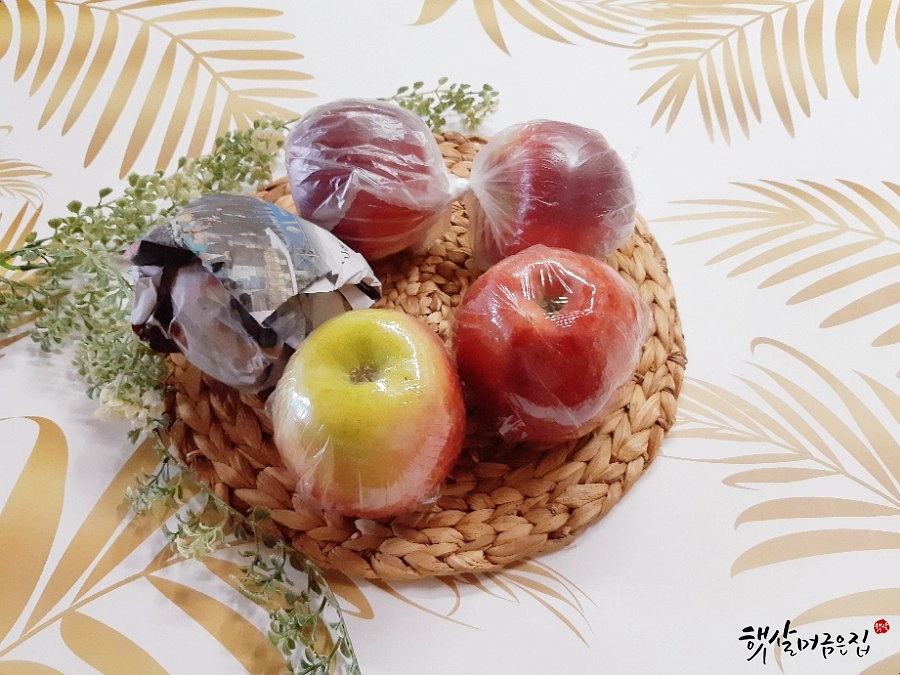
Step 7
Our second storage method involves using plastic wrap. Take your thoroughly dried apples and wrap each one individually and meticulously with plastic wrap. Ensure the wrap is sealed tightly with no gaps. This minimizes contact with air, which is very effective in preserving freshness and preventing the spread of ethylene gas that causes ripening.

Step 8
The third method uses a plastic bag. Place one dried apple into a clean plastic bag and loosely tie the opening. Then, place another apple on top of the first one inside the bag, and tie the bag securely again. This method involves storing two apples together in one bag.

Step 9
By storing them this way, you can enjoy the apples’ signature crisp texture and fresh taste for a long time, even after several weeks. Utilize these different storage methods to savor your apples at their delicious best!


