Mastering Steak: Perfect Searing and Plating
Elevate Your Home Cooking: A Detailed Guide to Grilling and Plating Steak

There are those days when a thick, juicy beef steak is all you crave, and today was one of those days for me! I’m not entirely sure if it’s my body or my taste buds calling for it, but my decision was to order up some delicious steak. So, I decided to go fancy and grill a steak myself, complete with an artful plating. It’s funny how when others present a beautifully arranged dish, it seems achievable, but when I try it myself, it suddenly becomes so challenging… But don’t worry! Based on my own experiences and a few mishaps, I’m here to guide you through the process of grilling a perfect steak and plating it beautifully, ensuring success even for beginners.
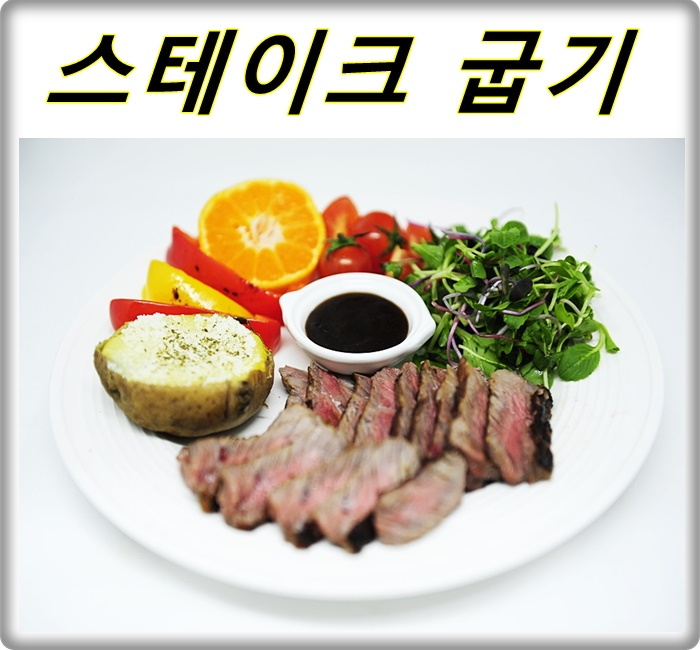
Ingredients- 1-2 servings Korean beef sirloin (about 2-3 cm thick)
- 1-2 Tbsp butter
- 1/2 bell pepper (use various colors for visual appeal)
- 1 cooked potato (mashed or whole)
- A handful of baby greens (for salad)
- 3-4 cherry tomatoes
- Steak sauce, to taste
- 1 tangerine (for garnish)
Cooking Instructions
Step 1
The key to a perfect steak is those beautiful grill marks! To achieve this, start by preheating your pan until it’s smoking hot. You want the pan to be thoroughly heated, so wait until you see wisps of smoke rising. (Though it’s hard to see in the photo, I waited until the pan was smoking!)

Step 2
Typically, you’d melt some butter in the pan before adding the steak to infuse it with flavor. Oh dear, I just realized while writing this post that I forgot to add the butter first! (How could I forget such a crucial step? ㅠ.ㅠ)

Step 3
Oh no… I burnt this expensive cut of meat! ㅠ.ㅠ It’s definitely overcooked. I placed the steak in the pan and got distracted with preparing the plating, and this is what happened. Where are those grill marks I envisioned? Darn it!

Step 4
My goal was to grill it to a perfect medium, somewhere between blue rare, rare, medium rare, medium, medium well, and well done. But as I was cooking, it turned into medium well. I’ll aim for my target doneness next time!

Step 5
After grilling the steak, the ‘resting’ period is crucial. Cover the steak with a paper towel and let it rest for about 3 to 5 minutes. This resting time allows the juices to redistribute throughout the meat, resulting in a more tender and flavorful steak.

Step 6
It wasn’t until after I finished cooking the steak that I remembered I was supposed to grill the bell peppers alongside it. So, I reduced the heat significantly and cooked the bell peppers until they were nicely charred.

Step 7
Originally, I planned to slice the steak with beautiful grill marks intact. However, since it was overcooked, I decided to slice it and then plate it. Honestly, I actually prefer slicing all my steak before eating anyway, rather than cutting it as I go. Feel free to serve it whole or sliced, according to your preference!


