Mouthwatering Yukjeon (Korean Pan-Fried Beef)
Easy & Delicious Yukjeon Recipe from ‘Soo Mi’s Side Dishes’

I was re-watching a TV show when my daughter saw how simple and delicious-looking this dish was and asked me to make it! So, I decided to follow along and give it a try myself. The tender yukjeon paired with the tangy dipping sauce is an absolute delight.
Yukjeon Ingredients- 300g Top Blade Steak (or similar tender cut)
- 3 Tbsp Sweet Rice Flour
- 1/4 Onion
- 1 handful Chives
- Pinch of Salt
- Pinch of Black Pepper
- 2 Eggs
- Generous amount of Canola Oil
Simple Dipping Sauce- 5 Tbsp Vinegar
- 2 Tbsp Soy Sauce
- 2 tsp Mustard Paste
- 5 Tbsp Vinegar
- 2 Tbsp Soy Sauce
- 2 tsp Mustard Paste
Cooking Instructions
Step 1
First, prepare the beef. Lay two sheets of paper towel flat on your work surface, then place the slices of beef on top, ensuring they don’t overlap.

Step 2
Cover the beef slices with another layer of paper towel. Gently press down to absorb as much blood as possible. Properly draining the blood is key to a clean, fresh flavor without any gamey taste.

Step 3
Once the blood is drained, sprinkle black pepper evenly on both sides of the beef slices. This seasoning will help neutralize any unwanted odors.

Step 4
Next, lightly season with salt. Be careful not to add too much; a gentle sprinkle is all you need to enhance the beef’s natural flavor.

Step 5
Now it’s time to coat the seasoned beef. Place the beef slices on a plate and have your sweet rice flour ready.

Step 6
Sprinkle the sweet rice flour generously over both sides of the beef, ensuring an even coating. This flour coating will make the yukjeon delightfully crispy and nutty. Gently shake off any excess flour.

Step 7
Next, prepare the egg wash. Crack two eggs into a bowl. Remove the chalazae (the white stringy bits) and whisk gently until smooth. No need to whisk vigorously.

Step 8
Dip the flour-coated beef slices into the egg wash, ensuring they are coated on all sides. Aim for a thin, even layer of egg wash.

Step 9
With the egg wash coating complete, the beef is ready for frying. Let’s get the pan heated.

Step 10
Heat a frying pan over medium heat and add a generous amount of canola oil. Carefully place the egg-coated beef slices into the hot oil. Avoid overcrowding the pan; leave some space between each slice to ensure even cooking and prevent sticking.

Step 11
Reduce the heat to low. Cooking yukjeon on high heat can burn the outside before the inside is cooked. Use low heat for gentle, even cooking. Fry each side for about 1-2 minutes, flipping only once per side. Overcooking can make the beef tough, so watch it closely.

Step 12
While the yukjeon is cooking, prepare the vegetables. Thinly slice the onion and cut the chives into roughly 3-4 cm lengths. Cutting them too long might make rolling difficult.

Step 13
Arrange the cooked yukjeon neatly on a large plate or cutting board. It’s best to work while they are still warm, as they might lose their shape if they cool down too much.

Step 14
Neatly place the sliced onions and cut chives on top of each piece of yukjeon. Don’t overfill, as too many vegetables can cause the yukjeon to unroll or burst.

Step 15
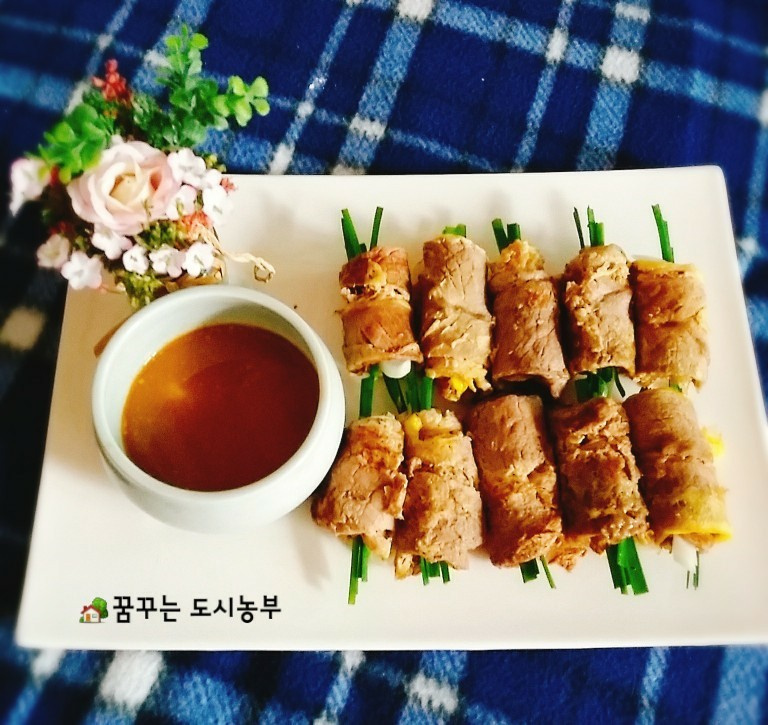
Now, carefully roll up the yukjeon, enclosing the vegetables. Roll them gently but firmly, similar to making a sushi roll, to keep the filling contained without crushing the beef.

Step 16
Once all the yukjeon rolls are complete, it’s time to make the delicious dipping sauce. Combine all the sauce ingredients in a small bowl.

Step 17
Whisk together 5 Tbsp vinegar, 2 Tbsp soy sauce, and 2 tsp mustard paste until well combined and smooth. This creates a perfectly balanced tangy and slightly spicy dipping sauce. Feel free to adjust the amount of mustard to your preference.


