Mujojeong (Radish Honey Syrup) for Soothing Coughs and Airways
Making Mujojeong: A Tea Beneficial for Colds and Airways

I’m sharing a recipe for Mujojeong, a tea that’s excellent for your airways! My parents tend to have weaker respiratory systems, which has always been a concern for me. I’ve gifted them bellflower root tea and pear-bellflower juice before, but one day I read that Mujojeong is very good for the airways. So, I decided to make this tea, which is great for the throat and airways, for both sets of parents! This recipe is made with care to show my affection.
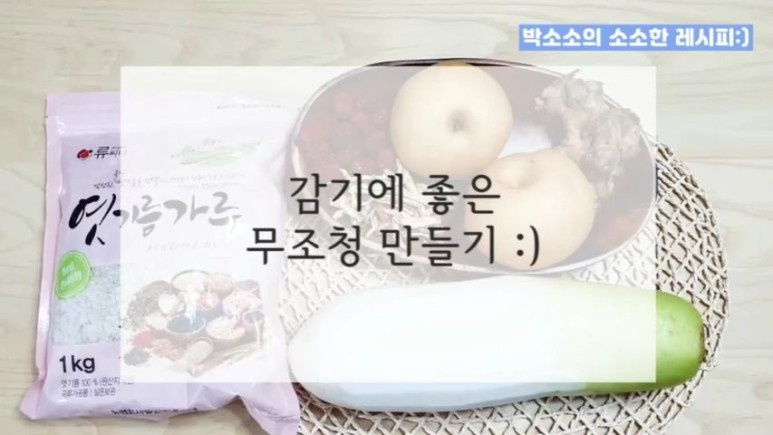
Ingredients- 1 Korean radish (medium-sized)
- 1 piece of ginger (thumb-sized)
- Approx. 300g dried jujubes (dates)
- 2 pears (medium-sized)
- 500g malted barley powder
- Approx. 3-4 servings of rice (for firm cooked rice)
Cooking Instructions
Step 1
First, prepare all the ingredients needed for making Mujojeong. Wash them thoroughly and prepare them according to their specific needs. This is the crucial first step.

Step 2
For the radish, ginger, and pear, it’s best to slice them thinly. This makes them easier to mash later, whether you use a blender or a mortar and pestle. Slicing them thinly also helps the flavors to infuse better when cooked.

Step 3
While traditional recipes might use bellflower root, here we’re adding a subtle flavor using readily available bellflower root tea bags. Steep the tea bags in cold water for about a day to create a concentrated infusion. This adds a delicate aroma and benefits of bellflower root.

Step 4
After washing the dried jujubes, make several small slits with a knife. This will help their sweet flavor and aroma to infuse more readily into the liquid and makes them easier to mash later.

Step 5
Cook the rice in a rice cooker until it’s firm and slightly dry (godubap). This type of rice holds its shape better when fermented. While the rice is cooking, soak the 500g of malted barley powder in lukewarm water. Gently knead it to release the malted barley liquid. It’s best to use only the clear liquid from the top to avoid a grainy texture.

Step 6
Now, combine all the main ingredients for Mujojeong in a large pot. Add the thinly sliced radish, ginger, pear, and the slit jujubes. Pour in the steeped bellflower root tea and enough fresh water to cover the ingredients. Bring to a boil over high heat, then reduce to medium-low and simmer until all ingredients are very tender, about 30 minutes to an hour.

Step 7
Once the ingredients are thoroughly cooked and soft, mash them finely using a blender or a mortar and pestle until smooth. Ensure there are no large chunks. Add the cooked firm rice and the filtered malted barley liquid to the mashed mixture. Stir everything together thoroughly, ensuring the rice grains are well dispersed in the liquid.

Step 8
Transfer the mixture to a rice cooker and set it to the ‘keep warm’ mode for about 8 hours. During this fermentation process, the ingredients will develop a natural sweetness and a comforting aroma. You’ll notice the color deepening and a pleasant, slightly nutty scent, similar to the photo. Stir occasionally to prevent the rice from clumping.

Step 9
After 8 hours, let the mixture cool slightly so it’s safe to handle. Place a sieve over a bowl or pot, and line it with a cheesecloth or fine-mesh sieve. Carefully pour the fermented mixture into the cloth and strain the liquid. Squeeze firmly to extract as much of the clear Mujojeong liquid as possible. It’s safer to do this after it has cooled down a bit, as the mixture can be quite hot.

Step 10
Pour the strained Mujojeong liquid back into a pot. Gently simmer it over medium-low heat, stirring constantly with a wooden spoon to prevent it from sticking to the bottom. Slow simmering is key to developing a rich flavor without scorching.

Step 11
Continuously check the consistency as it simmers. Once it reaches your desired thickness, turn off the heat. Carefully pour the hot syrup into pre-sterilized glass jars. You can adjust the consistency to your preference; I prefer it to be moderately thick, so it slowly drizzles off a spoon.

Step 12
I made a generous amount, but it seems my jars were a bit too small to fill completely! Despite that, it looks and feels so rewarding. Diluted with warm water, it’s soothing for the throat and great for preventing colds. It’s a wonderful homemade health tonic for your family!


