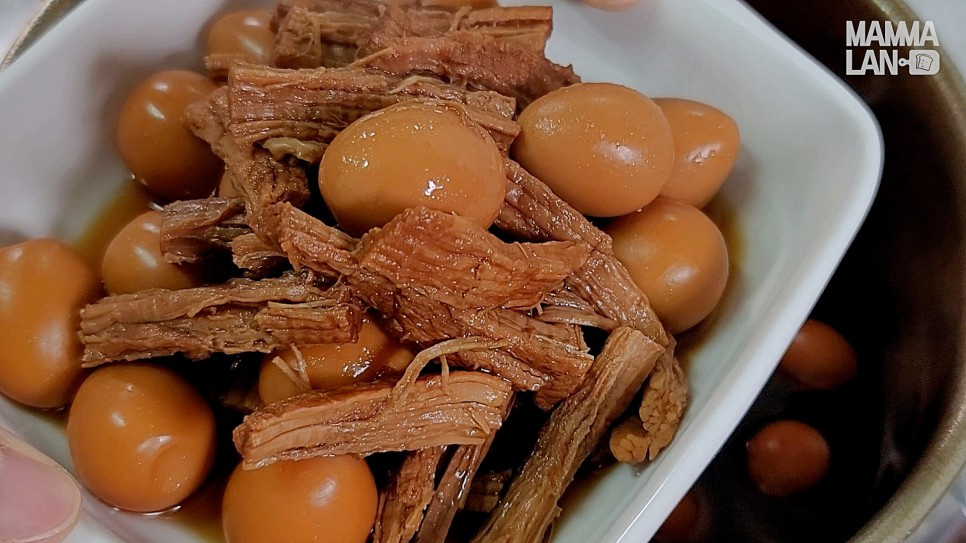
Nutritious Beef and Quail Egg Soy Sauce Braised Dish
Easy Recipe for Beef and Quail Egg Jangjorim: The Ultimate Rice Companion!

Introducing a beloved classic side dish for the whole family: Beef and Quail Egg Jangjorim! This dish features the perfect harmony of tender beef and popping quail eggs. Made in advance, it makes for a satisfying staple side that children especially adore for its savory and sweet flavor, guaranteed to make them finish their rice bowls in no time! We’ll reveal the secrets to this simple yet deeply flavorful recipe!
Main Ingredients- 400g Beef Rump (for Jangjorim)
- 360g Quail Eggs (hard-boiled and peeled)
- 1 stalk Green Onion
- 5 cloves Garlic
Cooking Instructions
Step 1
Prepare all the ingredients for making delicious Beef and Quail Egg Jangjorim. It’s convenient to have the quail eggs pre-boiled and peeled.

Step 2
Rinse the beef rump under running water and gently pat it dry with paper towels to remove any surface blood. (In this recipe, we’re not soaking to remove blood; we’ll boil it directly. However, if you prefer to soak, you can submerge it in cold water for about 30 minutes before proceeding.)

Step 3
Fill a pot with plenty of water and bring it to a boil. Once boiling, add the prepared beef and boil for about 10 minutes. This step helps remove impurities and tenderizes the meat.

Step 4
After boiling for 10 minutes, you’ll notice that the surface of the beef has turned white and is cooked. It’s time to take it out.

Step 5
Rinse the boiled beef under cold running water to remove any remaining impurities or excess fat. This ensures a cleaner-tasting Jangjorim.

Step 6
In a clean pot, pour in 1.5 liters of water, which will serve as the base for the braising liquid. This generous amount of water will allow the ingredients to simmer and reduce beautifully.

Step 7
Now, add the rinsed beef to the pot. It will simmer along with the liquid, contributing to a tender texture.

Step 8
This is the key to achieving the rich flavor of Beef Jangjorim! Add 1 cup of soy sauce, 1/2 cup of sugar, and 4 tablespoons of mirin. For added aroma, toss in the piece of kelp, the whole stalk of green onion, and the whole garlic cloves. Bring this mixture to a gentle boil to create a flavorful broth.

Step 9
Rinse the pre-boiled and peeled quail eggs under running water and add them to the pot. As they simmer in the braising liquid, they will absorb the delicious soy sauce flavor.

Step 10
Now, cover the pot and let it simmer gently over medium-low heat for about 40 minutes. Stir occasionally to prevent sticking or burning. It’s crucial during this stage for the quail eggs to fully absorb the flavors. (This is the longest cooking step in the recipe.)

Step 11
After about 40 minutes of simmering, remove the ingredients that need to be set aside. Take out the tender beef, fragrant green onion, whole garlic cloves, and kelp. Place them on a plate or in a sieve.

Step 12
Once the beef has cooled slightly, shred it by hand along the grain into bite-sized pieces. Shredding the beef allows it to absorb the seasoning even better, resulting in a more flavorful dish.

Step 13
Return the shredded beef to the pot with the remaining braising liquid. Simmer for another 5 minutes, ensuring the shredded beef is well-coated in the sauce. This allows the flavors to penetrate deeply into the meat.

Step 14
Voilà! Your delicious Beef and Quail Egg Jangjorim, the ultimate rice companion, is finally ready. It looks incredibly appetizing!

Step 15
The perfectly balanced sweet and savory soy sauce flavor has beautifully infused the quail eggs and beef, making it look absolutely delicious. Served over warm rice, it’s pure bliss! Now all that’s left is to enjoy this delightful dish!


