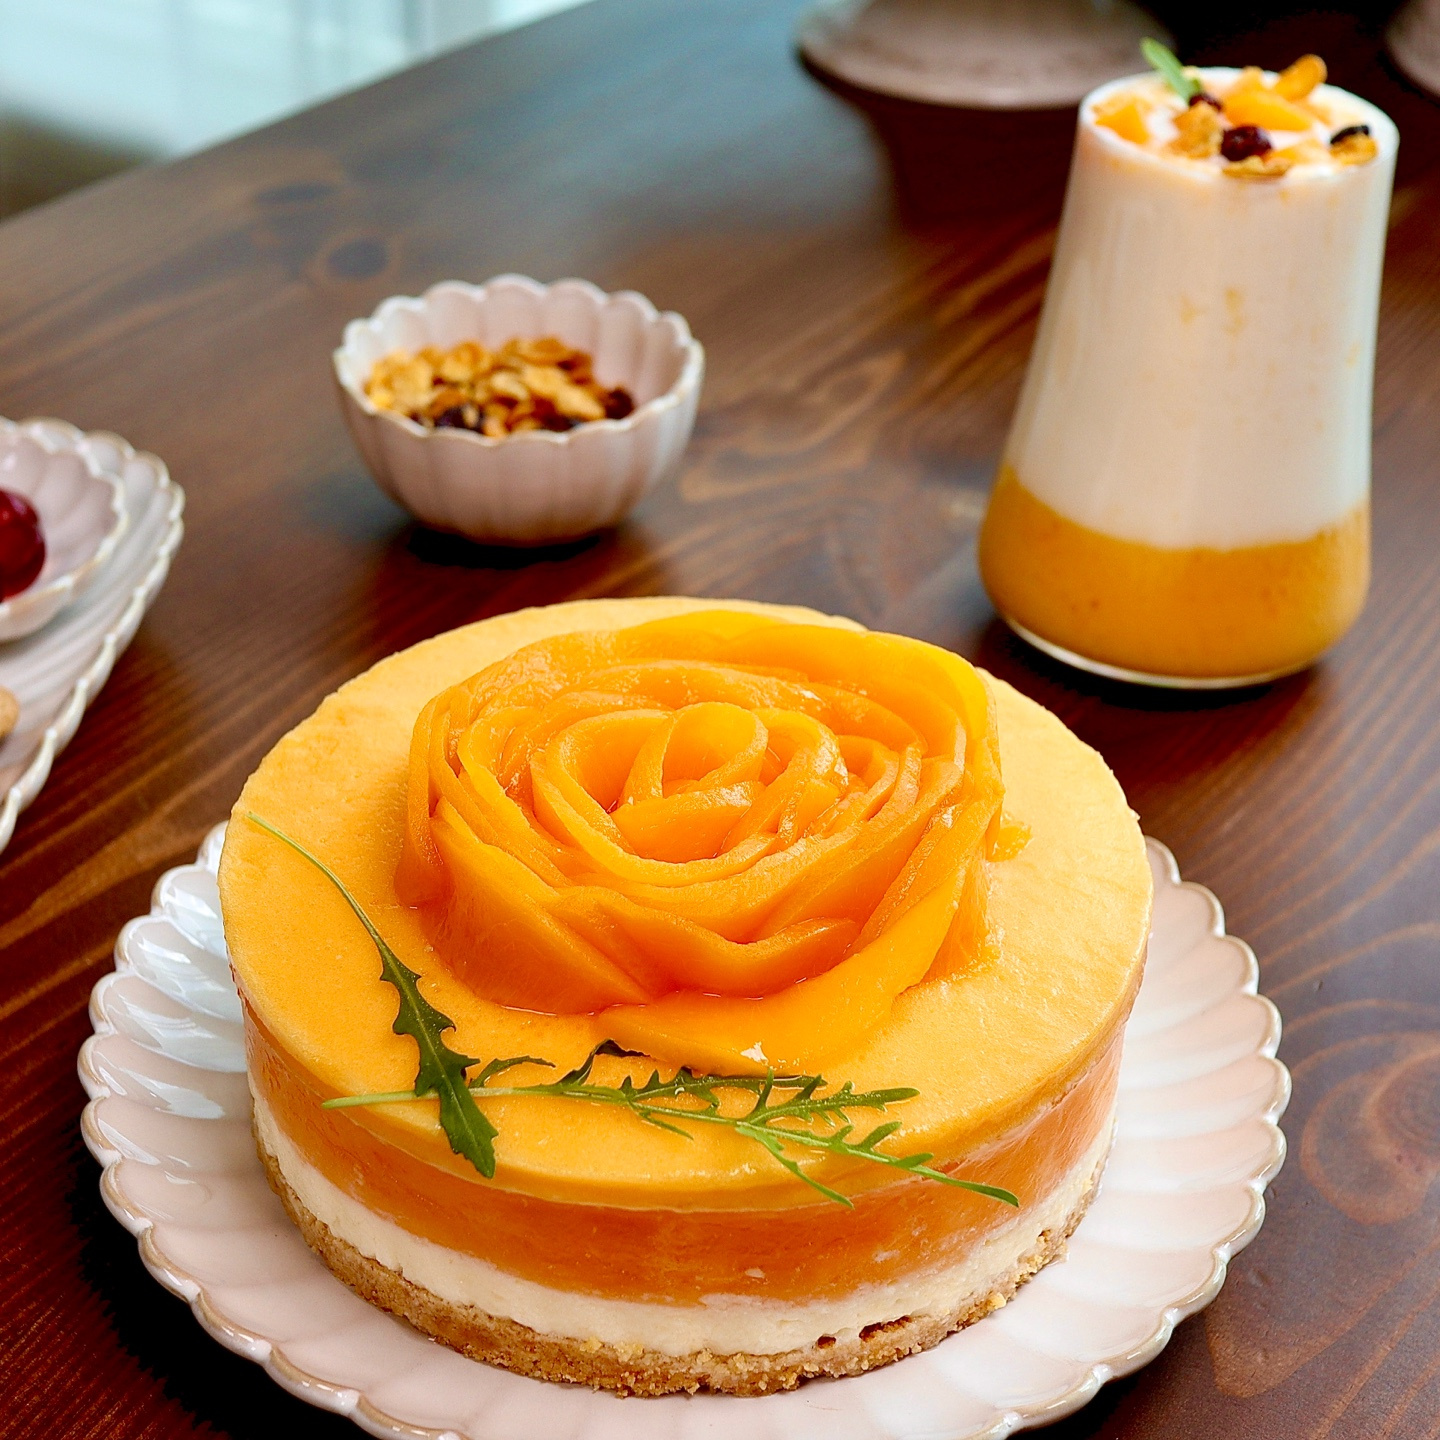
Peachy Delight: No-Bake Canned Peach Cream Cheese Cake
Effortless No-Bake Cake Using Canned Peaches and Cream Cheese

Create a delightful cake without any baking, perfect for any occasion, using easily accessible canned peaches. This cake offers a harmonious blend of tartness and sweetness, boasting a smooth, jelly-like texture that pairs wonderfully with the summer season. Enjoy this refreshing dessert!
Cake Base- 1 package Oreo cookies (approx. 100g)
- 30g unsalted butter, melted
Cooking Instructions
Step 1
Let’s begin by making a sweet and refreshing no-bake cake using canned peaches. You’ll be amazed at how wonderful this dessert turns out without any oven time!

Step 2
Carefully separate the cream filling from the Oreo cookies. Set the cream aside for later use.

Step 3
Place the separated Oreo cookies into a ziplock bag or a clean plastic bag.

Step 4
Using a rolling pin, the bottom of a glass, or similar tool, crush the cookies into fine crumbs. Aim for a consistent, sandy texture without large chunks.

Step 5
Add the melted 30g of unsalted butter to the crushed Oreo crumbs. Mix thoroughly until the butter is evenly incorporated, resembling the texture of wet sand.

Step 6
Prepare your cake mold (a 15cm or 18cm springform pan is recommended).

Step 7
Pour the Oreo and butter mixture into the bottom of the prepared mold. Press down firmly with the back of a spoon or the base of a glass to create an even and compact layer. This will form the cake’s base. For easier removal, lining the sides of the mold with parchment paper is a good idea. Place the mold in the freezer for at least 15 minutes to allow the base to set.

Step 8
Now, let’s prepare the creamy mousse layer. In a bowl, place 200g of cream cheese that has been softened at room temperature.

Step 9
Add 30g of heavy cream (or milk) and 50g of granulated sugar to the cream cheese. Whisk or stir with a spatula until smooth and free of lumps.

Step 10
Incorporate the reserved Oreo cream filling into the mixture. Stir well until all ingredients are combined into a smooth, creamy batter. You’ll notice a lovely sweet and rich aroma.

Step 11
In a small bowl, combine 5g of gelatin powder with 30g of cold water. Let it sit for about 10 minutes to allow the gelatin to bloom and absorb the water, becoming thick and jelly-like.

Step 12
Gently heat the bloomed gelatin in the microwave for approximately 10 seconds, or until it is completely dissolved and clear. Be careful not to overheat. Use it immediately while it’s hot.

Step 13
Gradually pour the hot, dissolved gelatin into the cream cheese mixture while whisking quickly. It’s crucial to mix rapidly and thoroughly to prevent the gelatin from clumping. This will create a smooth mousse consistency.

Step 14
Retrieve the cake mold from the freezer. Carefully pour the cream cheese mousse mixture over the set Oreo base. Gently shake the mold or use a spatula to ensure the surface is even. Return the mold to the freezer for at least 30 minutes, or until the mousse is firm to the touch.

Step 15
Prepare the canned peaches for the topping. Dice them into bite-sized pieces. Smaller pieces will integrate better into the cake.

Step 16
In a separate bowl, pour the reserved syrup from the canned peaches. This syrup will be the base for our refreshing jelly topping.

Step 17
Add the diced peach pieces to the peach syrup and mix gently. You can let this sit for a bit to allow the peach flavor to infuse into the syrup.

Step 18
Bloom the remaining 5g of gelatin powder with 30g of cold water, then microwave for 10 seconds until clear. Stir this dissolved gelatin into the peach syrup and diced peach mixture. The syrup will set into a jelly consistency once chilled.

Step 19
Take the partially set cake out of the freezer. Carefully pour the peach jelly mixture over the mousse layer. Ensure the jelly evenly covers the mousse. Return the cake to the refrigerator for at least 2 hours, or until both the mousse and jelly are completely set and chilled.

Step 20
Let’s create some beautiful peach decorations for the cake. Thinly slice the canned peaches; these will act as our ‘petals’.

Step 21
Start by rolling one thin peach slice tightly to form the center of the flower. Then, arrange additional thin slices around this center, overlapping them to create a blooming flower effect. Make a few of these to adorn the cake.

Step 22
Carefully remove the fully set cake from the mold. If you used parchment paper, peel it away for a clean presentation.

Step 23
Arrange the lovely peach flowers you made on top of the cake. Place them artistically to create a beautiful garnish.

Step 24
Optional Tip: You can also make a simple peach jelly juice using any remaining peach syrup for a delightful accompanying beverage. (Refer to the ‘Cooking Tips’ section for instructions, if available).

Step 25
Behold your stunning creation – a cake adorned with blooming peach flowers!

Step 26
This cake pairs wonderfully with the simple peach jelly juice for an elevated dessert experience.

Step 27
Serving this peach cake chilled enhances its refreshing peach flavor and the delightful contrast between the smooth mousse and the slightly firm jelly. It’s a perfect summer treat! Enjoy your delicious cake! 🙂


