Perfect Steak: Reverse Sear vs. Traditional Sear at Home
Mastering Steak at Home: Reverse Sear vs. Traditional Sear – Which is Your Favorite?

Want to cook restaurant-quality steak at home? We’ll guide you through comparing the reverse sear and traditional sear methods step-by-step, revealing how to achieve the most delicious steak. Follow along with these two cooking techniques for a flavorful sirloin steak and experience perfection!
Main Ingredients- 400g high-quality beef (e.g., sirloin or ribeye)
- Coarse salt (to taste)
- Freshly ground black pepper (to taste)
- Olive oil or cooking oil (for searing)
Cooking Instructions
Step 1
Today, we’re going to compare two special methods for cooking steak at home: ‘reverse searing’ and ‘traditional searing’. We’ll prepare two steaks, one using the reverse sear technique and the other using the conventional sear method, so we can directly compare the results by sight and taste. Let’s create a restaurant-worthy steak right in your kitchen!

Step 2
We’re using sirloin or ribeye for our steak today, a 400g cut known for its rich flavor. First, gently pat the surface of the steak with paper towels to remove any excess moisture or blood. Removing this helps reduce any gamey odors and ensures a cleaner flavor profile.

Step 3
Lightly coat the surface of the steak with olive oil (or cooking oil). Then, generously season with coarse salt and freshly ground black pepper. If you like, you can add herbs like rosemary for an extra aromatic touch. Now, one steak is ready for immediate pan-searing, while the other will begin its reverse sear journey in the oven.

Step 4
Reverse searing involves cooking the steak at a low temperature for an extended period to ensure even cooking throughout, followed by a quick sear in a hot pan to develop a crispy exterior. While a meat thermometer is ideal for precise internal temperature control, you can also estimate it. We’ll set the oven to 100°C (212°F) and cook for approximately 50 minutes. Cook one side for 30 minutes, then flip and cook for another 20 minutes. This should result in a medium-rare to medium internal doneness. Please adjust the time and temperature based on your oven’s performance.

Step 5
Here’s the reverse-seared steak, fresh from the oven! Even at this stage, it looks and smells incredible. When you gently press the steak with your fingers, it should feel soft and yielding, indicating it’s close to rare. While delicious as is, we’ll now move it to a hot pan to develop a beautiful crust and enhance its flavor.

Step 6
Heat a pan over high heat with a little oil, then carefully place the steak in it. Sear each side and the edges for about 30-40 seconds. A great advantage of reverse searing is that there’s significantly less smoke when searing in the pan – excellent! In the last 10 seconds of searing, add a knob of butter to enrich the flavor. Baste the steak with the melted butter to ensure the flavor is evenly distributed.

Step 7
Look at that gorgeous crust! Reverse-seared steaks are said to not require a long resting period because the low-temperature cooking ensures the juices are evenly distributed. However, for the best flavor, we’ll let it rest for about 3 minutes. Now, let’s slice into this beautiful steak!

Step 8
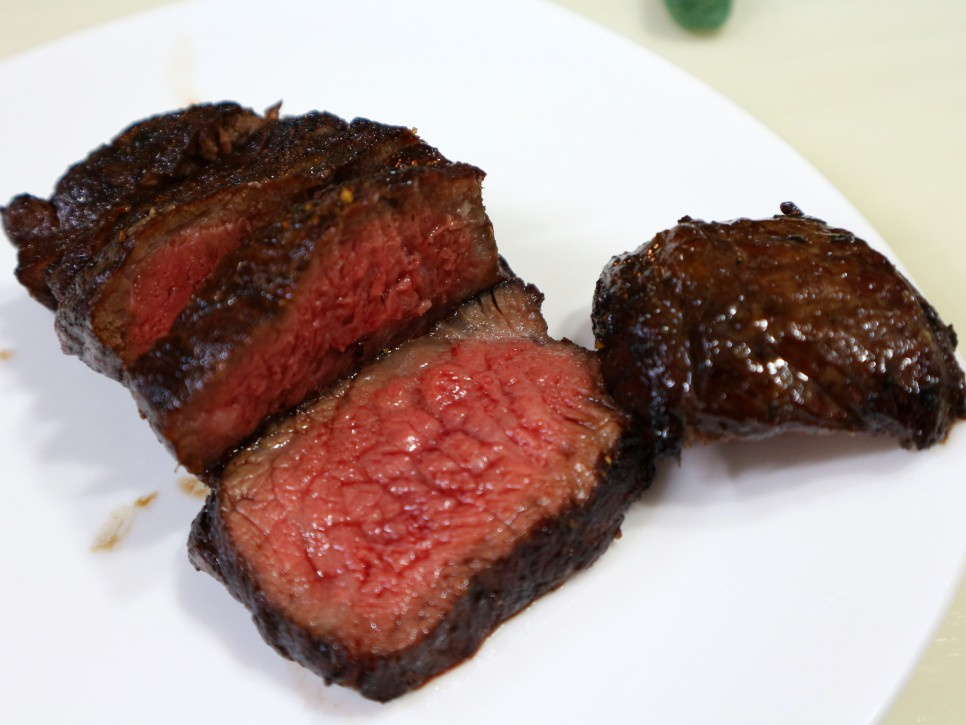
Absolutely stunning! The steak slices effortlessly, revealing a perfect medium-rare to medium center, exactly as desired. It has that ideal texture: crispy on the outside, juicy on the inside.

Step 9
This crispy exterior, tender interior, and rich, clean beef flavor are simply divine. Considering the quality and taste, it offers great value. I’ll definitely be ordering this cut again! Now, let’s prepare the other steak using the traditional searing method.

Step 10
For the traditional sear, we’ll heat the pan over high heat with a generous amount of oil until it just begins to smoke. Place the steak in the pan and start searing each side. This method focuses on quickly searing the exterior to lock in the juices.

Step 11
Unlike reverse searing, the traditional method produces considerably more smoke in the pan – about three times as much. This steak is around 4cm thick, and even after searing the outside, it feels quite rare inside when pressed. To ensure it’s cooked through to our liking, we’ll place it in a 170°C (338°F) oven for an additional 10 minutes. (This step can be adjusted based on the steak’s thickness and your desired doneness.)

Step 12
I love the thickness of this steak! Adding that extra time in the oven after the traditional sear allowed it to reach the perfect internal doneness.

Step 13
This time, we decided to make some creamy mashed potatoes to accompany the steak. Steak and mashed potatoes are always a perfect pairing! Enjoy your own perfect steak with your favorite side dishes.


