Persimmon Ice Cream
[Traditional Food Recipe Contest] Making Persimmon Ice Cream with Ihwa-ju

Learn how to make a unique persimmon ice cream by combining the traditional Geonsidanza recipe from the Royal Cuisine Research Institute, specializing in Joseon Dynasty cuisine, with Ihwa-ju, a type of Korean rice wine. This dessert offers a harmonious blend of tradition and modernity.
Main Ingredients- 3 Dried Persimmons (seeds and pulp removed)
- 160g Wet Mepssal Flour (non-glutinous rice flour)
- 50g Wet Chapssal Flour (glutinous rice flour)
- 30g Nuruk (Korean traditional fermentation starter)
- 80ml Hot Water
- 60ml Cold Water
Cooking Instructions
Step 1
First, sift the mepssal flour and chapssal flour twice through a fine sieve. This step ensures a smoother texture for the dough. Gradually add 80ml of hot water to the sifted flour while kneading to form a dough. Using hot water cooks the rice flour slightly, giving the resulting rice cakes a pleasant chewiness.

Step 2
Once the dough comes together, shape it into small, round rice cakes with a hole in the center, about 1.5cm in diameter. Gently press down with your index finger to create the hole. This shape allows the rice cakes to cook evenly and quickly when submerged in boiling water.

Step 3
Fill a pot with plenty of water and bring it to a rolling boil. Once the water is boiling vigorously, carefully add the prepared rice cakes.

Step 4
When the rice cakes float to the surface, cook them for just one more minute, then immediately remove them from the water. Be careful not to overcook, as they can become too soft and mushy.

Step 5
Drain the cooked rice cakes lightly. While they are still warm, use a spatula or a mashing tool to thoroughly mash them until smooth and lump-free. It’s important to mash them completely. Allow the mashed dough to cool down to below 25°C (77°F). Introducing nuruk to a dough that’s too hot can kill the beneficial yeast cultures.

Step 6
Once the dough has cooled sufficiently, add 30g of nuruk powder and knead it thoroughly with your hands. Ensure the nuruk is evenly distributed throughout the dough. A crucial tip: avoid letting the dough temperature exceed 30°C (86°F). The ideal temperature for nuruk activity is between 20-25°C (68-77°F), where the yeast cultures are happiest.

Step 7
Transfer the kneaded dough into a clean, sterilized glass jar. Ferment the dough in a cool place at around 23°C (73°F) for about 10 days. During fermentation, stir the mixture occasionally to prevent the surface from drying out and to ensure even fermentation. The dough is ready when it thins out to a liquid consistency and emits a subtle scent reminiscent of pear blossoms. Thoroughly sterilizing the jar is essential to prevent contamination and ensure a delicious outcome.

Step 8
[Ihwa-ju after 2 days of room temperature fermentation] You will notice the volume has doubled compared to the initial amount. At this stage, loosen the lid slightly to allow fermentation gases to escape, but keep it covered. Continue fermenting for another 7 days, stirring gently from time to time. 
Step 9
Mix 60ml of cold water into the fermented Ihwa-ju to achieve a smoother consistency. Pour the prepared Ihwa-ju into a zipper bag and freeze it. Once it’s partially frozen and can be scraped with the back of a knife, gently scrape the frozen mixture and shape it into a long, cylindrical form.

Step 10
Remove the stems and the core from the dried persimmons. Then, flatten them into a rectangular shape or slice them thinly to prepare for rolling.

Step 11
Arrange the prepared persimmon slices overlapping slightly on a plate or spread them out on a bamboo sushi mat. Place the frozen Ihwa-ju cylinder on top and carefully roll the persimmon around it, ensuring it’s fully covered. Using a bamboo mat makes rolling easier and tighter. Secure the roll with plastic wrap or a ziplock bag to prevent it from unraveling.

Step 12
Twist the ends of the rolled persimmon Ihwa-ju roll in opposite directions, similar to wrapping a piece of candy, to create decorative ends. Then, place it back in the freezer to harden further and set the shape.

Step 13
Once the persimmon Ihwa-ju roll is completely frozen and firm, slice it into desired thicknesses using a knife while it’s still wrapped. After slicing, carefully remove the plastic wrap to reveal the finished ice cream.

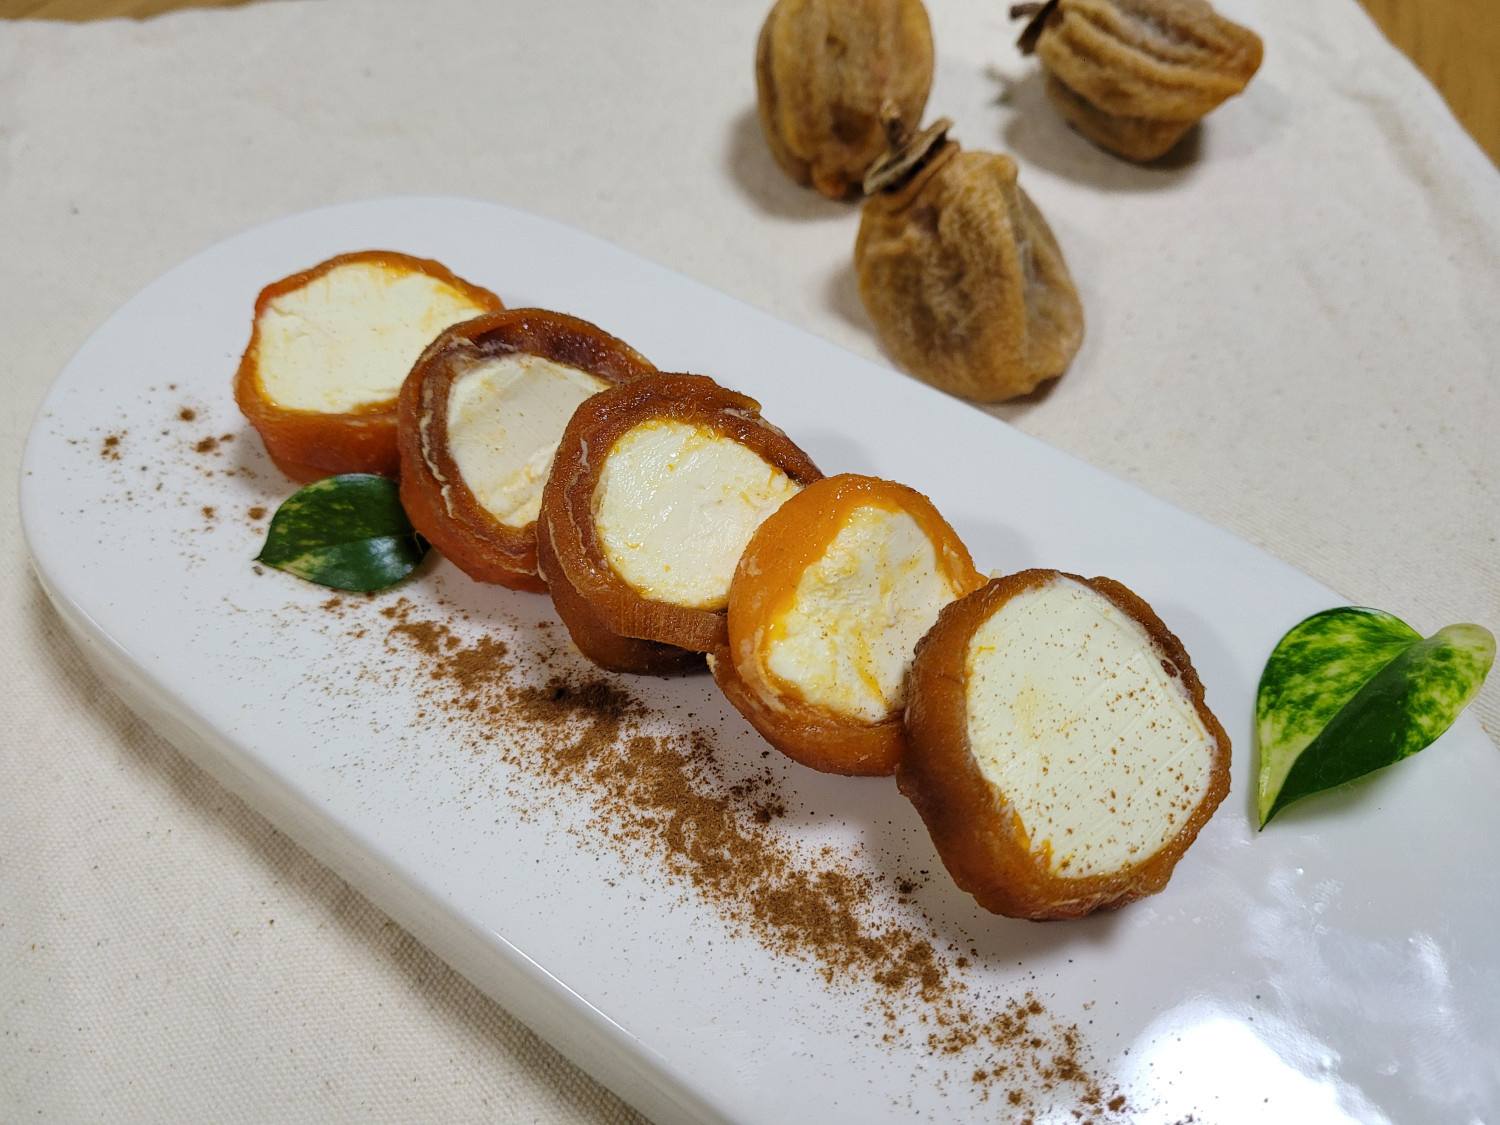
Step 14
Arrange the beautifully sliced persimmon ice cream on a serving plate. Your unique persimmon ice cream, infused with traditional flavors, is now ready to be enjoyed! We hope you savor every bite~^^!

Step 15
Additional Tip: Besides the rolled shape, using whole persimmons is also a visually appealing option. Remove the stem and hollow out the inside of the persimmon. Then, fill the cavity with the well-fermented Ihwa-ju using a piping bag and freeze. This creates another delightful dessert. Feel free to explore different presentations based on your preference!


