Refreshing and Crispy Yeolmu Kimchi Golden Recipe
Mastering the Art of Making Yeolmu Kimchi! From Fresh Radish Preparation to Delicious Kimchi Completion

Here’s a recipe for delicious Yeolmu Kimchi, perfect even in small batches. Ideal for 1-2 person households who want to make it without hassle. Enjoy the crisp texture and refreshing broth of this Yeolmu Kimchi to enrich your summer meals!
Main Ingredients for Yeolmu Kimchi- 500g young radishes (Yeolmu)
- 1/2 onion
- 3-5 stalks green onions
- 1 chili pepper (preferably green, Cheongyang type)
- 1 red chili pepper
- 1/2 tbsp sansho pepper powder (optional, adjust to taste)
Salting the Yeolmu- 1/2 paper cup coarse sea salt
- 500ml water
Making the Rice Porridge (Japssalpul)- 2 tbsp glutinous rice flour
- 1 paper cup water
Kimchi Seasoning (Blender Mixture)- 10 cloves garlic
- 1/2 onion
- 2 dried ginger pieces (or 1/2 tbsp minced fresh ginger)
- 1 tbsp salted shrimp (shrimp meat only)
- 1 paper cup Korean pear juice (or grated pear)
- 3 red chili peppers
- 1/2 tbsp sugar
Kimchi Seasoning (Finishing Touches)- 3 tbsp anchovy sauce (Myeolchi Aekjeot)
- 3-4 tbsp red chili flakes (Gochugaru)
- 1/2 paper cup coarse sea salt
- 500ml water
Making the Rice Porridge (Japssalpul)- 2 tbsp glutinous rice flour
- 1 paper cup water
Kimchi Seasoning (Blender Mixture)- 10 cloves garlic
- 1/2 onion
- 2 dried ginger pieces (or 1/2 tbsp minced fresh ginger)
- 1 tbsp salted shrimp (shrimp meat only)
- 1 paper cup Korean pear juice (or grated pear)
- 3 red chili peppers
- 1/2 tbsp sugar
Kimchi Seasoning (Finishing Touches)- 3 tbsp anchovy sauce (Myeolchi Aekjeot)
- 3-4 tbsp red chili flakes (Gochugaru)
- 10 cloves garlic
- 1/2 onion
- 2 dried ginger pieces (or 1/2 tbsp minced fresh ginger)
- 1 tbsp salted shrimp (shrimp meat only)
- 1 paper cup Korean pear juice (or grated pear)
- 3 red chili peppers
- 1/2 tbsp sugar
Kimchi Seasoning (Finishing Touches)- 3 tbsp anchovy sauce (Myeolchi Aekjeot)
- 3-4 tbsp red chili flakes (Gochugaru)
Cooking Instructions
Step 1
First, let’s prepare the young radishes. If there’s soil on the root part, gently scrape it off with a knife for clean preparation.

Step 2
Scrape off the soil from the root area using a knife. This will help you cleanly prepare the radishes.

Step 3
If the radish roots are thin, you can use them as they are. However, if they are thick, cut them in half. This will help the seasoning penetrate better and ensure even cooking.

Step 4
Rinse the cleaned young radishes thoroughly under running water several times to remove any remaining soil or debris.

Step 5
Cut the washed radishes into bite-sized pieces. Usually, cutting them into thirds works well. Avoid cutting them too large so the seasoning can be evenly distributed.

Step 6
The stems and leaves of the young radishes have different salting times. To ensure even salting, place the stems in the bowl first, then layer the leaves on top. This method ensures both parts are salted properly.

Step 7
Dissolve 1/2 paper cup of coarse sea salt in 500ml of water to make a brine. Pour this brine over the radishes in the bowl. It’s enough if the water slightly covers the radishes when pressed down. Now, let them salt for 30 minutes.

Step 8
To make the glutinous rice porridge, combine 1 paper cup of water and 2 tbsp of glutinous rice flour in a pot. Whisk them well *before* turning on the heat to prevent lumps. (Using cold water helps prevent clumping.)

Step 9
After the rice flour is fully dissolved, turn on the heat and stir. The mixture will quickly thicken into a smooth porridge. Once it becomes thick, immediately turn off the heat. Overcooking can make it too gummy.

Step 10
While the rice porridge is cooking, you’ll have some extra time. Use this to prepare the other ingredients for the kimchi. Finely chop the onion and chili peppers. These vegetables will add depth of flavor and texture to your Yeolmu Kimchi.

Step 11
Check the state of the radishes after 30 minutes of salting. They should look wilted, as shown in the photo. Placing the stems first and then the leaves on top resulted in perfectly and evenly salted radishes!

Step 12
Rinse the well-salted radishes 2-3 times under running water to remove excess salt. Then, place them on a colander to drain thoroughly. Proper draining prevents the kimchi from becoming mushy and keeps it crisp.

Step 13
While the radishes are draining, let’s make the kimchi seasoning. In a blender, combine about 10 cloves of garlic, 1/2 onion, 2 dried ginger pieces (or 1/2 tbsp minced ginger), 1 tbsp salted shrimp (shrimp meat only), 1 paper cup of Korean pear juice, 3 red chili peppers, and 1/2 tbsp sugar. Blend until smooth.

Step 14
Transfer the blended seasoning mixture to a bowl. Add the prepared glutinous rice porridge, 3-4 tbsp of red chili flakes, and 3 tbsp of anchovy sauce. Mix everything well to create the final seasoning paste. The rice porridge adds smoothness and depth to the kimchi.

Step 15
Add the drained young radishes to the bowl with the seasoning. Also, add the prepared chopped onion and chili peppers. Pour all the prepared seasoning paste over them.

Step 16
Gently mix everything together with your hands, ensuring the seasoning coats the radishes evenly. Be careful not to over-knead, as this can make the radishes mushy. Mix lightly.

Step 17
Carefully pack the well-mixed Yeolmu Kimchi into a kimchi container. Avoid pressing down too firmly; leave some space so the kimchi has room to ferment and expand.

Step 18
After packing, leave the kimchi container at room temperature (like on a balcony) for half a day to let it ferment slightly. Then, refrigerate it. This process yields a truly delicious Yeolmu Kimchi! (Adjust fermentation time based on weather.)

Step 19
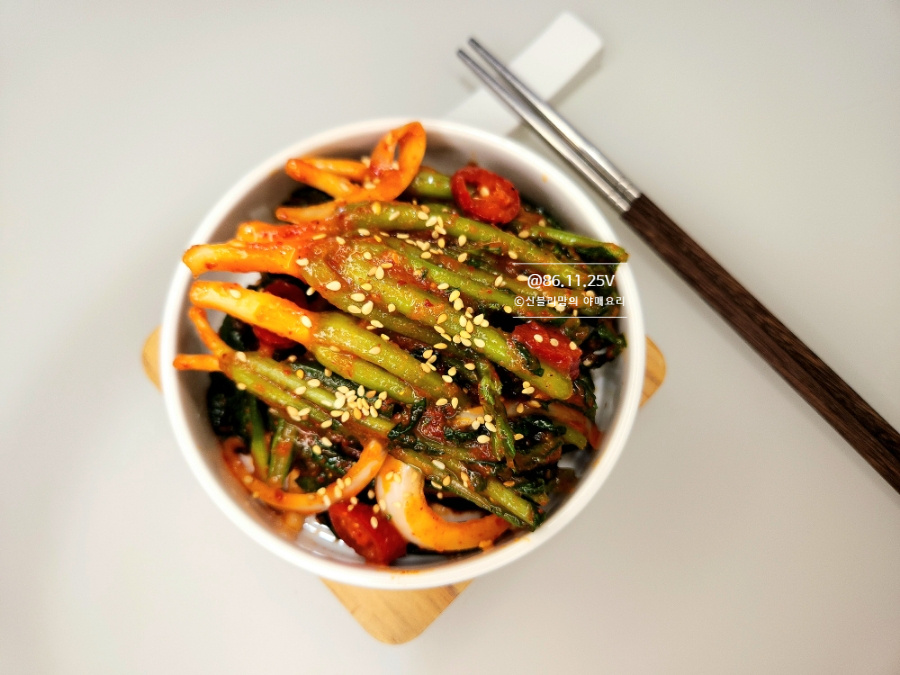
And there you have it – a recipe for delicious Yeolmu Kimchi! My husband has a discerning palate and prefers freshly made dishes, so I only made 500g this time. I was surprisingly impressed by how delicious it turned out!

Step 20
This Yeolmu Kimchi tastes even better when served chilled from the refrigerator! The finished Yeolmu Kimchi is fantastic in bibimbap or as a refreshing Yeolmu Kimchi noodle soup. Be sure to make it and enjoy!


