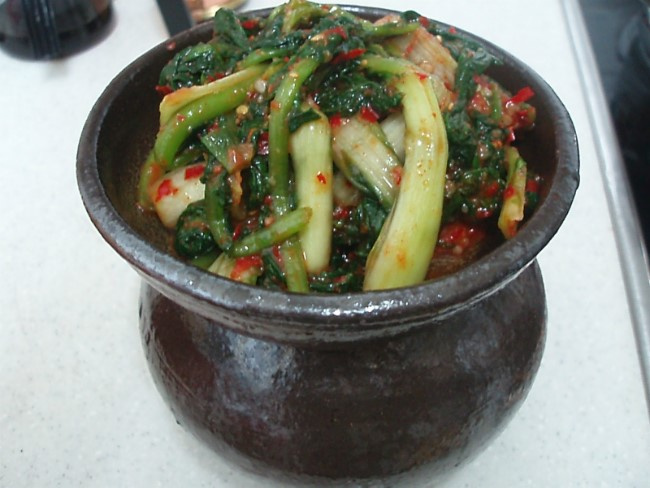
Refreshing Summer Delight: Yeolmu and Eolgal Kimchi
How to Make Refreshing Yeolmu and Eolgal Kimchi

Beat the summer heat with this incredibly refreshing and crisp Yeolmu and Eolgal Kimchi! I’ve combined the tender young radish (Yeolmu) with the leafy Eolgal cabbage, creating a kimchi with a wonderfully balanced flavor and texture. While Yeolmu kimchi alone is delicious, adding Eolgal cabbage brings a delicate sweetness and a softer bite that perfectly complements the crunch of the radish. This kimchi offers a cool, invigorating taste with a satisfying umami depth. It’s so good, you’ll find yourself reaching for another bowl of rice! Here’s my personal method for making this delightful summer staple.
Kimchi Ingredients- 1 bunch Yeolmu (young radish)
- 1 bunch Eolgal cabbage (leafy cabbage)
- 2 cloves garlic, thinly sliced
- 2 Tbsp minced garlic (approx. 20g)
- 7-8 red chili peppers (seeds removed, chopped or for blending)
- 30-40g glutinous rice paste (3 Tbsp glutinous rice flour simmered in 1 cup water, then cooled)
- 100ml fish sauce (anchovy or sand lance)
- 1/2 bunch scallions, cut into 4-5cm lengths
- 2 Tbsp plum extract
- A pinch of sugar (adjust to taste)
Cooking Instructions
Step 1
1. Prepare and Salt the Yeolmu and Eolgal:
– Gently clean the Yeolmu, removing excess soil from the roots. Discard any wilted or damaged leaves. Wash the leaves by swishing them in water; avoid rubbing too vigorously, as this can impart a raw, grassy flavor.
– Similarly, wash the Eolgal cabbage and remove any wilted outer leaves.
– Place the Yeolmu and Eolgal in a large bowl. Sprinkle generously with coarse sea salt (not included in the ingredient list) and toss to coat evenly. Let it sit for about 30 minutes until the vegetables soften and wilt. Rinse thoroughly 2-3 times under cold water and squeeze out any excess moisture.
2. Make the Glutinous Rice Paste:
– In a pot, combine 1 cup (200ml) of water with 3 tablespoons of glutinous rice flour. Whisk until smooth.
– Cook over medium heat, stirring constantly to prevent lumps, until the mixture thickens into a paste. Remove from heat and let it cool completely. (Tip: If you don’t have glutinous rice flour, you can blend about half a bowl of cooked rice with water to achieve a similar consistency.)
3. Prepare the Chili Paste and Seasoning:
– Chop the red chili peppers into manageable pieces after removing the seeds.
– In a blender, combine the cooled glutinous rice paste, fish sauce, minced garlic, sliced ginger, chopped red chili peppers, plum extract, and a pinch of sugar. Blend until smooth. (Tip: Dried or frozen red chilies can also be used. Adjust the consistency of the paste with more rice paste or fish sauce if needed.)
4. Mix and Season:
– In a large mixing bowl, pour all the blended seasoning paste and add the cut scallions. Mix well.
– Add the squeezed Yeolmu and Eolgal to the seasoning mixture. Gently toss everything together with your hands, ensuring the vegetables are evenly coated with the paste. Avoid over-mixing or mashing the vegetables; a gentle approach is key to maintaining their crispness and preventing a raw taste.

Step 2
5. Ferment the Kimchi:
– Transfer the prepared kimchi into an earthenware pot or an airtight container.
– Leave it at room temperature for about a day to begin fermenting. You’ll notice the kimchi releasing some liquid and developing a slightly tangy aroma. Once it reaches this stage, refrigerate it and store it cold to enjoy. (Tip: During hot summer days, kimchi ferments faster, so adjust the room temperature fermentation time accordingly.)

Step 3
6. Enjoy Your Delicious Kimchi:
– Your crisp and refreshing Yeolmu and Eolgal Kimchi is ready! It’s delicious right after making, but the flavors deepen beautifully after about a day of fermentation. Enjoy it as a side dish with rice, or use it as a vibrant ingredient in bibimbap!


