Rich and Fudgy Oreo Brownies
Indulge in Happiness! Homemade Fudgy Oreo Brownie Recipe

When you desperately need a sugar boost, whip up these incredibly fudgy Oreo brownies that will recharge your spirits 10,000%! The delightful combination of chewy brownies and the satisfying crunch of Oreos creates a match made in heaven. Experience a moment of pure bliss with these rich and decadent Oreo brownies. Ready to dive into this sweet temptation? Let’s bake!
Ingredients- 210g Ghana Dark Milk Chocolate (use dark chocolate for a richer flavor)
- 100g Unsalted Butter, softened to room temperature
- 3 Large Eggs, at room temperature
- 70g Brown Sugar (adjust sweetness by modifying sugar quantity)
- 20g Unsweetened Cocoa Powder (enhances deep chocolate flavor)
- 40g Cake Flour (sifted for a smoother texture)
- 1/2 tsp Vanilla Extract (optional, but adds wonderful aroma)
- 100g Oreo Cookies, roughly chopped
Cooking Instructions
Step 1
Let’s gather all the ingredients needed to create these rich and fudgy Oreo brownies! Follow these steps closely, and you’ll achieve delicious results every time.

Step 2
First, ensure your butter is softened. Leave 100g of unsalted butter at room temperature for at least an hour until it’s pliable. Using cold butter can make it difficult to mix and affect the final texture.

Step 3
To help the butter melt more quickly during the double boiling process, cut it into smaller cubes. Small preparations like this make a big difference in baking!

Step 4
I’ve used a chocolate bar that’s easily found in convenience stores. Considering the sweetness of the Oreos, I opted for ‘Ghana Dark Milk Chocolate,’ which isn’t overly sweet. If you prefer a more intense chocolate flavor, feel free to use a dark chocolate with 70% cocoa solids or higher.

Step 5
Just like the butter, chop 210g of chocolate into small pieces. This ensures it melts smoothly and quickly during the double boiling. Before you begin, preheat your oven to 180°C (350°F) for at least 20 minutes.

Step 6
Now, let’s start the double boiling. Place a heatproof bowl containing the chopped butter and chocolate over a saucepan filled with simmering water. Make sure the bottom of the bowl doesn’t touch the water directly as it melts.

Step 7
Using a silicone spatula, gently stir the butter and chocolate until they are completely melted and combined. Be careful, as the water is hot!

Step 8
Once the butter and chocolate have smoothly melted, remove the bowl from the heat and let it cool slightly. It’s crucial to let it cool to a lukewarm temperature; otherwise, adding it to the eggs will cook them.

Step 9
In a separate mixing bowl, crack 3 large eggs that have been at room temperature for at least an hour. Room temperature eggs emulsify better with other ingredients.

Step 10
Add about half a teaspoon of vanilla extract to enhance the brownie’s aroma and flavor. If you don’t have it, it’s okay to omit, but it truly elevates the taste!

Step 11
Gently whisk the eggs and vanilla extract together using a whisk. Avoid creating too much foam, as this can result in a tougher brownie texture. Just mix until combined.

Step 12
Next, add 70g of brown sugar,

Step 13
and whisk again until the sugar is well incorporated into the egg mixture. Give it a good ‘shake shake’!

Step 14
Now, gradually pour the lukewarm chocolate-butter mixture into the egg mixture. Remember, it’s vital that the chocolate mixture has cooled down sufficiently! Adding it hot will scramble the eggs, ruining your batter.

Step 15
Gently fold everything together with a spatula until just combined. You’ll see a glossy brownie batter start to form.

Step 16
Sift 40g of cake flour and 20g of cocoa powder into the bowl. Sifting prevents lumps and ensures a smooth, velvety texture in your final brownie.

Step 17
Mix carefully until no dry streaks of flour remain. The batter already looks wonderfully thick and fudgy – this is a good sign that delicious brownies are on their way!

Step 18
Time for the Oreos! Add about half of your 100g of chopped Oreos (50g) into the batter. Try to keep some larger chunks for texture.

Step 19
Gently fold the Oreos into the batter, being careful not to crush them too much. Overmixing can turn the cookies into crumbs. Your fudgy brownie batter is now ready!

Step 20
Prepare your square baking pan by lining it with parchment paper.

Step 21
Make sure the parchment paper fits snugly into the corners of the pan. This will help you achieve those perfect, sharp edges on your brownies. Folding the paper neatly into the corners is key!

Step 22
Pour all the brownie batter into the prepared pan and spread it evenly with your spatula. Gently tap the pan on the counter 2-3 times. This helps to release any trapped air bubbles, ensuring a smooth, even top.

Step 23
Arrange the remaining 50g of chopped Oreos on top of the brownie batter. Feel free to place them however you like for a decorative finish.

Step 24
Even before baking, it looks incredibly appetizing! Now, let’s send this beauty into the oven to work its magic. Into the oven it goes!

Step 25
Bake in the preheated 180°C (350°F) oven for approximately 30 minutes. Baking times can vary depending on your oven, so keep an eye on it and adjust as needed. A toothpick test is a great way to check for doneness!

Step 26
Watching the brownies puff up in the oven is so satisfying! To achieve that perfectly fudgy texture, insert a toothpick or skewer into the center. It should come out with a few moist crumbs attached – not completely clean, and not wet batter.

Step 27
Carefully remove the beautifully baked brownies from the oven.

Step 28
Using the parchment paper, lift the brownies out of the pan. Immediately transfer them to a wire rack to cool completely. Letting them cool properly is essential for the best texture.

Step 29
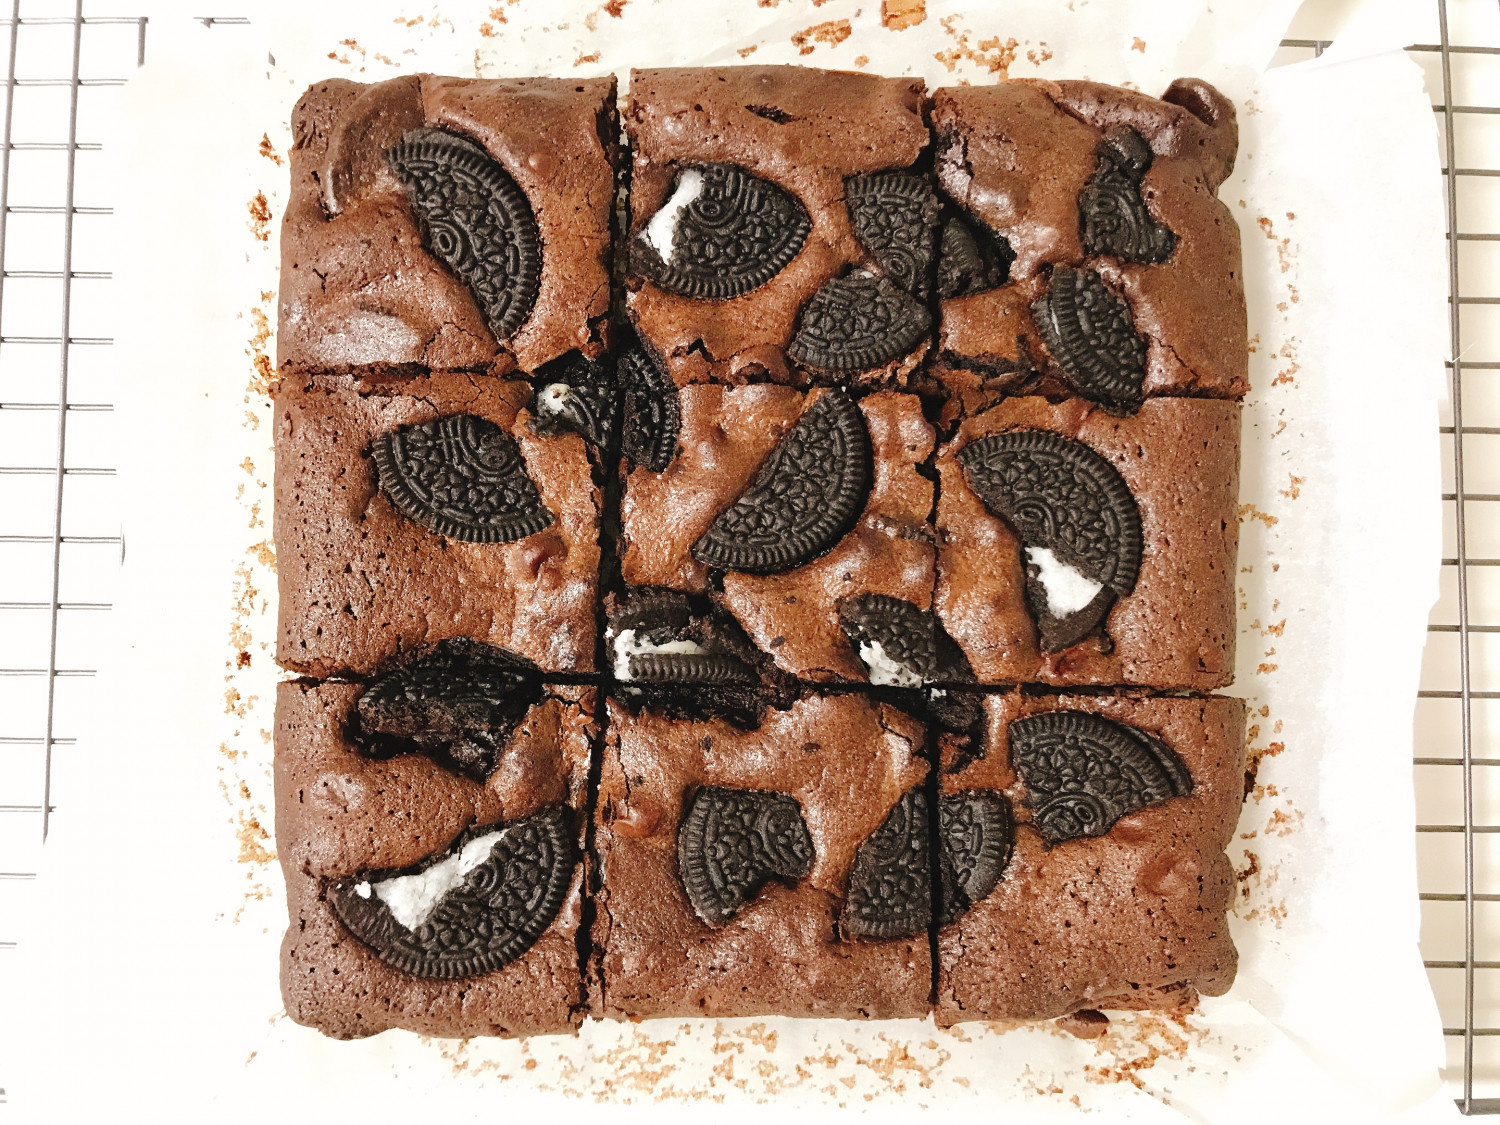
Once the brownies have cooled down thoroughly, use a sharp knife to cut them into neat squares. Get ready to admire your delicious creation and perhaps plate them beautifully!

Step 30
Ta-da! The fudgy brownie center I was hoping for has turned out perfectly. I’m so proud of this first attempt! Just looking at them makes my mouth water. And of course, brownies are best served stacked high!

Step 31
Look at this incredibly fudgy cross-section! You can see how dense and rich they are. Because I used dark milk chocolate, they’re perfectly sweet – not too much, just right!

Step 32
The chunks of Oreo cookies provide a delightful textural contrast, making each bite even more enjoyable. Here’s a pro tip: Brownies taste even better when chilled! I highly recommend refrigerating them overnight for an extra fudgy experience. They’ll be the perfect companion to a cup of Americano.

Step 33
The baking process is quite straightforward, making this a fantastic recipe for beginner bakers. I truly encourage you to give it a try!

Step 34
Why not lose yourself in the irresistible charm of these sweet and fudgy Oreo brownies? Enjoy! *^^*


