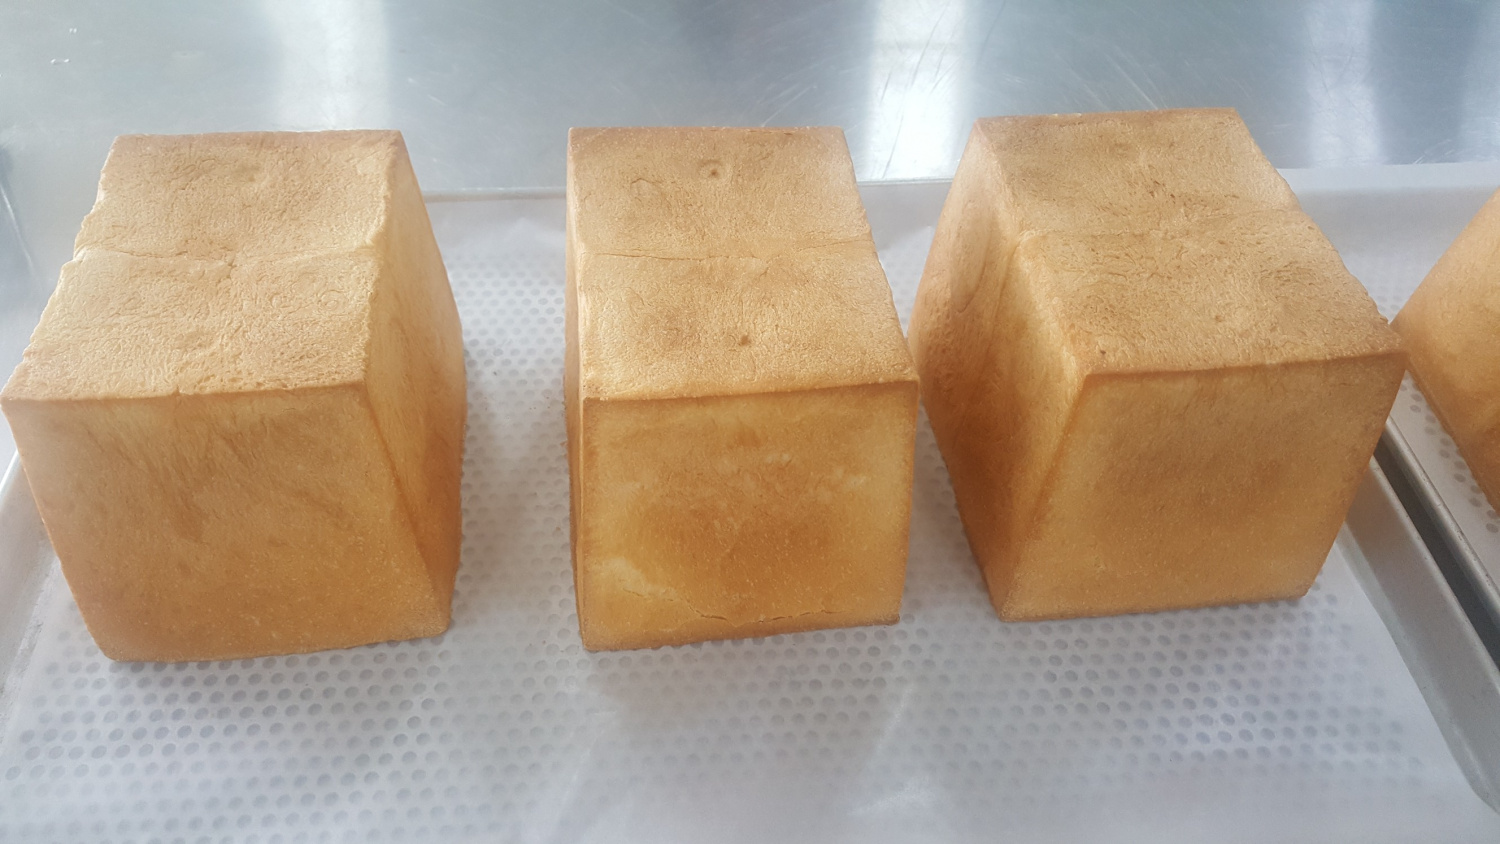
Rolled Cheese Pullman Loaf: The Epitome of Richness
Homemade Freshly Baked Rolled Cheese Pullman Loaf

The rich, nutty flavor of a freshly baked Pullman loaf is truly unparalleled! When you tear into a warm slice, the aroma that fills your mouth is simply divine. Despite being a potential culprit for expanding waistlines, its addictive charm makes it irresistible. Today, we’re sharing a recipe for a rolled cheese Pullman loaf, elevated with the savory goodness of cheese.
Main Ingredients- 1400g Bread Flour
- 812g Water
- 21g Instant Dry Yeast
- 14g Dough Improver
- 28g Salt
- 84g Sugar
- 56g Unsalted Butter
- 70g Whole Egg (beaten)
- 42g Milk Powder
Cooking Instructions
Step 1
In a mixing bowl, combine all ingredients except the butter (fat). Mix until a rough dough forms and all ingredients are just incorporated. This stage is called the ‘clean-up’ stage.

Step 2
Add the measured butter (fat) to the dough. Continue mixing until the dough becomes smooth, elastic, and reaches its final stage of development. This ensures a well-developed gluten structure.

Step 3
Check that the gluten development is at 100%. To test, gently stretch a piece of dough. If it can be stretched thin enough to form a translucent membrane without tearing easily, the gluten is well-developed.

Step 4
Place the dough in a proofing chamber set at 27°C (81°F) with 75-80% humidity. Allow it to ferment for about 40 minutes, or until the dough has doubled or tripled in volume. This is the first proof (bulk fermentation).

Step 5
Here’s a tip to check if the first proof was successful: Gently poke the dough with a floured finger. If the indentation springs back slowly, or if the dough can be stretched thinly without tearing, forming a web-like structure, the proofing is complete.

Step 6
Divide the dough into 10 equal portions, each weighing approximately 250g. Shape each portion into a round ball (round-shaping). Cover the dough balls with plastic wrap and let them rest at room temperature for 10-15 minutes. This ‘intermediate proof’ makes the dough easier to shape in the next step.

Step 7
Grease the inside of your Pullman loaf pans thoroughly with oil. This is a crucial step to prevent the bread from sticking to the pan.

Step 8
You can use any type of vegetable oil, such as canola oil or grapeseed oil. Ensure the entire inner surface of the pan is lightly and evenly coated.

Step 9
Take each portion of dough and flatten it into an oval shape using a rolling pin. Now is the time to add your rolled cheese, distributing it evenly over the surface.

Step 10
Perform a ‘three-fold’ or ‘letter fold’ on the dough. Imagine folding a letter: fold one-third of the dough over the middle, then fold the remaining third over that.

Step 11
This is what the dough looks like after the three-fold. The delicious rolled cheese is now nestled inside!

Step 12
Place the folded dough vertically and roll it up tightly from one end. Be careful not to squeeze out the cheese.

Step 13
Pinch and seal the seam of the rolled dough firmly with your fingers. This prevents the loaf from unraveling during baking.

Step 14
Place the shaped loaves into the Pullman pan with the seam side down. Shape two loaves per pan, ensuring they fit nicely within the pan’s dimensions to achieve the characteristic square shape.

Step 15
Place the shaped loaves side-by-side in the prepared Pullman pan. Gently press down on the dough to ensure an even height. Now, begin the second proof. Ferment in a proofing chamber at 38-43°C (100-109°F) with 85% humidity for 30-40 minutes.

Step 16
Once the second proof is complete, and the top of the dough is about 1cm (approximately 0.4 inches) below the rim of the pan, cover the pan with its lid. Covering is essential for creating the signature flat-top shape of a Pullman loaf.

Step 17
With the lid on, allow the loaves to proof for another 5-10 minutes in the proofing chamber. This final short proof helps ensure the loaf rises evenly with crisp edges. Bake in a preheated oven at 180°C (356°F) for both top and bottom heat for 35-40 minutes.

Step 18
Behold the beautifully baked Pullman loaf with its well-defined edges! The aroma of freshly baked bread is truly intoxicating.

Step 19
Doesn’t it look like a sturdy, perfectly squared brick? That’s the distinct charm of a Pullman loaf – its satisfying weight and shape!

Step 20
This photo shows the basic Pullman loaf, made without any cheese. It’s a testament to pure, simple bread flavor.

Step 21
And here is the star of our show – the rolled cheese Pullman loaf! Packed with cheese, it offers an extra layer of savory deliciousness and a wonderfully chewy texture.

Step 22
Slathered with homemade strawberry jam, this bread is pure bliss – so good, it might be dangerous! (Just kidding, but it’s incredibly delicious!) We’ll be sharing our strawberry jam recipe next time, so stay tuned!


